Pruning
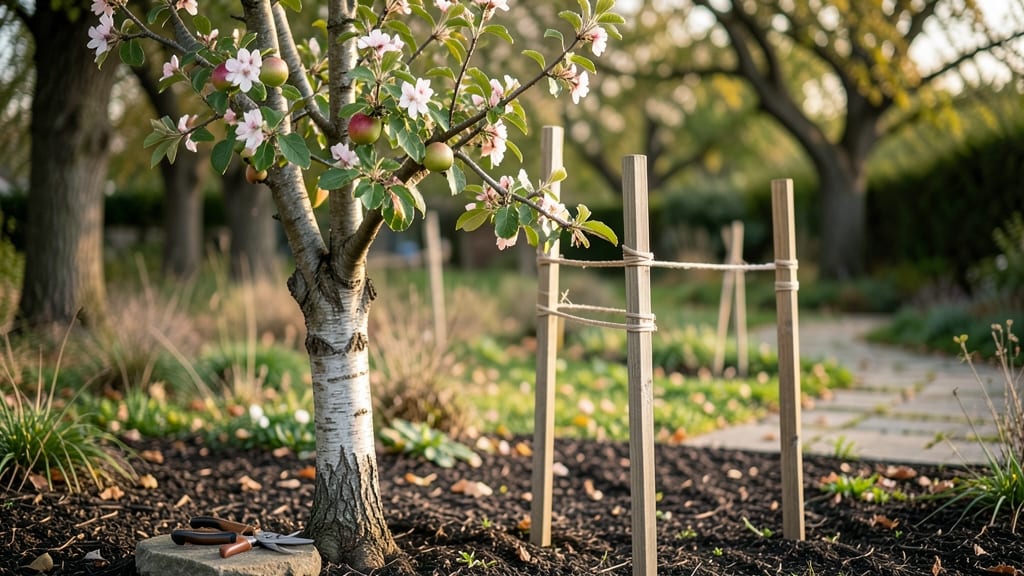
Training an apple tree isn’t just about shaping branches—it’s about unlocking a harvest that keeps giving year after year. 🌱 I’ve watched my own apple trees go from tangled messes to structured, fruit-loaded giants, and the difference comes down to when and how you guide those branches.
The right cuts at the right time mean more sunlight reaching the fruit, fewer diseases, and a shape that lasts for decades.
Start with young trees when they’re still flexible—this is when pruning does the most good. You’ll need basic tools: sharp pruners for small branches, a saw for thicker limbs, and some flexible tree ties for shaping.
The goal? Open the center so air circulates, and train the main branches to spread outward at a wide angle. This isn’t rocket science, but it does require patience—rushing leads to weak growth or broken limbs.
By the end of your first season, you’ll have a tree with strong structure and room for fruit to develop. The branches will be sturdy enough to hold heavy apples, and the shape will make harvesting a breeze.
Plus, you’ll avoid the heartbreak of apples rotting in the shade or branches snapping under the weight. Think of it as sculpting with wood and sunlight.
This method works for any apple variety, whether you’re growing in a backyard, orchard, or even a small urban space with espalier techniques. The key is consistency—just 10 minutes of attention every few months keeps the tree productive for life. Ready to turn that wild sapling into a fruit machine?
📚 In This Guide
- What you need
- Instructions
- Tips and common mistakes
- Wrapping up and next steps
What you need
- ● Pruning shears: Sharp, bypass-style shears (for cuts under ½ inch thick). One pair is all you need!
- ● Pruning saw: A folding pruning saw with a 7- to 8-inch blade for thicker branches (over ½ inch).
- ● Gloves: Heavy-duty, cut-resistant gloves (size medium or large) to protect your hands.
- ● Disinfectant: 70% isopropyl alcohol or a pruning sealant (like Tanglefoot Tree Wound Pruning Sealer) to prevent disease.
- ● Ladder: A stable, extendable ladder (8–12 feet tall) if your tree is mature.
- ● Tarp or bucket: To collect pruned branches and debris.
- ○ Permanent marker: For labeling cuts (optional but helpful for tracking growth).
- ● Loppers: For branches ¾–2 inches thick (if you don’t want to use a saw).
- ● Pole pruner: For high branches (saves ladder time!).
- ● Tree training tape: Soft, jute or rubber tape to guide young branches (¼–½ inch wide).
- ● Grafting tools: If you plan to graft new varieties (budding knife, grafting tape).
- ● Spray bottle: With water to clean tools between cuts.
Instructions for training an apple tree: a year-long pruning plan
Here’s how I’ve trained apple trees to grow strong, productive branches—no guesswork, just clear steps.
🌱 Step 1: Prune for Open-Center Structure in Early Spring
When buds swell but before leaves appear (around March-April), remove dead, crossing, or inward-growing branches first. These compete for energy and block airflow, inviting disease. Use clean, sharp pruners to cut just outside the branch collar—the swollen area where the branch meets the trunk. You’ll see new growth emerge from the center, creating an open vase shape.
Leave 3-5 main scaffold branches spaced evenly around the trunk, angled outward like spokes on a wheel. These will support future fruit. If a branch grows too close to another, trim one completely to avoid future rubbing. I always step back to visualize the tree’s shape—it should look balanced, not lopsided.
✂️ Step 2: Thin Fruit Spurs and Water Sprouts in Late Spring
After flowering but before fruit sets (around May-June), focus on fruit spurs—those short, stubby branches where apples form. Thin them so each spur has 1-2 buds per cluster. Too many fruits strain the tree, leading to small, poor-quality apples. Cut back to the bud closest to the main branch, leaving the rest for next year.
Remove water sprouts—those fast-growing vertical shoots from the trunk or scaffold branches. They steal energy from fruit production. Snip them at the base with a sharp pair of pruners. You’ll notice these shoots pop up after heavy rains or in sunny patches—they’re the tree’s way of reaching for light, but they’re useless for bearing fruit.
☀️ Step 3: Summer Pruning for Airflow and Light
In July-August, when the tree is actively growing, do light pruning to improve airflow. Look for suckers (shoots growing from the base) and shade branches (those growing inward or too densely). Cut these back by one-third to encourage bushier growth. The goal here is to let sunlight and air reach the center of the tree—this prevents fungal diseases like apple scab.
If you see long, whippy branches growing outward, you can trim them to redirect energy to fruit production. Just make your cuts just above a leaf bud or lateral branch. Avoid heavy pruning now—the tree is focused on fruit development, not regrowth. Think of this as a maintenance trim, not a major reshaping.
⏰ Step 4: Winter Dormancy Pruning for Long-Term Shape
When the tree is fully dormant (after leaf fall, around November-December), do the bulk of your pruning. Remove dead, diseased, or weak branches first—they’re easy to spot against bare wood. Then, thin out excessive growth to maintain the open-center shape you started in spring. Aim to keep the tree’s height manageable (around 10-12 feet for standard varieties).
Look for dominant leaders—a single strong vertical branch that could overtake the tree’s shape. If one exists, prune it back to encourage side branches. You’ll see where the tree naturally wants to grow by how the branches angle. Step back often to check balance—your goal is a tree that looks like an open umbrella, not a dense, tangled mess.
🌿 Step 5: Year-Round Maintenance Checks
Every 3-4 months, do a quick visual check for suckers, water sprouts, or crossing branches. Remove them as soon as you spot them—small cuts heal faster and cause less stress. I keep a small pair of pruners in my gardening toolbox and do a 5-minute walk-around of the tree whenever I’m outside. It’s these little checks that keep the tree healthy and productive long-term.
Watch for new growth patterns—if branches start growing inward again, prune them back early. The key to training an apple tree is consistency. Over time, you’ll develop a rhythm: light pruning in summer, heavy cuts in winter, and constant vigilance in between. Your tree will thank you with bigger, tastier apples every year.
Tips & tricks for training an apple tree
These simple strategies will help you shape your apple tree into a productive, healthy powerhouse—without the guesswork.
The Timing Secret: In Step 1, when pruning for that open-center shape, I always check the weather forecast first. Avoid pruning if rain is expected within 24 hours—the fresh cuts need time to seal and heal. I've learned this the hard way after seeing fungal infections creep in after wet conditions. March-April is ideal because the tree is just waking up, but if you miss it, don't stress—just wait until buds start swelling again.
Pruning Precision: For Step 2's fruit spurs, use a sharp pair of pruners and make your cuts just above a bud that's facing outward. This creates a natural growth pattern that angles away from the center. I like to visualize the tree as an open umbrella—each cut should help create that shape. If you're unsure which bud to cut to, look for one that's slightly larger than the others; it's more likely to grow into a strong branch.
Seasonal Strategy: During summer pruning (Step 3), I focus on the "one-third rule"—never remove more than one-third of the tree's foliage at once. This prevents shock and maintains photosynthesis. I also avoid pruning during extreme heat or drought—wait for cooler days when the tree has more energy to recover. Think of summer pruning as maintenance, not a major overhaul.
Winter Wisdom: When doing your bulk pruning in November-December (Step 4), I always start with the "dead wood first" approach. Remove any branches that are clearly dead, diseased, or broken—they're just taking energy from your tree. Then work on thinning out the canopy to let light reach the center. I step back every few cuts to check the balance, aiming for that open vase shape we started with in spring.
Pro Tips for Training An Apple Tree
- These simple strategies will help you shape your apple tree into a productive, healthy powerhouse—without the guesswork.
- The Timing Secret: In Step 1, when pruning for that open-center shape, I always check the weather forecast first. Avo...
- Pruning Precision: For Step 2's fruit spurs, use a sharp pair of pruners and make your cuts just above a bud that's f...
Frequently asked questions
Got questions about training your apple tree? You’re not alone! Here are answers to the most common queries—from beginners to seasoned gardeners—to help you grow a thriving, productive tree.
How young is too young to start pruning an apple tree?
Start training your apple tree as soon as you plant it—even if it’s just a sapling! The first year focuses on shaping the scaffold (main branches) to ensure a strong, open structure. Avoid heavy cuts; aim for 20-30% of the tree’s total growth to encourage healthy development. Learn more about seasonal timing.
When is the best time of year to prune an apple tree?
For most regions, late winter or early spring (just before buds swell) is ideal—this promotes vigorous growth. Summer pruning (after harvest) can reduce disease risk and control size, but avoid heavy cuts. Never prune in fall (unless removing dead wood), as it invites fungal infections. Check your local frost dates for precision!
What if my apple tree isn’t bearing fruit after training?
Patience is key! Apple trees often take 3–5 years to bear fruit after planting. If it’s been longer, check for:
- Pollination: Most varieties need a second tree for cross-pollination.
- Sunlight: Ensure 6+ hours of direct sun daily.
- Soil health: Test pH (ideal: 6.0–6.5) and amend with compost.
- Pruning balance: Too many dense branches can block light and fruit.
Can I use regular scissors or shears to prune an apple tree?
Nope! Apple trees need sharp, clean pruning tools to avoid tearing bark or spreading disease. Use:
- Bypass pruners for small branches (<1 inch).
- Loppers for medium branches (1–2 inches).
- A pruning saw for thicker limbs.
What’s the difference between “open-center” and “central-leader” training?
Choose based on your tree’s variety and space:
- Open-center (bush shape): 4–6 main branches spread evenly (great for dwarf trees or small yards).
- Central-leader (standard shape): One dominant vertical trunk with lateral branches (ideal for full-sized trees).
Wrapping up and next steps
Training an apple tree is all about patience, strategy, and a little green thumb love—but the rewards are sweeter than the fruit itself! 🍏 By mastering pruning techniques, you’ll shape a tree that thrives year-round, producing abundant harvests while staying healthy and strong.
Whether you’re a beginner or refining your skills, every snip brings you closer to a bountiful orchard.
Ready to put your knowledge into action? Start small—pick one branch this season and observe the changes. Before you know it, your apple tree will be the star of your garden! 🌱✨