Pruning
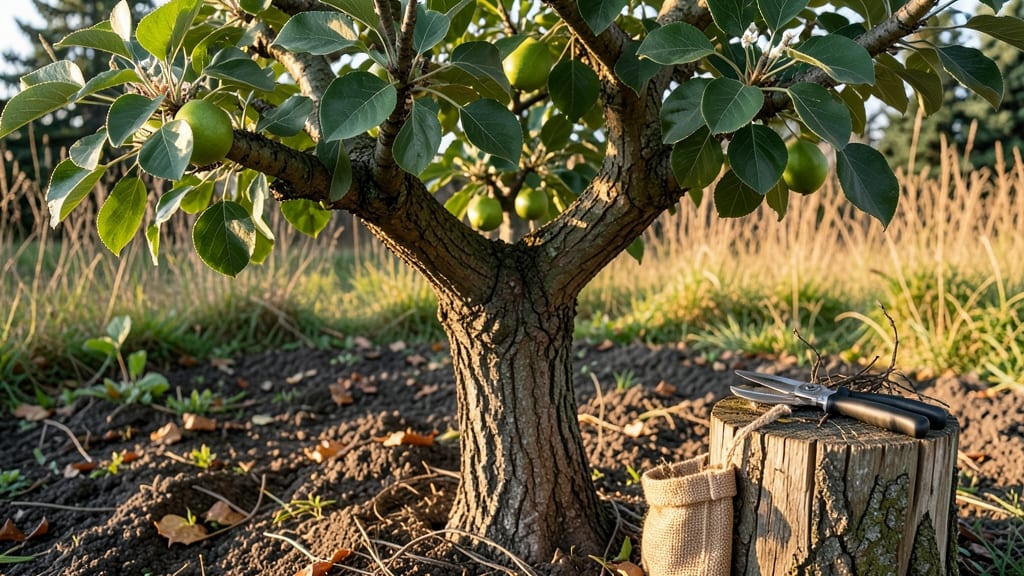
Pruning an overgrown pear tree isn't just about hacking back branches—it’s the key to unlocking healthier growth and better fruit production. 🌿 I’ve turned my tangled, shadowy mess into a sunlit, productive tree by following a few simple rules, and you can too.
The secret lies in timing, tool choice, and knowing which branches deserve to stay (or go).
Start with the right tools: sharp pruners for small branches, a pruning saw for thicker limbs, and gloves to protect your hands from thorns.
The best time to prune is late winter or early spring while the tree is dormant, but avoid pruning too close to bud break—this can invite pests and diseases. I’ve learned that patience here pays off with stronger harvests later.
You’ll focus on three main tasks: removing dead or diseased wood, thinning out crowded branches to improve airflow, and shaping the tree to encourage sunlight penetration. After pruning, clean up the area to prevent fungal growth and give your tree a fresh start.
The results? More sunlight reaches the fruit, branches grow stronger, and next year’s harvest will be bigger and healthier.
Whether you’re a beginner or a seasoned gardener, this method works for any overgrown pear tree. The key is confidence—once you see how much easier it is to manage the tree afterward, you’ll wonder why you waited so long. Let’s get those branches trimmed and your tree thriving again!
📚 In This Guide
- What you need
- Instructions
- Tips and common mistakes
- Wrapping up and next steps
What you need
- ● Pruning shears (bypass or anvil type) – Choose bypass for clean cuts (great for live branches) or anvil for thicker branches (up to 1.5 inches). Sharpen them beforehand!
- ● Loppers (long-handled) – For branches 1.5 to 3 inches thick. Look for bypass-style to avoid crushing.
- ● Pruning saw (folding or curved blade) – For branches over 3 inches thick. A curved blade glides better through wood.
- ○ Extension pole (optional but helpful) – A 3- to 5-foot telescoping pole with a saw or shears attachment for high branches.
- ● Rubber gloves – Protect your hands from thorns, sap, and blisters. Opt for gardening gloves with reinforced palms.
- ● Safety glasses – Debris flies when cutting, so ANSI-rated goggles are a must.
- ● Work boots or sturdy shoes – Closed-toe footwear with good traction (you’ll be moving around uneven terrain!).
- ● Heavy-duty trash bags (2-3) – For collecting branches and debris. Contractor-style bags hold the most.
- ● Disinfectant (70% isopropyl alcohol or bleach solution) – Wipe tools between cuts to prevent disease spread (1 part bleach to 9 parts water).
- ● Rake or leaf blower – To clear fallen branches and leaves afterward.
- ● First-aid kit – Just in case! Include bandages, antiseptic wipes, and tweezers for splinters.
- ● Best time to prune – Late winter or early spring (before buds swell), or immediately after harvest in summer.
- ● Weather check – Choose a dry, calm day (no rain or wind for 24 hours before/after pruning).
- ● Tree health assessment – Inspect the tree for diseases (like fire blight) or pests before cutting. Treat if needed.
- ● Map the tree’s structure – Sketch or mentally note main branches, crossing limbs, and deadwood before you start.
- ● Tree wound sealant – Not necessary for most fruit trees, but handy for large cuts (over 2 inches) to prevent disease.
- ● Ladder (if needed) – A stable, 3-sided ladder rated for your height (never stand on a step-stool!).
- ● Pruning paint – For sealing cuts on older, larger trees (skip for young pears).
- ● Camera or phone – Snap before/after photos to track progress over time!
Step-by-step revival for pruning an overgrown pear tree
Here's how I transform tangled, overgrown pear trees into productive, sunlit canopies—without killing them in the process.
🪴 Step 1: Gather Tools and Assess the Tree
You'll need clean, sharp pruning shears for small branches, loppers for ½-inch to 2-inch stems, and a pruning saw for anything thicker. Disinfect blades with rubbing alcohol to prevent spreading disease between cuts. Start by standing back and scanning the entire tree—look for dead wood first (it's gray, brittle, and snaps easily when bent). These branches should go first, no matter where they are.
Next, identify the tree's central leader—the main vertical trunk or branch that should guide growth upward. In mature pear trees, this is often the thickest upright branch. If there isn't a clear leader, you'll need to establish one during pruning. Mark these branches with flagging tape or a spray bottle if you're working alone—it's easy to lose track of what you've already cut.
✂️ Step 2: Remove Dead, Diseased, and Crossing Branches
Make your first cuts on dead or diseased branches—these are the easiest to spot and remove. Cut just outside the branch collar (the swollen area where the branch meets the trunk) at a 45-degree angle. Avoid leaving stubs, as they invite rot and pests. For diseased wood, sterilize your tools between cuts to prevent spreading pathogens.
Next, tackle crossing branches—these rub against each other, creating wounds that invite disease. When two branches cross, remove the weaker one (usually the smaller branch or the one growing inward). If both are equal, remove the one that grows downward. You'll see the tree's natural structure emerge as you work—this is your reward for careful observation.
☀️ Step 3: Thin the Canopy for Sunlight and Airflow
Pears need sunlight to produce fruit, so your goal is to open up the canopy to let light reach the inner branches. Start at the outer edges and work inward, removing branches that block light from penetrating more than 6-8 feet into the tree. Aim to reduce the canopy by about 25-30%—this might sound drastic, but it's necessary for the tree's long-term health.
Look for water sprouts (fast-growing, vertical shoots) and suckers (shoots growing from the base or roots). These steal energy from fruit production—cut them back to their point of origin. You'll notice the tree's skeleton start to show through as you work. This is the moment that matters: your tree is transforming from a tangled mess into an open, airy structure.
🌱 Step 4: Shape the Tree and Encourage Fruit Production
Now it's time to shape the tree. For a central leader system, select the strongest upward-growing branch and remove competing vertical branches. For a multi-leader system (common in older pear trees), choose 3-5 well-spaced branches that form a natural framework. Prune to create an open vase shape—this allows sunlight to reach the inner branches where fruit forms.
Make cuts just above an outward-facing bud or branch to encourage growth in the direction you want. Avoid cutting back to a stub or leaving a lateral branch that grows straight back toward the trunk. You'll see new growth emerge from these buds in spring, filling in the gaps you've created. Real talk: this step takes patience, but it's where the tree's future productivity is decided.
⏰ Step 5: Clean Up and Monitor Recovery
After pruning, rake up and dispose of all debris—this removes potential disease and pest habitats. Water the tree deeply to help it recover from the stress of pruning. Over the next 2-3 weeks, monitor the tree for signs of stress like wilting leaves or oozing sap at pruning cuts. If you see excessive sap, the cuts may have been too large—this is normal but indicates you should be more conservative next time.
In the following growing season, you'll see new shoots emerge from the buds you left behind. These will fill in the gaps and create a stronger framework for future fruit production. Here's the thing—pear trees reward patience. While you won't see a full harvest this year, next season's fruit will be larger and more abundant because your tree now has the space and energy to produce them.
Tips & tricks for pruning an overgrown pear tree
A few careful techniques will help you transform that tangled mess into a thriving, fruit-bearing tree without causing permanent damage.
Tool Preparation: I can't stress this enough—sterilize your tools between cuts, especially when dealing with diseased wood. Use rubbing alcohol on blades, and consider keeping a small spray bottle of disinfectant handy. This prevents spreading pathogens that could turn your pruning session into an infection disaster. Also, sharpen your tools before starting; dull blades tear wood instead of making clean cuts, which invites disease.
Branch Collar Awareness: When making cuts in Step 2, focus on cutting just outside the branch collar—the swollen area where the branch meets the trunk. This is where the tree's natural healing begins. If you cut flush with the trunk or leave a stub, you're creating wounds that heal poorly and invite rot. Think of it like making a clean incision in surgery—precision matters.
Visualizing the Tree's Future: Before making any cuts, spend 5 minutes mentally mapping out where you want the tree to grow. Look for the strongest upward-growing branches that can serve as your central leader or framework. This step prevents the "oh no" moment when you realize you've removed a branch that should have stayed. Sketch a rough diagram if needed—it's an investment that pays off in fruit production.
Seasonal Timing: The best time to prune pear trees is late winter or early spring, just before buds begin to swell. This timing gives the tree time to heal before the growing season begins. If you must prune during the growing season, do it on a cloudy day to reduce stress on the tree. Avoid heavy pruning in fall, as it can leave wounds vulnerable to winter diseases.
Pro Tips for Prune An Overgrown Pear Tree
- A few careful techniques will help you transform that tangled mess into a thriving, fruit-bearing tree without causin...
- Tool Preparation: I can't stress this enough—sterilize your tools between cuts, especially when dealing with diseased...
- Branch Collar Awareness: When making cuts in Step 2, focus on cutting just outside the branch collar—the swollen area...
Frequently asked questions
When is the best time to prune a pear tree?
For most pear varieties, late winter or early spring (just before buds swell) is ideal. Avoid pruning in fall, as wounds may not heal before cold weather. Exception: Light shaping after harvest is fine, but avoid heavy cuts. Timing matters—prune too early, and you risk disease; too late, and you stunt growth.
Can I prune a pear tree in summer?
Yes, but only for light maintenance—never for major structural work. Summer pruning (June–August) can stress the tree and invite pests. If you must trim, do so after harvest, remove no more than 25% of foliage, and sterilize tools to prevent bacterial infections like fire blight.
What if I see bleeding sap after pruning?
Bleeding sap (clear or white liquid) is normal in early spring but isn’t harmful. It’s the tree’s way of pushing out excess moisture. To minimize it, prune on dry days and avoid cuts larger than 1 inch in diameter. If sap turns dark or smells foul, it could signal disease—clean tools and prune in better conditions next time.
Will pruning reduce my pear harvest?
Not if done correctly! Proper pruning boosts fruit production by improving airflow and sunlight. However, over-pruning (removing >30% of branches) can temporarily reduce yields. Focus on thinning dense growth and opening the canopy—your tree will thank you with juicier, healthier pears!
What if my pear tree has dead branches—how do I remove them?
Dead branches (no leaves, dry wood, or hollow centers) must be cut back to the healthy wood (look for green tissue under the bark). Use clean, sharp tools and make cuts at a 45-degree angle just outside the branch collar. Disinfect tools between cuts to prevent spreading disease. Pro tip: Burn or bag dead wood—don’t compost it!
Can I prune a young pear tree the same way?
No! Young trees (under 3 years) need structural shaping, not heavy thinning. Focus on removing:
- Competing vertical branches (keep 3–5 main scaffold branches).
- Water sprouts (fast-growing, weak shoots).
- Crossing or rubbing branches.
Wrapping up and next steps
Pruning your overgrown pear tree might feel daunting at first, but with the right tools, timing, and technique, you’ll transform it into a thriving, fruit-bearing beauty! 🌳✨ Remember, the key is to prioritize safety, open the canopy for airflow, and shape the tree for long-term health.
Start small, stay patient, and soon you’ll be rewarded with bountiful harvests and a stunning landscape.
Ready to take the next step? Monitor your tree’s progress over the seasons—adjust pruning as needed, and don’t forget to celebrate those first signs of new growth! 🎉 For extra inspiration, explore local gardening forums or connect with fellow pear enthusiasts to share your success.