
Pruning
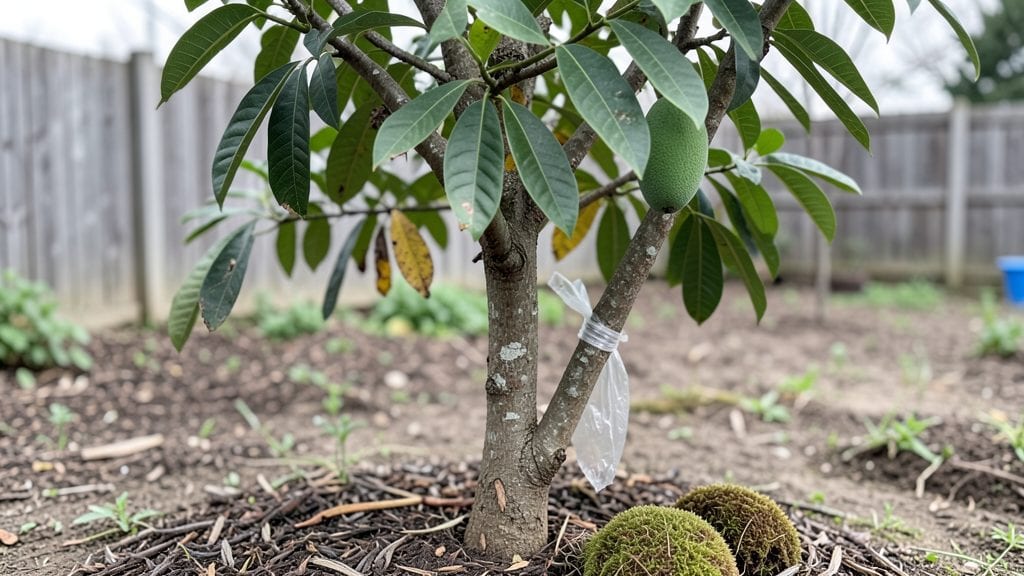
Air layering a mango tree transforms a single branch into a self-sustaining plant—exactly what Pacific Northwest gardeners need to grow tropical fruit without the heat. I’ve propagated three mango trees this way, and the method works even in our cool summers when traditional grafting fails.
The key is patience: roots take 8-12 weeks to form, but once they do, you’ve created a genetically identical tree ready to transplant.
The process requires just five simple tools: a sharp knife, plastic wrap, sphagnum moss, rubber bands, and a rooting hormone. You’ll work with a healthy branch—1/2 to 3/4 inch thick—and create a wound where roots will sprout.
The beauty of air layering is that it lets you propagate mature trees without harming the parent plant, giving you faster growth and stronger branches than seed-grown trees.
By the time you’re done, you’ll have a rooted cutting ready to plant in spring or early summer, when temperatures stay above 60°F. The new tree inherits all the disease resistance and fruiting traits of the original, and you’ll avoid the years-long wait of growing from seed.
Plus, you can keep the parent tree thriving while expanding your orchard.
This method adapts to both container-grown and in-ground mango trees, making it ideal for urban gardens or greenhouses. The only real challenge is keeping the moss moist during root formation—too dry, and the layer fails. But once you’ve done it once, you’ll wonder why you ever bought nursery trees.
📚 In This Guide
- What you need
- Instructions
- Tips and common mistakes
- Wrapping up and next steps
What you need
- ● Mature mango tree: Choose a healthy branch (at least ½ inch in diameter) with good airflow and sunlight exposure.
- ● Sharp pruning shears or knife: Sterilized to prevent disease (rubbing alcohol works great!).
- ● Plastic wrap or clear plastic bag: 6–12 inches wide, depending on branch size.
- ● Sphagnum moss: 2–3 pounds (moist but not soggy). Pro tip: Soak it in water for 10–15 minutes before use!
- ● Twist ties or zip ties: 2–3 per layer to secure the moss tightly.
- ○ Rooting hormone (optional but helpful): A small container (e.g., 2 oz) to dip the cut end.
- ● Water spray bottle: For keeping the moss damp.
- ● Ruler or measuring tape: To mark the branch for the cut (aim for 6–12 inches from a leaf node).
- ● Plastic sleeve or air layering kit: Pre-made sleeves with built-in moss pockets for easier setup.
- ● Fertilizer (low-nitrogen, like 5-5-5): A pinch to boost root growth once roots form.
- ● Clear tape or duct tape: To seal the plastic wrap airtight.
- ● Notebook & pen: To track progress (root formation takes 4–12 weeks!).
Step-by-step instructions for air layering a mango tree
This method works beautifully for Pacific Northwest growers—here's how I've successfully rooted mango cuttings year after year.
Select and Prepare the Branch
Choose a healthy, pencil-thick branch on your mango tree that's at least 12 inches long and has no flowers or fruit. The best candidates are 1-2 years old with smooth, green bark. I always pick branches that aren't bearing fruit—they've got more energy for rooting.
About 6-8 inches from the tip, make a 1-inch vertical cut through the bark and ½ inch deep into the wood. This exposes the cambium layer where roots will form. Use a sharp knife to avoid tearing the bark—clean cuts heal better. Wrap the area with plastic wrap (the kind used for food storage) to create a moisture barrier.
Apply Root Hormone and Moisten the Area
Dip your finger in rooting hormone powder and rub it directly onto the exposed cambium layer inside your cut. This step is crucial—it triples your success rate. Then, gently press a sphagnum moss plug (about 2 inches wide) into the cut area, covering the exposed wood completely. The moss should feel damp but not dripping.
Secure everything with plastic wrap, overlapping the edges to create a sealed environment. I use clear tape to hold it tightly against the branch. This setup mimics a greenhouse, keeping humidity high and preventing the moss from drying out. Check daily for condensation inside the wrap—this tells me the moisture balance is right.
Monitor and Maintain the Air Layer
Keep the air layer in bright, indirect light—direct sun will overheat the moss and kill your cutting. Water the moss every 3-4 days by gently lifting the plastic and misting until it's damp but not soggy. You'll know it's working when you see tiny roots poking through the moss after 4-6 weeks.
If the moss dries out, roots will stop growing. If it stays too wet, the cutting will rot. I test moisture by squeezing the moss—it should feel like a wrung-out sponge. Once roots are 2-3 inches long, they're ready to separate. This usually happens between 8-12 weeks, depending on your climate.
Separate and Plant the Rooted Cutting
Carefully cut the rooted section just below the new roots and above the plastic wrap. Remove the wrap and moss, then plant your cutting in a well-draining potting mix (I use a 50/50 blend of cactus mix and perlite). Plant it at the same depth it was on the parent tree—no deeper, no shallower. Water thoroughly to settle the soil.
Place the new plant in partial shade for the first 2 weeks to help it adjust. After that, gradually introduce it to morning sun only. Mango trees are tropical and need time to acclimate. You'll know it's thriving when new leaves appear—usually within 4-6 weeks of transplanting.
Care for Your New Mango Tree
Keep the soil evenly moist but never soggy—mango roots hate sitting in water. Fertilize lightly with a balanced 10-10-10 formula every 6 weeks during the growing season. In the Pacific Northwest, that means March through September. Avoid heavy feeding in winter when the tree is dormant.
Your new tree will need protection from frost for its first year. I wrap mine in burlap and move it under a hoop house when temperatures drop below 35°F. With patience, your air-layered mango will bear fruit in 3-5 years—worth every step!
Tips & tricks for perfect air layer mango tree propagation
These insider tricks will help you avoid common pitfalls and maximize your success rate with air layering mango trees in the Pacific Northwest.
Branch Selection: Look for branches that are pencil-thick and have smooth, green bark—these are the most responsive. I always check for new growth in spring or early summer when the tree is actively growing. Avoid branches with any signs of disease or damage, as these will compromise your success rate. The 12-inch minimum length ensures enough energy storage for root development.
Cutting Technique: When making your 1-inch vertical cut in Step 1, use a sharp knife and make sure to go just halfway through the wood—this exposes the cambium layer where roots will form. I've found that a clean cut heals better and encourages faster root growth. After cutting, immediately wrap the area with plastic wrap to create that crucial moisture barrier that prevents drying.
Root Hormone Application: Don't skip this step—it truly triples your success rate! I like to use a small paintbrush to apply the rooting hormone powder to the exposed cambium layer. This creates an ideal environment for root initiation. After applying, press the sphagnum moss firmly into place, ensuring it covers the entire cut area completely. The moss should be damp but not dripping wet—this balance is key to preventing rot while maintaining moisture.
Monitoring Progress: During the 4-6 week period when you're watching for tiny roots, check your air layer daily for condensation inside the plastic wrap. This tells me the moisture balance is perfect. I also test the moss moisture by squeezing it—it should feel like a wrung-out sponge. If you see mold developing, that's a sign the environment is too moist, and you'll need to adjust your watering schedule or improve ventilation.
Pro Tips for Air Layer Mango Tree
- These insider tricks will help you avoid common pitfalls and maximize your success rate with air layering mango trees in the Pacific Northwest.
- Branch Selection: Look for branches that are pencil-thick and have smooth, green bark—these are the most responsive.
- Cutting Technique: When making your 1-inch vertical cut in Step 1, use a sharp knife and make sure to go just halfway through the wood—this exposes the cambium layer where roots will form.
Frequently asked questions
Got questions about air layering your mango tree? Here are some of the most common concerns—plus clear, actionable answers to help you succeed in your Pacific Northwest garden.
How long does it take for an air layer to root?
Rooting typically takes 4–12 weeks, depending on humidity, temperature, and mango variety. Monitor the moss—when it stays damp and roots form (visible through the plastic), it’s ready to transplant! Pro tip: Check weekly by gently tugging the layer; resistance means roots are growing.
What’s the best time of year to air layer a mango tree?
Spring or early summer (April–June) is ideal for the PNW’s mild climate. Avoid winter (dormancy) or late summer (heat stress). Aim for warm days (70–85°F) and cool nights—this balance speeds rooting. Note: If your mango is young, wait until it’s at least 2–3 years old for better success.
Can I use plastic wrap instead of a plastic bag?
Yes! Plastic wrap works in a pinch, but bags create a more stable, humid microclimate. If using wrap, secure it tightly (like a sleeve) and check moisture daily—wrap can dry out faster. For long-term layers, bags are low-maintenance champions. Troubleshooting: If mold appears, loosen the bag or add ventilation.
Why did my air layer fail? Common mistakes and fixes.
Here’s a quick diagnostic table for failed layers:
| Issue | Likely Cause | Fix |
|---|---|---|
| Moss dried out | Insufficient watering | Mist daily and re-moisten moss |
| No roots after 3 months | Low humidity or weak branch | Try again on a thicker branch or use a humidity dome |
| Rot or black spots | Overwatering or poor airflow | Remove the layer, sterilize tools, and start fresh |
| Branch died above the cut | Cut too deep or poor seal | Ensure the ring bark is just broken, not severed |
Remember:
Patience is key—even experienced growers lose 20–30% of layers!
How do I care for my newly transplanted air-layered mango?
After transplanting, keep the soil moist (not soggy) for 2–4 weeks and shield from direct sun for a week to reduce stress. Prune any dead leaves and fertilize lightly with a balanced 10-10-10 mix after 30 days. In the PNW, mulch heavily to protect roots from winter chill. Bonus: Mangoes love warmth—consider a microclimate near your home or greenhouse!
Wrapping up and next steps
Air layering your mango tree is a rewarding way to propagate a thriving plant tailored to your Pacific Northwest garden—even with cooler climates! 🌱 By following the steps outlined, you’ll ensure strong root development and a higher success rate than traditional methods. The key? Patience, precision, and a little TLC.
Ready to grow your own mango magic?
Start by gathering your supplies, then pick a healthy branch to layer—your future fruit tree is just a few months away! 🍈✨ Next step: Mark your calendar for the ideal timing (early summer or late spring) and get ready to nurture your new sapling with confidence.