
Landscaping
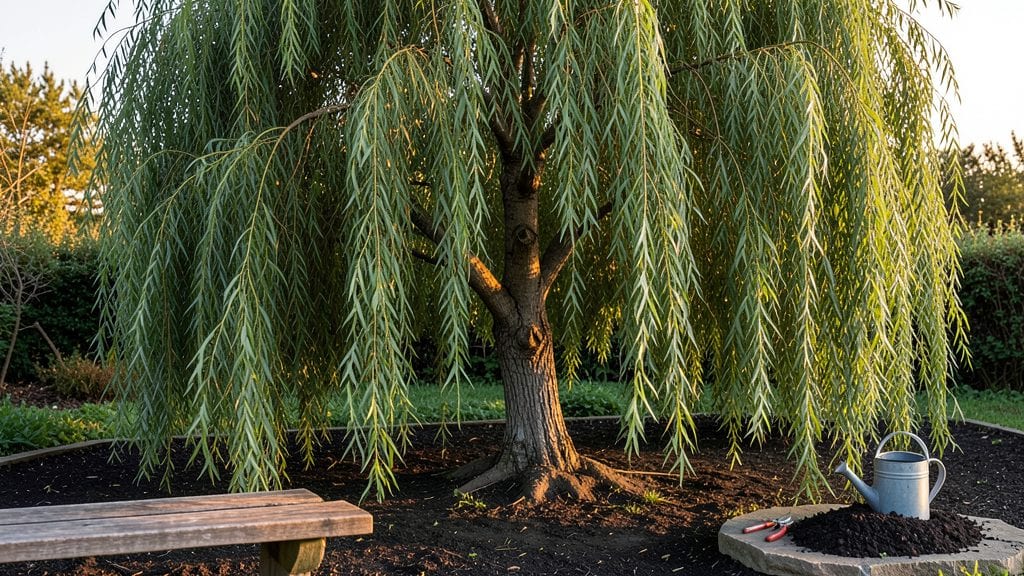
Landscaping with weeping trees transforms your Pacific Northwest yard into a serene, frost-proof masterpiece—where cascading branches craft natural privacy and soften harsh lines like living sculptures. 🌿 The key lies in placement: near patios for shade, alongside driveways for dramatic entryways, or as focal points in mixed borders where their graceful arcs contrast with upright shrubs.
Start with soil prep—these trees thrive in well-draining mixes with organic matter, especially in our wetter climates. Space them 15-25 feet apart depending on mature size, and pair with ground covers like heuchera or creeping thyme to highlight their trunks.
Lighting transforms them at night: uplights cast dramatic shadows, while path lights guide visitors through their dappled canopies.
Seasonal magic happens here: spring's fresh foliage, summer's cooling shade, and winter's bare branches create stunning silhouettes against snow. The real payoff? A landscape that feels intentional, not just planted—where every element, from the tree's weeping habit to the mulch beneath, works together like a carefully composed painting.
Here's the secret: weeping trees work best when they're not alone. Layer them with perennials that bloom at different heights, add a curved bench beneath their branches, or let them frame a water feature.
The result? A space that feels like a retreat, not just a yard. Let's make it happen.
📚 In This Guide
- What you need
- Instructions
- Tips and common mistakes
- Wrapping up and next steps
What you need
- ● Weeping tree varieties: Choose frost-resistant options like Weeping Cherry (Prunus subhirtella), Weeping Willow (Salix babylonica), or Weeping Haze Elm (Ulmus glabra 'Pendula') (1–3 trees, depending on size and spacing).
- ● High-quality soil: 2–3 cubic yards of well-draining, slightly acidic soil (pH 6.0–7.0) mixed with compost for nutrient-rich planting.
- ● Mulch: 3–5 bags of organic mulch (cedar or pine bark) to retain moisture and regulate temperature.
- ● Slow-release fertilizer: 1–2 bags of balanced, organic fertilizer (10-10-10 or similar) to support root growth.
- ● Tree stakes & ties: 2–4 stakes (4–6 ft tall) and soft fabric ties to stabilize young trees during establishment.
- ● Shovel & spade: A round-point shovel for digging and a flat spade for refining the hole.
- ● Wheelbarrow: For hauling soil, mulch, and tools (1–2 cubic feet capacity).
- ● Pruning shears & loppers: Sharp, sterilized tools for shaping and trimming branches (bypass pruners for small cuts, loppers for thicker limbs).
- ● Measuring tape & string: To mark planting locations and ensure proper spacing (aim for 15–25 ft between mature trees).
- ● Watering hose or drip irrigation: A soaker hose or drip system to deliver deep, consistent watering.
- ● Gloves & knee pads: For comfort and protection during planting.
- ● Tree guards: Plastic or metal guards to protect young trunks from wildlife.
- ● Soil amendments: Sulfur or peat moss to adjust pH if needed.
- ● Decorative stones or edging: For a polished look around the base of the tree.
- ● Tree lighting: Solar-powered lights to highlight your weeping tree at night.
Step-by-step guide to landscaping weeping trees in the Pacific Northwest
Here’s how to create stunning vertical accents with frost-resistant weeping trees that thrive in PNW’s unique climate.
🌱 Step 1: Select the Right Weeping Tree Varieties
For the Pacific Northwest’s frost-prone winters and mild summers, choose varieties like the Weeping Cherry (Prunus subhirtella), Weeping Norway Maple (Acer platanoides), or Weeping Birch (Betula pendula)—all known for their cold hardiness and graceful habit. Avoid tropical species that struggle with freezing temperatures below 20°F. I always verify a tree’s hardiness zone (PNW ranges from 5-8) before purchasing.
Look for young trees with a well-established root system—these establish faster and handle transplant shock better. A 4-6 foot tall specimen provides instant impact while allowing room for growth. Check for signs of disease or pest damage on the bark and foliage before bringing it home.
🪴 Step 2: Prepare the Planting Site for Optimal Growth
Weeping trees need well-draining soil to prevent root rot, especially in the PNW’s damp winters. Test your soil’s pH—most weeping trees prefer a slightly acidic to neutral range (6.0-7.0). Amend heavy clay soil with 2-3 inches of organic compost mixed into the top 12 inches of soil to improve aeration.
Dig a hole twice as wide as the root ball but no deeper—planting too deep suffocates roots and can lead to early decline. Loosen the roots gently if they’re circling tightly in the container. Place the tree in the hole so the top of the root ball sits 1-2 inches above ground level—this prevents soil compaction from settling over time.
☀️ Step 3: Plant and Stake for Stability
Backfill the hole with native soil, tamping lightly every 6 inches to eliminate air pockets. Water deeply to settle the soil around the roots, then add a 2-3 inch layer of mulch (wood chips or shredded bark) over the root zone, keeping it 6 inches away from the trunk to prevent rot. Mulch retains moisture and regulates soil temperature—critical for frost resilience.
Stake the tree only if necessary—weeping trees with their wide canopies often need support in windy PNW sites. Use two stakes placed 18-24 inches from the trunk at a 45-degree angle, securing the tree with soft fabric ties (not wire) to avoid girdling. Leave the ties loose enough to allow trunk growth.
💧 Step 4: Water and Maintain Through the First Year
Water deeply once a week for the first season, ensuring the soil is moist 12 inches down—shallow watering encourages weak roots. In the PNW’s rainy winters, reduce watering to once every 2-3 weeks unless the soil feels bone-dry. Overwatering in winter can lead to root suffocation.
Fertilize lightly in early spring with a balanced, slow-release fertilizer (10-10-10) to support new growth. Avoid high-nitrogen fertilizers, which promote lush foliage at the expense of branch structure. Prune only to remove dead or crossing branches—never "thin" a weeping tree’s canopy, as this disrupts its natural elegance.
⏰ Step 5: Plan for Long-Term Frost Protection
In late fall, apply a 3-4 inch layer of mulch around the base to insulate roots from freezing temperatures. Wrap young trees’ trunks with tree guards (burlap or cardboard) to protect against voles and frost cracks, which are common in PNW winters. Remove the guards in early spring before new growth begins.
Monitor for silver leaf disease (a fungal issue in weeping cherries) and aphid infestations, which thrive in the PNW’s damp climate. Treat affected branches with neem oil or horticultural oil as a preventive measure in early spring and late summer. With proper care, your weeping tree will develop a stunning, frost-resistant silhouette that enhances your landscape for decades.
Tips & tricks for perfectly landscaping weeping trees in the Pacific Northwest
Creating a stunning vertical landscape with weeping trees takes thoughtful preparation—here are my go-to tips to ensure long-term success.
Variety Selection: When choosing between Weeping Cherry, Norway Maple, or Birch, consider your site's exposure. Weeping Cherries (Prunus subhirtella) offer beautiful spring blossoms but may need extra protection in zones colder than 6. For maximum frost resilience, the Weeping Norway Maple handles temperatures down to 20°F better than most. I always verify the specific cultivar's hardiness rating before purchasing—some Weeping Birches can tolerate lower temps but may struggle with the PNW's damp winters.
Root Ball Preparation: The key to preventing transplant shock lies in the root ball. Before planting, gently loosen any circling roots you find—this encourages outward growth rather than girdling. For container-grown trees, I recommend soaking the root ball in water for 15-20 minutes before planting to reduce shock. This simple step makes all the difference in establishing strong roots in the first critical season.
Soil Amendments: Don't skip the soil test! While most weeping trees prefer 6.0-7.0 pH, the PNW's clay-heavy soils often need adjustment. I've seen cases where trees struggled because the soil was too acidic—adding lime can help, but test first. For heavy clay, mix in 2-3 inches of organic compost into the top 12 inches of soil to improve drainage without compromising moisture retention. This amendment strategy prevents both root suffocation and drought stress.
Staking Strategy: Many gardeners over-stake weeping trees, which can actually weaken the trunk over time. Only use two stakes at a 45-degree angle when absolutely necessary—typically for newly planted trees in exposed sites. I've found that using soft fabric ties (not wire) prevents girdling, and leaving them loose allows for natural trunk expansion. Check ties monthly and adjust as the tree grows—this prevents damage that could compromise the tree's stability.
Pro Tips for Landscaping Weeping Trees
- Creating a stunning vertical landscape with weeping trees takes thoughtful preparation—here are my go-to tips to ensure long-term success.
- Variety Selection: When choosing between Weeping Cherry, Norway Maple, or Birch, consider your site's exposure.
- Root Ball Preparation: The key to preventing transplant shock lies in the root ball.
Frequently asked questions
Got questions about adding weeping trees to your Pacific Northwest landscape? Here are some answers to help you get started with confidence!
What are the best weeping tree varieties for cold, wet climates like the PNW?
The Pacific Northwest’s frost and rain make Weeping Cherry (Prunus serrulata 'Kanzan') and Weeping Willow (Salix babylonica) top picks—they’re hardy and adaptable. For smaller spaces, consider Weeping Japanese Maple (Acer palmatum 'Crimson Sentinel'), which thrives in shade and handles winter chills. Always check local nurseries for region-specific recommendations!
When is the best time to plant a weeping tree in the PNW?
Fall (September–November) is ideal—cooler temps and winter rains help roots establish before spring growth. Spring (March–April) is a close second if you miss fall, but avoid planting in late summer or winter when frost risks linger. Give young trees a head start by watering deeply 2–3 times weekly for the first year!
How much does it cost to landscape with a weeping tree, and what’s included?
Costs vary: A 5-gallon weeping tree runs $50–$150, while mature specimens (15+ ft) can hit $500+. Landscaping services add $1,000–$3,000+ for planting, mulching, and soil prep. Pro tip: DIY planting saves money—just rent a post-hole digger ($50/day) and invest in quality mulch ($20–$50/bag) to retain moisture.
Why is my weeping tree dropping leaves early, even in mild PNW weather?
Early leaf drop often signals root stress (over/under-watering), pests (aphids, spider mites), or disease (fungal issues like powdery mildew). Check soil moisture—weeping trees hate soggy roots! Inspect branches for pests and prune dead limbs. If problems persist, consult a local arborist for a soil test or treatment plan.
Can I train a non-weeping tree to grow in a weeping shape?
While you can’t force a tree like an oak to weep naturally, you can prune selectively to encourage a cascading habit in flexible species like Silver Birch (Betula pendula) or Hornbeam (Carpinus betulus 'Fastigiata'). Use spreader bars on young branches to guide growth downward. Warning: Heavy pruning stresses trees—limit shaping to early spring or late fall.
Wrapping up and next steps
Incorporating weeping trees into your Pacific Northwest landscape isn’t just about aesthetics—it’s about creating resilient, frost-hardy vertical beauty that thrives year-round. From selecting the right species to mastering pruning and soil care, these trees offer elegance, shade, and low-maintenance charm that elevates any outdoor space.
Whether you’re a seasoned gardener or just starting, their adaptability makes them a smart, stylish choice for your yard.
Ready to transform your space? Start small—pick one weeping tree that fits your vision, then expand as you gain confidence. Your future shady retreat (or stunning focal point) is just a few saplings away! 🌿✨