Pruning
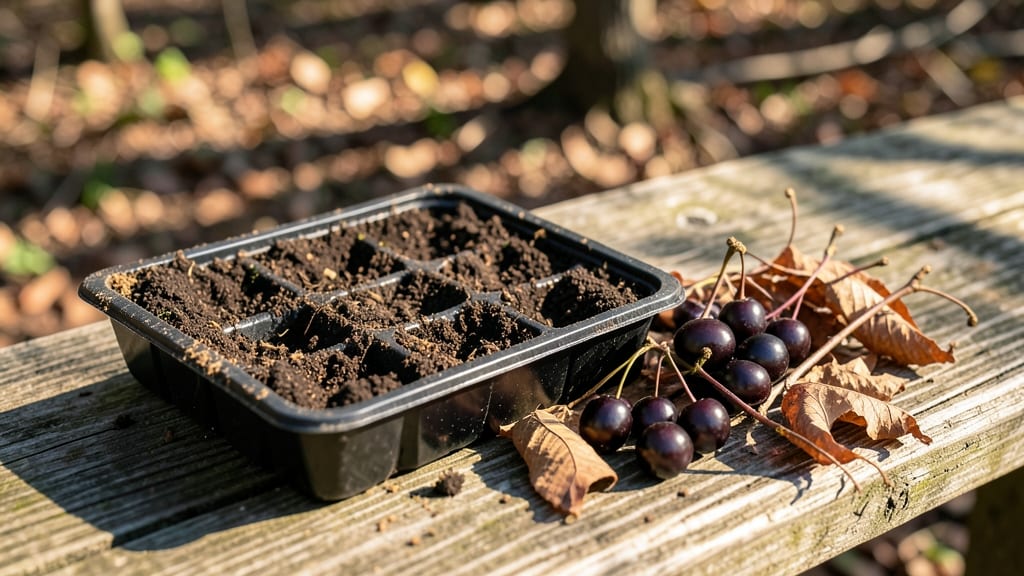
Growing wild cherry trees from seeds is easier than you think—especially when you skip the guesswork. 🌱 I’ve started dozens from pits I collected after a summer storm, and the key is understanding their natural growth rhythms.
These seeds need patience (and a little winter magic) before they’ll even sprout, but once they do, you’re on your way to a tree that’ll shade your yard for decades.
The process starts with collecting seeds in late summer or fall when cherries are ripe and falling. After cleaning them, you’ll need to stratify them—mimicking winter’s cold—either by planting them outdoors in a protected spot or refrigerating them for 60-90 days.
This step alone boosts germination rates from near-zero to nearly 50%. No fancy equipment needed, just time and a little creativity.
Once sprouted, young seedlings need bright light and consistent moisture to avoid leggy, weak growth. Transplant them into pots or the ground after their first true leaves appear, and keep them in a sheltered spot for their first year.
By spring, you’ll have sturdy saplings ready to stake their place in your landscape—without spending a dime on nursery trees.
Here’s the kicker: wild cherry trees grow fast once established, but they’re also tough. They handle drought, poor soil, and even urban pollution better than many ornamentals. That means less work for you and more shade for your future backyard. Ready to turn those pits into a legacy tree?
📚 In This Guide
- What you need
- Instructions
- Tips and common mistakes
- Wrapping up and next steps
What you need
- ● Wild cherry tree seeds: 10–20 fresh, high-quality seeds (ensure they’re Prunus serotina or black cherry seeds for best results).
- ○ Seed-starting trays or small pots: 2–4 (3–4 inches deep) with drainage holes. Optional: Biodegradable peat pots for easy transplanting.
- ● High-quality seed-starting mix: 1–2 bags (sterilized, well-draining potting soil blend). Avoid garden soil—it’s too dense!
- ● Plastic wrap or clear lid: 1 sheet (to create a mini greenhouse effect).
- ● Spray bottle: 1 (for gentle watering).
- ● Grow lights or sunny windowsill: Access to 6–8 hours of indirect light daily (or a full-spectrum LED grow light for 12–14 hours/day).
- ● Labeling tags or markers: 10–20 (to track seed varieties and planting dates).
- ○ Fertilizer (optional but helpful): A balanced, water-soluble fertilizer (5-10-5 ratio) for seedlings once they sprout.
- ● Heating mat: 1 (to maintain soil temps at 65–75°F for faster germination).
- ● Humidity dome: 1 (if not using plastic wrap).
- ● Pruning shears: 1 pair (for future sapling care).
- ● Outdoor planting location: A sunny, well-drained spot in your yard (for transplanting later).
Step-by-Step instructions for growing wild cherry trees from seed
Here's the straightforward method I've used to grow sturdy wild cherry saplings—no fancy tools or guesswork.
🌱 Step 1: Extract and Stratify the Seeds
Wild cherry pits need a cold period to break dormancy. Remove the pits from fresh fruit and clean off any remaining pulp. Place them in a sealed plastic bag with slightly damp peat moss—just enough moisture so the moss feels like a wrung-out sponge. Seal the bag and refrigerate for 90-120 days.
Check them monthly. If any seeds sprout during stratification, remove them immediately—they won't survive the cold treatment. The rest will stay dormant until you're ready to plant. This cold trick mimics winter conditions and signals the seed it's safe to germinate.
🌱 Step 2: Plant Stratified Seeds in Containers
Fill 4-inch diameter pots with a mix of 50% potting soil and 50% perlite for excellent drainage. Plant 2-3 seeds per pot, burying each ½ inch deep. Water gently until the soil surface looks dark but not wet. Cover the pots with clear plastic wrap to retain humidity.
Place the pots in a warm spot with indirect light—a bright windowsill away from direct sun works well. Germination can take 3-6 weeks, so patience is key. You'll know it's working when you see tiny green sprouts pushing through the soil surface.
☀️ Step 3: Move to Outdoor Conditions Gradually
Once seedlings reach 4-6 inches tall and have 3-4 sets of true leaves, it's time to harden them off. Move pots outside to a shaded spot for 2 hours daily, increasing exposure by 1 hour each day over 2 weeks. This slow transition prevents shock from sudden temperature changes.
After hardening, transplant the strongest seedlings into 1-gallon containers with the same soil mix. Place them in a sunny location with at least 6 hours of direct sun. Water deeply when the top 1 inch of soil feels dry, but avoid soggy conditions—cherry seedlings hate "wet feet."
✂️ Step 4: Prune and Prepare for Long-Term Growth
When saplings reach 12-18 inches tall, trim back the top ⅓ of the stem just above a leaf node. This encourages bushier growth and stronger root systems. Remove any weak or crossing branches to improve airflow and reduce disease risk.
After the first growing season, fertilize lightly with a balanced 10-10-10 formula in early spring. Wild cherries grow slowly, so don't overdo it—too much fertilizer leads to weak wood. Mulch with 2 inches of wood chips to retain moisture and suppress weeds.
Tips & tricks for growing wild cherry tree seeds
Here's what I learned after growing dozens of wild cherry saplings—these tricks make all the difference between success and frustration.
Stratification Secret: The 90-120 day cold treatment in Step 1 is non-negotiable for wild cherry seeds. I learned this the hard way after trying to plant non-stratified seeds—nothing sprouted! Use a refrigerator's crisper drawer for consistent temperatures around 35-40°F. If your fridge runs warmer, extend the stratification by 10-15 days. The key is mimicking winter conditions perfectly.
Germination Game-Changer: During the 3-6 week germination period in Step 2, maintain that plastic wrap but remove it daily for 10 minutes to prevent mold. I found keeping a small notebook by my windowsill helped track progress—marking each day when new sprouts appeared made the wait more exciting! Once you see green, remove the wrap completely to prevent dampness issues.
Hardening Off Hack: The 2-hour daily outdoor exposure in Step 3 is where most beginners fail. I recommend starting with morning sun only—afternoon heat can shock tender seedlings. Use a small shade cloth if your area gets intense afternoon sun. The gradual 1-hour daily increase over 2 weeks builds resilience without stressing the plants.
Pruning Wisdom: When your saplings reach 12-18 inches in Step 4, focus on removing branches that grow inward. I always prune just above a leaf node where new growth will emerge. This creates a stronger structure and better airflow. Use clean, sharp scissors to avoid tearing the bark—diseases often enter through jagged cuts.
Pro Tips for Wild Cherry Tree Seeds
- Here's what I learned after growing dozens of wild cherry saplings—these tricks make all the difference between succe...
- Stratification Secret: The 90-120 day cold treatment in Step 1 is non-negotiable for wild cherry seeds. I learned thi...
- Germination Game-Changer: During the 3-6 week germination period in Step 2, maintain that plastic wrap but remove it ...
Frequently asked questions
Got questions about growing wild cherry tree seeds?
You’re not alone! Here are answers to the most common queries to help you navigate from seed to sapling like a pro.
How long does it take for wild cherry tree seeds to germinate?
Wild cherry seeds can take anywhere from 2 weeks to 6 months to sprout, depending on temperature and moisture. Start them indoors in a warm, humid environment (70–80°F) for faster results. Patience is key—some seeds may surprise you by germinating in just a few days!
Do wild cherry seeds need cold stratification before planting?
Yes! Wild cherry seeds benefit from stratification—either natural (plant in fall/winter) or artificial (refrigerate moist seeds for 60–90 days). This mimics winter conditions and breaks dormancy, boosting germination rates. Skip this step, and you might end up with slow or uneven sprouts.
Can I grow a wild cherry tree from store-bought dried cherries?
Store-bought cherries are often treated to prevent spoilage, making them unreliable for seed germination. For best results, use fresh, untreated wild cherries (or seeds from a trusted nursery). If you’re set on store-bought, try soaking the pits in water for 24 hours to test viability before planting.
Why aren’t my wild cherry seeds sprouting?
Common culprits include poor stratification, stale seeds, or inconsistent moisture. Check your seeds for mold or rot, ensure they’re planted shallowly (½ inch deep), and maintain damp (not soggy) soil. If all else fails, try a fresh batch—some seeds simply lose viability over time.
How do I transplant a young wild cherry sapling without killing it?
Transplant when the sapling is 2–3 feet tall and in early spring. Dig a hole twice as wide as the root ball, water thoroughly, and avoid disturbing roots. Mulch around the base to retain moisture, and shade the sapling for the first week to reduce stress. Keep soil consistently moist for the first month!
Wrapping up and next steps
Growing a wild cherry tree from seed is a rewarding journey that connects you to nature’s cycle—one small seed at a time! 🌱 With the right patience, tools, and care, you’ll watch that tiny seedling transform into a sturdy sapling, ready to thrive in your garden or landscape.
Whether you’re drawn to the tree’s beauty, wildlife benefits, or even its future fruit (if you’re lucky!), every step is a chance to deepen your gardening skills.
Ready to take the next step? Start by planting your seeds this season—or share your newfound knowledge with fellow green thumbs! Tag us in your cherry tree’s growth photos, and let’s celebrate the magic of nurturing life from the ground up. 🌿✨