
Pruning
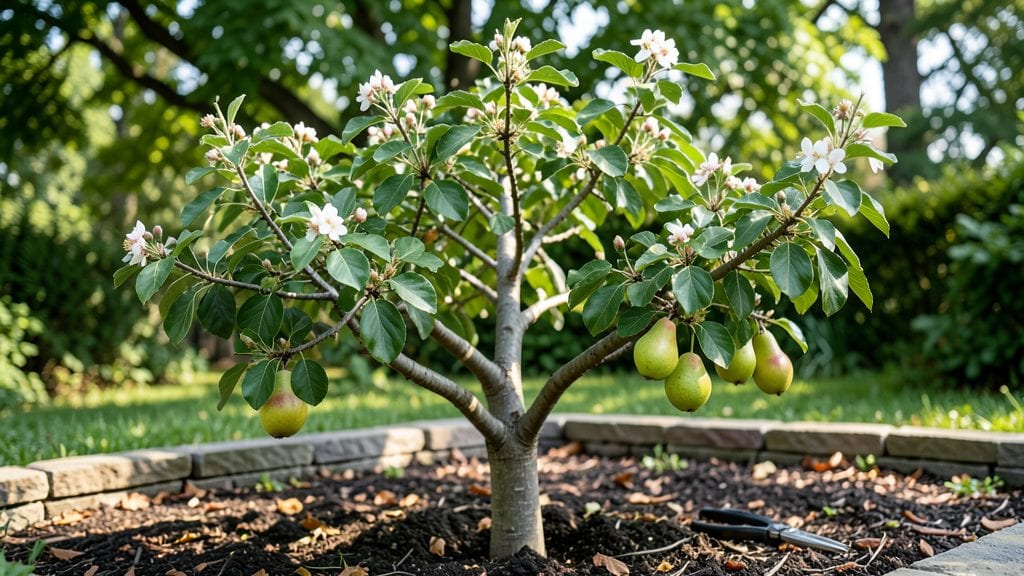
Mastering pear tree care and maintenance isn’t just about pruning—it’s about unlocking a lifetime of sweet harvests and sturdy branches. 🌳 I've learned that the difference between a thriving tree and one struggling with disease or poor fruit starts with consistent, seasonal attention.
My first pear tree nearly died from neglect, but after three years of trial and error, I cracked the code to keep it healthy through every season.
The key moves are simple but non-negotiable: pruning at the right time (late winter or early spring), watering deeply but infrequently, and fertilizing with the right balance of nutrients. Most people overlook the soil prep—amending with compost before planting makes all the difference in root strength.
You'll see the payoff in fewer pests, better fruit set, and a tree that lives for decades instead of just a few years.
By summer, your tree will reward you with glossy leaves and clusters of developing pears, while proper pruning ensures sunlight reaches every branch. The secret weapon? Regular inspections for signs of fire blight or borers—catching problems early means saving the whole tree.
With this approach, you're not just maintaining a tree; you're building a legacy of fruit.
Works for both backyard orchards and container-grown dwarf varieties. Whether you're dealing with a mature tree or a newly planted sapling, these steps keep things manageable year after year. Let's get that tree thriving for generations.
📚 In This Guide
- What you need
- Instructions
- Tips and common mistakes
- Wrapping up and next steps
What you need
- ● Pruning shears – Bypass pruners (sharp, 6-8" blades) for clean cuts (1 pair).
- ● Loppers – Heavy-duty, 18-24" for thicker branches (1 pair).
- ● Hand saw – Pruning saw with curved blade for large branches (1).
- ● Rubbing alcohol (70%+) – For sterilizing tools between cuts (small bottle).
- ● Garden gloves – Cut-resistant, durable to protect hands (1 pair).
- ○ Tree wound paint/sealant – Optional but helpful for larger cuts (small tub).
- ● Sturdy ladder – Extension ladder, 12-20 ft (if tree is tall) (1).
- ● Disposable pruning bags – For collecting debris (1-2 bags).
- ● Watering can or hose – For post-pruning hydration (1).
- ● Fertilizer (balanced, 10-10-10 or organic) – Slow-release granules (5-10 lbs).
- ● Pole saw – For high branches without a ladder.
- ● Tree spray (copper fungicide) – Prevents disease if needed.
- ● Mulch (wood chips or straw) – 2-3" layer to retain moisture.
- ● Reflective tape – Attach to pruners for visibility in tall trees.
- ● Pruning guide or app – For reference during cuts (e.g., iTree).
Step-by-Step instructions for year-round pear tree health
Here's the simple system I use to keep my pear trees thriving through every season.
✂️ Step 1: Prune for Structure in Late Winter
Start pruning your pear tree in late winter (just before buds swell) when the tree is still dormant. This is the best time because you can see the branch structure clearly without leaves obscuring your view. Grab your pruning shears and focus on removing dead, crossing, or diseased branches first—they're the easiest to spot and won't contribute to fruit production.
Next, open up the center of the tree by cutting back branches that grow inward. You want sunlight and air to reach the center where most of the fruit develops. Cut branches back to an outward-facing bud or branch junction. Make clean cuts at a 45-degree angle just above a bud that faces the outside of the tree. This ensures new growth will continue outward rather than inward.
🌿 Step 2: Thin Fruit in Early Spring
Once your tree flowers in early spring, you'll need to thin the fruit clusters to ensure quality pears. Wait until the fruit is about pea-sized before beginning—this gives you enough time to see which fruit is setting properly. Start by removing overcrowded clusters first, leaving only 6-8 inches between fruit on each branch. This spacing prevents branches from breaking under the weight of too many pears.
Use your fingers or small pruning shears to gently twist off unwanted fruit. Be patient—this step takes time but pays off with larger, better-quality pears. If you notice any fruit with signs of disease (like spots or unusual growth), remove it immediately to prevent spreading. You'll know you've done it right when you can see sunlight reaching the center of the tree and branches aren't sagging under weight.
☀️ Step 3: Monitor Water and Fertilize Mid-Summer
During mid-summer, your pear tree will need consistent moisture to support fruit development. Water deeply once a week if rainfall is less than 1 inch, ensuring the soil is moist 6 inches deep. You'll know it's time to water when the top inch of soil feels dry to the touch. Avoid wetting the leaves to prevent fungal diseases like fire blight, which can devastate your tree overnight.
Apply a balanced fertilizer (like 10-10-10) in early summer to give your tree a nutrient boost. Follow the package instructions for application rates, but generally, 1 pound of fertilizer per inch of trunk diameter is a good starting point. After fertilizing, water the tree thoroughly to help nutrients absorb into the soil. You'll see healthier leaves and stronger branches within a few weeks—this is your sign the tree is thriving.
🪴 Step 4: Protect and Prepare for Winter
As temperatures drop in late fall, prepare your pear tree for winter by applying a 2-3 inch layer of mulch around the base. Keep the mulch 6 inches away from the trunk to prevent rot. This layer insulates the roots and protects them from freezing temperatures. Also, wrap the trunk of young trees with tree guard or burlap to shield it from sunscald and rodent damage.
Before the first hard frost, give your tree one final deep watering to ensure it has enough moisture to survive the winter. Prune any remaining dead or diseased branches, and remove any fallen leaves or fruit from the ground to reduce the risk of pests and diseases returning next season. Your tree will reward you with strong, healthy growth in spring if you've done these steps right—just look for fresh, vibrant buds in early spring as your confirmation.
Tips & tricks for perfect pear tree care
Here's what nobody tells you about keeping your pear tree thriving—these are the little details that make all the difference between a struggling tree and one loaded with fruit.
Tool Prep: Before you start pruning in Step 1, sharpen your pruning shears with a file or sharpening stone. Dull blades can crush branches instead of making clean cuts, which invites disease. I also like to wipe down the blades with rubbing alcohol between cuts to prevent spreading any potential pathogens from diseased branches. This might seem like overkill, but it's a habit that pays off in healthier trees.
Thinning Strategy: In Step 2, when you're thinning fruit clusters, focus on keeping the largest, healthiest-looking pears spaced evenly around the branch. I've found that leaving one pear per cluster actually produces larger fruit than leaving multiple small ones. Also, prioritize pears on the outer branches—these get the most sunlight and air circulation, which reduces the risk of fungal issues.
Watering Wisdom: During mid-summer (Step 3), I've learned the hard way that morning watering is best. Watering in the evening can leave moisture on the leaves overnight, creating the perfect conditions for fungal diseases like fire blight. If you must water in the evening, do it early enough that the leaves have several hours to dry completely before nightfall. And always water at the base, not overhead.
Mulch Matters: When applying that 2-3 inch layer of mulch in Step 4, choose organic mulch like wood chips or straw. These break down over time, adding nutrients to the soil. Avoid using fresh wood chips from treated lumber—they can release harmful chemicals as they decompose. Also, remember to pull back the mulch slightly each year as the trunk grows to maintain that 6-inch clearance.
Pro Tips for Pear Tree Care And Maintenance
- Here's what nobody tells you about keeping your pear tree thriving—these are the little details that make all the difference between a struggling tree and one loaded with fruit.
- Tool Prep: Before you start pruning in Step 1, sharpen your pruning shears with a file or sharpening stone.
- Thinning Strategy: In Step 2, when you're thinning fruit clusters, focus on keeping the largest, healthiest-looking pears spaced evenly around the branch.
Frequently asked questions
Got questions about keeping your pear tree thriving?
Here are answers to the most common concerns—from pruning puzzles to pest problems—so you can enjoy a bountiful harvest year after year.
When is the best time to prune a pear tree?
Prune your pear tree during late winter or early spring (before buds swell) to promote healthy growth and fruit production. Avoid pruning in fall, as it can encourage disease. For summer-bearing varieties, light pruning after harvest can improve airflow. Always use sterilized tools to prevent infections!
How do I prevent pests like codling moths or aphids?
Start with preventative care: Remove fallen fruit and debris, thin canopies for airflow, and apply horticultural oil in early spring. For codling moths, use pheromone traps or Bt (Bacillus thuringiensis) sprays. Aphids? Blast them off with water or introduce ladybugs—nature’s pest control!
Should I protect my pear tree in winter?
Young trees or those in USDA zones 5-7 benefit from wrapping the trunk with tree guard or burlap to prevent sunscald and rodent damage. Mulch the base with 3–4 inches of organic matter (like wood chips) to insulate roots. Avoid heavy mulch piles against the trunk—keep it 2–3 inches away to prevent rot.
Why aren’t my pears ripening on the tree?
Pears need chilling hours (typically 200–500, depending on variety) to ripen properly. If your tree isn’t producing ripe fruit, it may be in a warm climate or lack winter dormancy. Try planting a low-chill variety like ‘Moonglow’ or ‘Seckel.’ Also, ensure the tree gets full sun (6+ hours/day) and balanced fertilization.
Can I grow a pear tree in a container?
Yes! Dwarf varieties like ‘Hooded’ or ‘Pineapple’ pears thrive in containers (15–20 gallon pots). Use well-draining soil, repot every 2–3 years, and move the pot to sunny outdoor spots in summer. In winter, bring it indoors near a south-facing window (if temps drop below 20°F). Just remember: Containers dry out faster—water deeply 2–3 times/week in hot weather!
Wrapping up and next steps
Caring for your pear tree is all about consistent, seasonal attention—from pruning for airflow and fruit production to protecting it from pests and disease. With the right tools, timing, and techniques, you’ll enjoy a thriving tree that rewards you with delicious pears for years to come. 🍐✨
Ready to take the next step? Grab your pruning shears and schedule your first pruning session this winter or early spring—your tree (and future harvest) will thank you!