
Trees
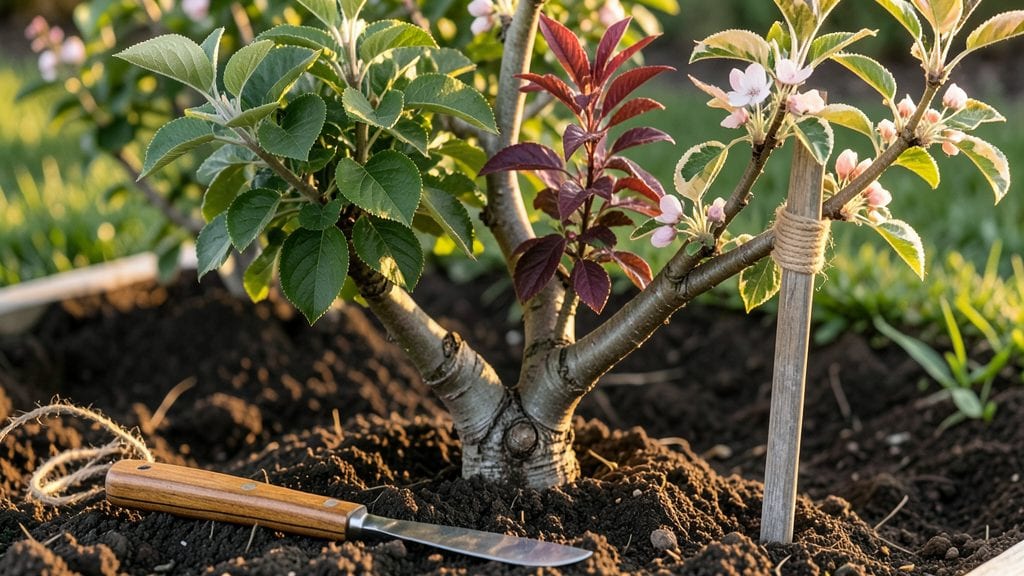
These multiple grafted fruit trees on one trunk bring summer peaches, fall apples, and winter pears—plus zero extra yard space. 🌳 I’ve grafted my own now, and the secret isn’t just in the technique but in pairing the right rootstocks with scions that thrive together.
The first time I saw my grafted tree bearing three different fruits at once, I knew this was the game-changer for small gardens.
Here’s the thing—you don’t need a green thumb to make this work. Start with a strong rootstock like a semi-dwarfing apple or peach variety, then add compatible scions (think apples with crabapples, peaches with nectarines).
The whip-and-tongue method takes practice, but even beginners can master it with the right tools: sharp grafting knives, grafting tape, and a little patience. Most grafts take hold within 6-8 weeks, and with proper care, you’ll have a tree that produces year-round.
What you end up with is a tree that looks like a living fruit salad. Imagine biting into crisp apples in September, juicy peaches in July, and sweet pears in November—all from one trunk.
The key is consistent watering, proper pruning to encourage airflow, and watching for signs of stress like wilting leaves or oozing sap at the graft union. Once established, these trees become the envy of the neighborhood, producing more fruit than you can eat.
Works in any climate zone where your chosen fruit varieties thrive—just adjust timing for late frosts or hot summers. The real magic happens in the third year, when your tree becomes a self-sustaining fruit powerhouse. Ready to turn your backyard into a mini orchard?
📚 In This Guide
- What you need
- Instructions
- Tips and common mistakes
- Wrapping up and next steps
What you need
- ● Rootstock: 1 healthy, disease-free rootstock (e.g., Malling 9 for apples, Citrus macroptera for citrus, or Prunus domestica for stone fruits). Choose based on your climate and soil.
- ● Scion Wood: 4 compatible scion varieties (e.g., Granny Smith, Fuji, Gala, and Honeycrisp for apples; or Lemon, Orange, Grapefruit, and Lime for citrus). Ensure they’re dormant-season (late winter/early spring) or greenwood (summer) cuts.
- ● Scion wood should be ¼-inch thick, 4-6 inches long, and taken from 1-year-old growth.
- ● Grafting Tools: 1 sharp grafting knife (or pruning shears for larger cuts).
- ● 1 grafting tape (or plastic wrap as a budget alternative).
- ● 1 sealant (e.g., pruning seal or tree wound dressing).
- ● Growing Supplies: 1 5-gallon pot or container (if starting indoors) with drainage holes.
- ● Well-draining potting mix (or garden soil amended with compost).
- ● 1 mulch (e.g., straw or wood chips) to retain moisture.
- ● Grafting Clamps: To secure grafts while they heal (great for whip-and-tongue or cleft grafts).
- ● Hormone Root Stimulator: Speeds up root growth if propagating from cuttings.
- ● Humidity Dome: A plastic bag or greenhouse setup to maintain moisture for young grafts.
- ● Label Tags: To track varieties and grafting dates.
- ● Fungicide: Prevents infection (e.g., copper fungicide or neem oil).
Step-by-Step instructions for creating a multi-grafted fruit tree
Here's how to combine four fruit varieties into one tree for a compact, productive harvest.
🪴 Step 1: Select and Prepare Your Rootstock and Scions
Start with a healthy 1-2 year old rootstock—this is your tree's foundation. I recommend dwarfing rootstock for easier maintenance, especially if space is limited. Choose scions (grafting wood) from four different fruit varieties you love, ensuring they're disease-free and about the thickness of a pencil.
Collect scions in late winter or early spring while the tree is still dormant. Cut 6-8 inch long pieces with at least three buds per scion. Store them in a plastic bag with moist paper towels in the fridge until ready to graft. This keeps them fresh and prevents drying out—critical for successful grafting.
✂️ Step 2: Make Clean Cuts for the Whip-and-Tongue Graft
First, make a clean diagonal cut about 2 inches long on the rootstock, ending just above a bud. Then, cut a tongue-shaped notch about ½ inch deep into the rootstock's cut surface. This notch helps align the scion perfectly with the rootstock.
Repeat the same cuts on the bottom of each scion, ensuring the tongue fits snugly into the rootstock's notch. The cambium layers (the green layer just under the bark) must align perfectly—this is where new growth will form. If your cuts aren't clean, the graft won't take. I like to use a sharp grafting knife and wipe the cuts with a damp cloth to remove any sap.
🌱 Step 3: Attach Scions and Secure the Graft
Slide the scion's tongue into the rootstock's notch, pressing firmly until the cambium layers meet. Do this for all four scions, spacing them evenly around the rootstock. Wrap each graft union tightly with rafting tape or plastic grafting clips, leaving no gaps. This keeps the scion and rootstock in perfect contact while they heal.
Cover the entire grafted area with rafting wax or grafting sealant to prevent drying and infection. I like to add a little water to the wax before applying it—this helps it stick better and creates a better seal. Label each scion with its variety using waterproof tape so you don't mix them up later.
☀️ Step 4: Protect and Monitor the Grafted Tree
Place the grafted tree in a bright, shaded area for the first few weeks—direct sun can dry out the grafts too quickly. Keep the soil evenly moist but not soggy, watering gently at the base. In about 4-6 weeks, you should see new growth emerging from the scions. This is your signal that the graft has taken!
Once the new shoots are 2-3 inches tall, carefully remove the grafting tape or clips. If you leave them on too long, they can girdle the new growth. Keep an eye out for any signs of stress, like yellowing leaves or wilting, and adjust watering as needed. This is the moment that matters—patience now means a bountiful harvest later.
⏰ Step 5: Prune and Train for a Strong Structure
After the first growing season, prune the rootstock back to about 6 inches above the highest graft union. This encourages the scions to grow stronger and directs energy into fruit production. Remove any suckers (shoots growing below the graft) immediately—they compete with your desired varieties.
Train the four main branches to spread evenly around the tree, tying them to stakes if needed. This creates a balanced structure that supports all four varieties. In subsequent years, prune in late winter to shape the tree and remove any dead or crossing branches. You'll love how compact and productive this tree becomes—four varieties in one trunk, all thriving together!
Tips & tricks for perfect multi-grafted fruit trees
Creating a multi-grafted fruit tree is a rewarding project that combines horticultural science with a touch of creativity. Here are my best tips to help you succeed.
Scion Selection Matters: When choosing your four scion varieties, pick fruits that have similar growing conditions—things like sunlight needs, soil preferences, and chilling requirements. For example, pairing apples with pears works well since they share similar care needs. I also recommend selecting varieties that mature at different times throughout the season so you get a continuous harvest.
Precision in Step 2: The cleanliness and accuracy of your cuts in Step 2 are absolutely critical. Use a sharp grafting knife and make sure your diagonal cuts are smooth—no jagged edges. The cambium layer (that green layer just under the bark) must align perfectly between the scion and rootstock. If you're unsure about your cuts, practice on scrap wood first to get comfortable with the technique.
Grafting Tape Technique: When wrapping your grafts in Step 3, don't be afraid to go a little overboard with the tape—just make sure you can still feel the cambium layers touching. I like to use two layers of grafting tape for extra security. The goal is to create a tight seal that prevents drying while still allowing the graft to breathe slightly. Remember to leave the top bud exposed so it can grow upward.
Post-Grafting Care: In Step 4, that bright shaded area is crucial—direct sun can cause the grafts to dry out too quickly. I've found that placing the tree under a shade cloth for the first two weeks gives the grafts the best chance to establish. Also, keep a close eye on moisture levels—consistency is key. You want the soil to stay damp but never soggy, as too much water can lead to rot.
Pro Tips for Multiple Grafted Fruit Trees
- Creating a multi-grafted fruit tree is a rewarding project that combines horticultural science with a touch of creativity.
- Scion Selection Matters: When choosing your four scion varieties, pick fruits that have similar growing conditions—things like sunlight needs, soil preferences, and chilling requirements.
- Precision in Step 2: The cleanliness and accuracy of your cuts in Step 2 are absolutely critical.
Frequently asked questions
Got questions about growing multiple grafted fruit trees? You’re not alone! Here are some of the most common queries—and their answers—to help you get started with confidence.
What are the best fruit varieties to graft together?
Popular combinations include apple + pear + cherry or peach + plum + apricot on a single rootstock. Choose varieties with similar growing seasons and sunlight needs. Avoid grafting tropical fruits (like mangoes) with temperate ones—they won’t thrive together!
How long does it take for grafted branches to bear fruit?
With proper care, grafted branches may produce fruit in 1–3 years, depending on the fruit type and rootstock vigor. Dwarf rootstocks speed up fruiting, while standard sizes take longer. Patience pays off—healthy grafts reward you with year-round harvests!
Can I graft new varieties onto an existing tree?
If your current tree is healthy, you can graft new varieties onto its branches. Just ensure the scion (new graft) matches the rootstock’s compatibility. Timing is key: Late winter/early spring (dormant season) is ideal for best success rates.
What pests or diseases should I watch for?
Grafted trees are vulnerable to fire blight, canker, and aphids. Prune infected branches immediately, and use organic sprays (neem oil) for pests. Keep the graft union clean and protected with grafting wax to prevent rot or invasion.
Do all grafted fruits ripen at the same time?
Not necessarily! Some varieties ripen sequentially, giving you a staggered harvest. Others may fruit together—it depends on the combination. Research your chosen varieties’ bloom times to plan for the best timing and avoid overcrowded fruit clusters.
Pro Tip:
Label each grafted branch as soon as you plant it! Use waterproof tags to track varieties, ripening times, and care notes. Trust us—you’ll thank yourself later when harvest season rolls around.
Wrapping up and next steps
Multiple grafted fruit trees are a game-changer for home gardeners and homesteaders, offering four delicious varieties in one tree—maximizing space while extending your harvest season.
Whether you're drawn to the convenience of year-round fruit or the joy of experimenting with flavors, this technique proves that small spaces can yield big rewards. 🌱
Ready to transform your orchard? Start small by choosing one tree to experiment with, and don’t hesitate to reach out to local grafting groups for tips or even scion wood swaps. Your future self—and your taste buds—will thank you!