
Pruning
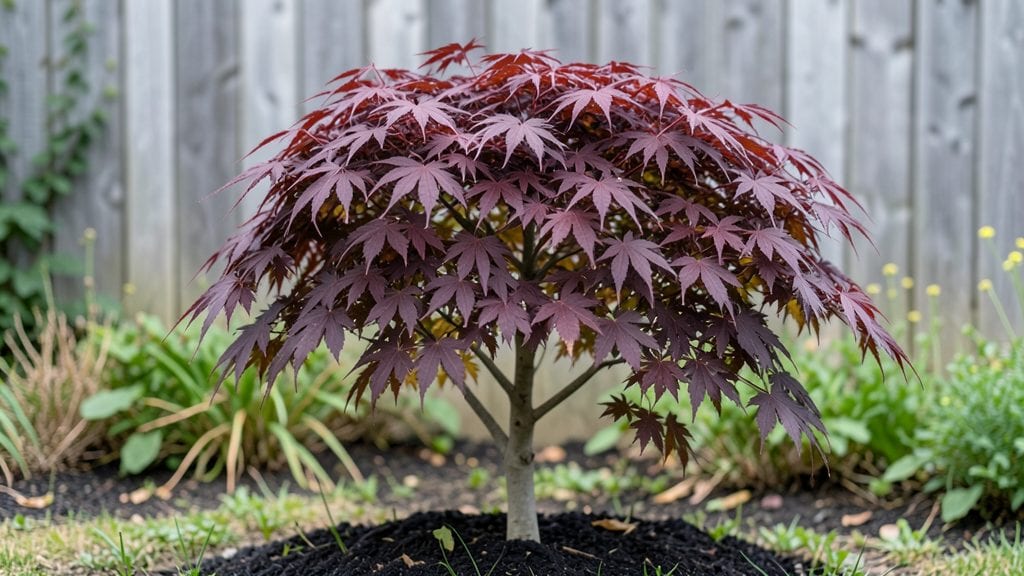
This Japanese red leaf maple tree, the Acer palmatum 'Atropurpureum,' transforms any Pacific Northwest garden into a living masterpiece with its fiery foliage that dances through all four seasons.
I planted mine last spring, and now it’s the centerpiece of my shady corner—its deep burgundy leaves turning even more vibrant when backlit by morning sun.
The secret isn’t just the tree itself but how you nurture it: the right soil, strategic pruning, and a little seasonal TLC keep those leaves popping like a neon sign in winter.
Start with well-draining soil mixed with compost—this tree hates soggy roots—and place it where it gets dappled shade (morning sun, afternoon shade works best). Water deeply once a week after establishment, but never let it sit in wet soil; these maples throw dramatic fits when their feet stay cold.
Pruning isn’t just about shape—it’s about encouraging those brightest leaves by thinning crowded branches in late winter. Think of it like giving your tree a haircut for maximum drama.
By summer, you’ll see why this tree is worth the wait: leaves that glow like embers, even in the grayest PNW days. The real magic happens in fall, when the red deepens into almost-black hues before winter’s crisp air.
With proper care, your maple will stay compact (5–10 feet tall) and vibrant for decades, becoming the kind of plant neighbors photograph in their holiday cards. The key? Don’t over-fertilize—rich soil makes for soft, floppy leaves, not the bold, crisp foliage you’re after.
For winter prep, wrap the trunk in burlap if your zone gets colder than 10°F—young trees need protection from freeze-thaw cycles. Mulch heavily around the base to insulate roots, and watch how the tree’s silhouette stands out against snow like a stained-glass window.
Once you’ve mastered these basics, your red leaf maple will reward you with year-round interest—and maybe even a few surprise spring blossoms if you’re lucky.
📚 In This Guide
- What you need
- Instructions
- Tips and common mistakes
- Wrapping up and next steps
What you need
- ● Pruning shears: Bypass pruners (for small branches, ¼"–½" thick). Example: Felco F-2 or Corona Tools.
- ● Loppers: For medium branches (½"–1½" thick). Look for bypass-style loppers with ratcheting handles for leverage.
- ● Pruning saw: Curved-tooth saw for branches thicker than 1½". Pro tip: A folding pruning saw saves space!
- ● Gloves: Heavy-duty, cut-resistant gloves (e.g., Mechanix Wear or Worn Again) to protect hands from thorns and sharp edges.
- ● Disinfectant: 70% isopropyl alcohol or a pruning sealant (like Tanglefoot Tree Wound Pruning Sealer) to prevent disease spread.
- ● Ladder: Extension ladder (20–30 ft) with non-slip feet if the tree exceeds 8 ft tall.
- ● Safety gear: Safety glasses (ANSI-rated)
- ● Long sleeves/pants (to avoid scratches from Acer palmatum’s serrated edges)
- ● Pole pruner: For high branches (e.g., Fiskars X27).
- ● Tree wound dressing: Only use if the cut is large (>2" diameter); otherwise, let it heal naturally.
- ● Marking spray: Bright paint (e.g., pink or yellow) to mark branches for removal before cutting.
- ● Wheelbarrow/bag: For hauling debris (a 10-gallon contractor bag works well).
- ● Pruning guide: A measuring tape or branch caliper to track branch thickness.
How to plant and care for a Japanese red leaf maple tree
This stunning tree thrives in the Pacific Northwest’s climate—here’s how to plant and nurture it for vibrant foliage all year.
Choose the Perfect Planting Location
The Japanese Red Leaf Maple (Acer palmatum 'Atropurpureum') craves partial shade to full sun, but in the PNW’s cooler summers, morning sun with afternoon shade prevents leaf scorch. Avoid low spots where cold air pools—this tree dislikes soggy roots. Test the soil pH (ideal: 5.0-6.5) using a simple kit; amend with sulfur if needed.
Dig a hole twice as wide as the root ball but no deeper. The top of the root flare (where roots meet trunk) should sit 1-2 inches above ground level—burying it too deep suffocates the tree. Loosen the sides of the hole with a shovel to encourage root spread.
Plant with Proper Spacing and Soil Prep
Space your 4 trees 15-20 feet apart to allow mature spread (15-25 feet wide). Mix the removed native soil with 3 parts compost and 1 part peat moss to improve drainage and fertility. This tree tolerates clay but thrives in well-draining, slightly acidic soil.
Place the tree in the hole, backfill with the amended soil mixture, and tamp gently to remove air pockets. Water deeply to settle the soil—10 gallons per tree—until moisture reaches 6 inches down. Mulch with 3 inches of wood chips, keeping mulch 6 inches away from the trunk to prevent rot.
Water and Fertilize for Establishment
Water twice weekly for the first month, then taper to once weekly once leaves appear. Check soil moisture by sticking your finger 2 inches deep—water when dry. Overwatering causes root rot, while underwatering stresses the tree in the PNW’s dry summer months.
Apply a balanced 10-10-10 fertilizer in early spring (March) and again in mid-summer (July), using ½ pound per tree. Avoid high-nitrogen fertilizers—they promote leafy growth at the expense of vibrant red foliage. Prune only to remove dead branches in late winter (February) before new growth begins.
Prune and Protect for Long-Term Health
Prune in late winter (February) to shape the tree and remove crossing branches. Use sterilized pruners to make clean cuts just above a bud or branch collar. Never remove more than 25% of the canopy in one season—this tree recovers slowly from heavy pruning.
In the PNW’s windy coastal areas, stake young trees for the first year to prevent uprooting. Watch for aphids or spider mites on new growth—spray with neem oil if you spot sticky residue on leaves. The red foliage fades in winter but returns boldly in spring with proper care.
Tips & tricks for perfect Japanese red leaf maple planting and care
A few simple tricks will help you keep your Japanese Red Leaf Maple thriving for decades in the Pacific Northwest's unique climate.
Location is Everything: When choosing your planting spot, pay extra attention to the afternoon sun. In the PNW's cooler summers, the afternoon sun can be surprisingly intense—even if your area gets full sun. If you notice leaves starting to scorch after the first summer, consider moving your tree slightly deeper into shade for the afternoon hours. The ideal morning sun with afternoon shade creates that perfect balance for vibrant foliage.
Soil Prep Secret: The 3 parts compost to 1 part peat moss ratio in Step 2 is perfect for creating that slightly acidic, well-draining soil this tree loves. For an extra boost, mix in a handful of cottonseed meal (optional) when planting—it adds nitrogen without promoting excessive leaf growth. This helps establish strong roots while maintaining that signature red foliage color. Remember to keep that mulch 6 inches away from the trunk to prevent rot.
Watering Wisdom: During the first month, those twice-weekly waterings are critical. I've seen many trees fail because people watered too much or too little. For a quick check, stick your finger 2 inches deep—if it feels dry, it's time to water. In the PNW's dry summer months, you might need to increase to three times weekly if you're not getting regular rainfall. The goal is consistent moisture without waterlogged soil.
Pruning Precision: The February pruning in Step 4 is your chance to shape your tree while it's dormant. Make your cuts just above a bud or branch collar—this is where new growth will emerge. I always prune on a dry day when the tree is completely dormant. If you're unsure about where to cut, look for the slight swelling at the base of the branch—this is your branch collar. Never remove more than 25% of the canopy in one season, as this tree recovers slowly from heavy pruning.
Pro Tips for Japanese Red Leaf Maple Tree
- A few simple tricks will help you keep your Japanese Red Leaf Maple thriving for decades in the Pacific Northwest's unique climate.
- Location is Everything: When choosing your planting spot, pay extra attention to the afternoon sun.
- Soil Prep Secret: The 3 parts compost to 1 part peat moss ratio in Step 2 is perfect for creating that slightly acidic, well-draining soil this tree loves.
Frequently asked questions
Got questions about growing and caring for your Japanese Red Leaf Maple Tree? You’re not alone—this stunning tree has unique needs! Here are answers to the most common queries to help you keep your foliage vibrant year-round.
How often should I prune a Japanese Red Leaf Maple?
Prune your Japanese Red Leaf Maple once a year, ideally in late winter or early spring (before new growth starts). Avoid heavy pruning in fall—it can stress the tree and reduce winter hardiness. Light shaping trims in summer are fine, but never prune more than 25% of the canopy at once.
Can Japanese Red Leaf Maples survive cold winters in the Pacific Northwest?
This tree thrives in USDA Zones 5-8, making it perfect for the PNW. However, young trees may need winter mulch (2-3 inches of wood chips) to protect roots from freeze-thaw cycles. Avoid heavy snow buildup on branches—gently shake it off to prevent breakage.
Why are my Japanese Red Leaf Maple leaves turning brown or yellow?
Brown/yellow leaves often signal overwatering, underwatering, or nutrient deficiencies. Check soil moisture—it should stay evenly moist but not soggy. Yellowing between veins? Likely iron deficiency (common in alkaline soils). Try a chelated iron supplement or adjust soil pH with sulfur.
What’s the best alternative if I want a smaller red-leafed tree?
If space is limited, consider these compact alternatives:
- Dwarf Japanese Maple ('Bloodgood'): Grows 15-20 ft tall, stunning red foliage.
- Crimson Queen Maple: Dwarf variety (10-15 ft), cold-hardy, and low-maintenance.
- Emperor I Maple: Upright but slower-growing (20-25 ft), with deep red leaves.
How do I revive a stressed Japanese Red Leaf Maple?
Start with these steps:
- Water deeply (1-2 inches per week) but avoid waterlogging.
- Fertilize in early spring with acid-loving plant fertilizer (e.g., 10-10-10).
- Prune dead/diseased branches to redirect energy.
- Mulch heavily (3 inches of organic mulch) to retain moisture.
Wrapping up and next steps
The Japanese Red Leaf Maple isn’t just a tree—it’s a masterpiece that transforms your Pacific Northwest landscape into a living work of art. 🌿 With the right pruning techniques, you’ll keep its fiery foliage vibrant year-round while ensuring its health and longevity.
Whether you’re trimming for shape, removing dead branches, or encouraging new growth, every cut is a step toward a stunning, thriving specimen.
Ready to elevate your garden? Grab your tools, follow the steps above, and watch your maple shine brighter than ever. Your next project starts with a single snip—happy pruning! 🌟