
Size
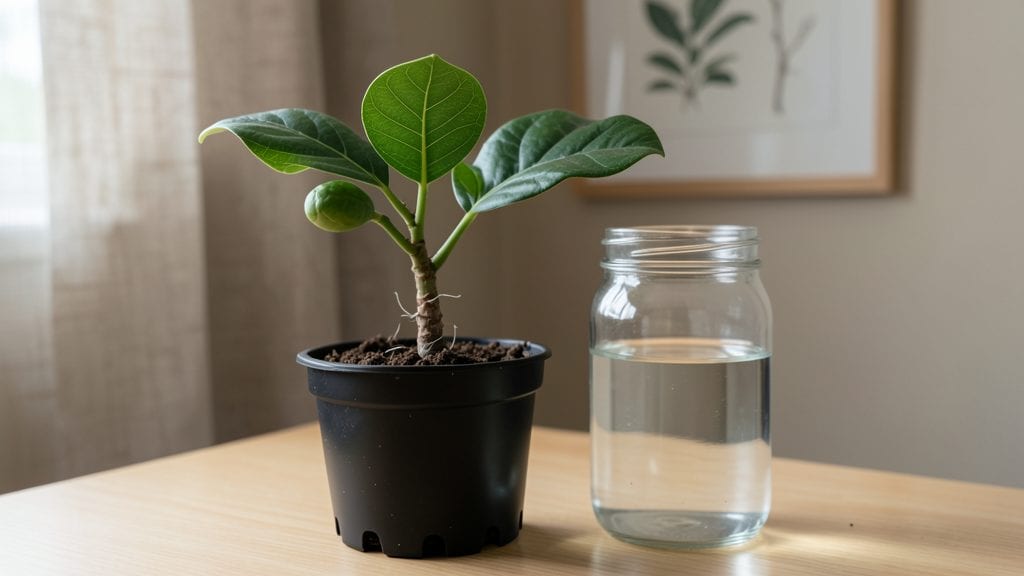
Growing an avocado tree from a pit is easier than you think—especially when you start with the right technique and patience. 🌱 I’ve turned grocery store pits into thriving 3-foot-tall trees using nothing but a glass, toothpicks, and a sunny windowsill.
The key isn’t luck; it’s understanding how avocado seeds germinate and what they need to survive their first critical weeks.
Most people quit after the first sprouts appear, but the real magic happens in weeks 3-4 when roots develop and the plant starts reaching for light. You’ll need a clean glass jar, three toothpicks, a damp paper towel, and a warm spot with bright indirect light.
That’s it—no fancy equipment, just the basics to give your seedling a fighting chance.
By week 4, you’ll have a sturdy 6-inch stem with a cluster of roots ready to transplant into soil. The leaves will be glossy and vibrant, and you’ll finally see why this project feels like watching a tiny miracle unfold.
Just don’t rush it—avocado trees grow slow but steady, and the payoff is worth every week of waiting.
Works just as well in apartments as it does in greenhouses, and the process teaches you more about plant biology than any textbook. Here’s exactly how to do it without killing your seedling along the way—trust me, I’ve tried all the wrong ways first.
📚 In This Guide
- What you need
- Instructions
- Tips and common mistakes
- Wrapping up and next steps
What you need
- ● 1 fresh avocado pit – Choose a firm, unblemished pit from a ripe avocado (💡 Pro tip: The fresher, the better!)
- ● 3-4 toothpicks – For balancing the pit while it sprouts roots
- ● 1 small glass or jar – At least 6 inches tall (e.g., a mason jar or drinking glass)
- ● Water – Room-temperature or slightly warm (change weekly)
- ● 1 plastic wrap or airtight lid – To create a humid environment
- ● Potting soil – Well-draining, organic mix (e.g., cactus/succulent soil or a 50/50 blend of potting soil and perlite)
- ● 1 small pot (4-6 inches wide) – With drainage holes (terracotta or plastic works)
- ○ Spray bottle (optional but helpful) – For misting leaves and maintaining humidity
- ○ Rooting hormone (gel or powder) – Speeds up root growth (optional but great for beginners!)
- ● Grow lights or sunny windowsill – If natural light is limited (avocados need 6+ hours of indirect light/day)
- ● Fertilizer (balanced, diluted) – Once the tree is established (e.g., fish emulsion or compost tea)
- ● Humidity dome or plastic bag – For extra moisture retention during early growth
- ● Support stake or trellis – As the tree grows taller (avocados can get top-heavy!)
Step-by-step instructions for growing an avocado tree from a pit
Here's how I turn a simple avocado pit into a thriving houseplant in just four weeks.
🌱 Step 1: Prepare the Avocado Pit for Planting
Start with a fresh avocado pit—one you've just eaten, not dried out from the grocery store. Rinse it thoroughly to remove any fruit residue, then scrub the surface gently with a soft brush to remove the brown outer layer. You're aiming for clean, bare wood underneath. This ensures nothing will interfere with root growth.
I like to soak the pit in lukewarm water for 24 hours first. This softens the hard outer shell slightly and helps the roots emerge faster. After soaking, pat it dry with a paper towel—you want it damp but not dripping. This step is crucial because a dry pit won't sprout roots, no matter how long you wait.
🪴 Step 2: Insert Toothpicks and Position in Water
Take three toothpicks and arrange them evenly around the pit, about 1 inch below the widest part. This creates a stable platform to hold the pit above the water without submerging it. The toothpicks should be parallel and spaced evenly—uneven spacing will make the pit wobble and fall over.
Place the pit in a glass or jar filled with 2-3 inches of room-temperature water. The water should cover about half the pit, just enough to touch the bottom but not submerge it completely. You'll see the toothpicks resting on the rim of the glass, keeping the pit suspended. Change the water every 3-4 days to prevent bacteria buildup, which can rot the pit before roots form.
☀️ Step 3: Provide Warmth and Light for Root Growth
Place the jar in a warm spot with bright, indirect light—a kitchen windowsill or under a grow light works best. Avoid direct sunlight, which can overheat the water and cook the pit. You'll know it's in the right spot when the water stays lukewarm to the touch and the pit doesn't feel hot.
Within 2-4 weeks, you should see small roots emerging from the bottom of the pit. These roots will grow quickly at first, so keep an eye on the water level—top it off as needed to maintain half-submersion. If the roots grow long and leggy, it's a sign the pit needs more light or the water is too warm. Here's the thing—roots that grow too fast can become weak, so balance is key.
🌿 Step 4: Transfer to Soil When Roots Are Established
Once the roots reach 2-3 inches long, it's time to plant the pit in soil. Fill a small pot (6-8 inches wide) with well-draining potting mix—avoid garden soil, which can compact and suffocate the roots. Make a hole in the center of the pot, just big enough to fit the pit snugly.
Place the pit in the hole with the roots facing downward, then cover the top half of the pit with soil. Water lightly until the soil feels damp but not soggy. Place the pot in a spot with bright, indirect light and keep the soil consistently moist—never let it dry out completely. You'll notice new growth from the top of the pit in 4-6 weeks, signaling that your tree is truly taking root.
⏰ Step 5: Care for Your Young Avocado Tree
Your young avocado tree will need regular watering—water when the top inch of soil feels dry to the touch. Overwatering is the biggest mistake here; it causes root rot and kills the plant before it even gets started. I like to use a spray bottle for gentle watering, which helps mimic the natural rainfall the tree would get outdoors.
After a few months, you can fertilize lightly with a balanced houseplant fertilizer once a month during spring and summer. Avoid heavy fertilizers—they can burn the delicate roots of a young tree. Keep the pot in bright, indirect light and rotate it occasionally so it grows evenly. With patience and care, your avocado pit will grow into a small tree, and who knows? Maybe even produce fruit someday!
Tips & tricks for perfect avocado tree growth
These simple tricks will help you avoid common pitfalls and give your avocado pit the best chance to thrive.
Soaking Secret: That 24-hour soak isn't just about softening the shell—it's about waking up the pit. I've found that using lukewarm water (around 80°F) works better than cold water. Too cold and the pit stays dormant; too hot and you risk cooking it. Also, don't skip the drying step after soaking—excess moisture can lead to mold before roots even form.
Toothpick Technique: The placement of those three toothpicks matters more than you'd think. Position them 1 inch below the widest part of the pit, not the top or bottom. This creates the perfect balance point. I like to use plastic toothpicks instead of wooden ones—they won't absorb water and weaken over time. Trust me on this: uneven toothpicks will make your pit wobble and potentially tip over.
Lighting Strategy: Bright, indirect light is key in Step 3, but what does that really mean? Place your avocado setup near an east-facing window where it gets morning sun but not harsh afternoon rays. If you don't have good natural light, a simple grow light bulb (around 6000K color temperature) for 12 hours a day works wonders. Watch for leggy roots—they're begging for more light!
Transplant Timing: Wait until those roots reach 2-3 inches before planting in soil, but don't wait too long. Roots longer than 3 inches can become tangled and damaged during transplant. When you plant, bury only the top half of the pit—this is where new growth will emerge. I've seen people bury the whole pit, and it never sprouts from the top.
Pro Tips for How Do You Grow An Avocado Tree From A Pit
- These simple tricks will help you avoid common pitfalls and give your avocado pit the best chance to thrive.
- Soaking Secret: That 24-hour soak isn't just about softening the shell—it's about waking up the pit.
- Toothpick Technique: The placement of those three toothpicks matters more than you'd think.
Frequently asked questions
How long does it take for an avocado pit to sprout?
With proper care, you’ll see tiny roots emerge in 2–4 weeks! Once rooted, it can take 5–13 years for the tree to bear fruit—patience is key!
Can I plant the pit directly in soil without water?
No—never skip the water step! The pit needs consistent moisture to sprout. After roots form (2–4 weeks), you can transplant it to soil. Dry pits won’t grow!
Will my avocado tree grow indoors or need sunlight?
Start indoors near a bright window, but move it outside (6+ hours of sun) once established. Young trees thrive in pots, but mature ones need outdoor space.
What if my pit rots or mold grows?
Overwatering or dirty pits cause rot. Use fresh, clean pits and change water every 2–3 days. If mold appears, rinse with water and restart.
Can I eat avocados from a homegrown tree?
Yes! But homegrown avocados may not match store-bought varieties in size or taste. Pollination is tricky—plant multiple trees for better fruit.
Wrapping up and next steps
Growing an avocado tree from a pit is a rewarding journey that blends patience, care, and a little creativity! 🌱 With the right steps—from sprouting to transplanting—you’ll be nurturing a tiny seedling that could one day bear fruit. Remember, consistency is key, and even small efforts add up over time.
Ready to take the next step? Once your avocado plant is thriving, explore pruning tips or learn how to fertilize for optimal growth. Your green thumb is already making progress—keep it up! 🌟