
Pruning
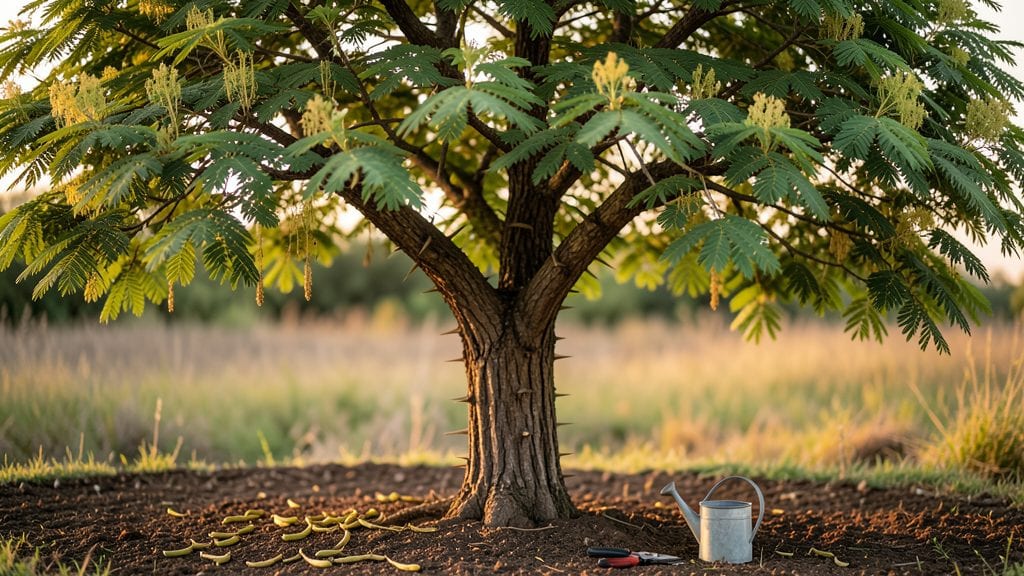
Planting a honey locust street tree in the Pacific Northwest means instant shade, cleaner air, and a privacy shield that grows itself—with almost no fuss. I’ve watched mine shoot up 10 feet in just three years, outpacing slower-growing options while handling our dry summers and damp winters without complaint.
The thorns might make it sound intimidating, but they’re actually a bonus for deterring vandals and pests.
This tree thrives in urban spaces where roots can’t spread freely—6-8 feet from sidewalks is ideal—and its deep taproot means it won’t compete with nearby foundations or driveways.
The fine, feathery foliage filters pollution better than many ornamentals, while the golden seed pods (yes, they’re messy in fall) add unexpected texture to winter landscapes. Just rake them up if you’re particular about tidiness.
By summer, you’ll have 30+ feet of dense shade along your driveway, with branches that naturally arch to create a canopy without pruning. The bark develops striking ridges over time, adding character to sidewalks and streetscapes.
It’s the kind of tree that makes neighbors pause and ask, “What is that?”—then wish they’d planted one too.
Fair warning: The seed pods do litter, and the thorns are real, but the trade-off is worth it for anyone tired of high-maintenance street trees. With the right spacing and a little cleanup, it’s the low-effort, high-impact choice for Pacific Northwest curb appeal.
📚 In This Guide
- What you need
- Instructions
- Tips and common mistakes
- Wrapping up and next steps
What you need
- ● Honey locust tree sapling: 1–3 trees (depending on spacing—aim for 15–25 feet apart for mature privacy). Choose 1-inch caliper or larger for faster growth.
- ● Shovel: 1 round-point or digging shovel (24–30" blade for mature trees).
- ● Garden hose or watering can: 1 for post-planting hydration.
- ● Mulch: 2–3 bags of wood chips or shredded bark (3–4" deep layer).
- ○ Tree stakes (optional but recommended): 2–4 4–6 ft wooden or metal stakes + soft tree ties (to secure young trees).
- ● Pruning tools: 1 bypass pruners (for small branches).
- ● 1 loppers (for branches up to 2" thick).
- ● 1 pruning saw (for thicker branches).
- ● Gloves: 1 pair heavy-duty work gloves (to protect from thorns!).
- ● Soil amendment (if needed): 1 bag of compost or peat moss (for poor soil).
- ● Tree guard: 1–2 plastic or metal tree wraps (to deter rodents or pets).
- ● Post-hole digger: 1 (if installing stakes for extra support).
- ● Drip irrigation kit: 1 (for automated watering in dry spells).
- ● Fertilizer: 1 slow-release, tree-specific fertilizer (apply in early spring).
- ● Safety gear: Sunglasses (to shield from debris).
- ● Long sleeves/pants (for thorn protection).
Planting and establishing a honey locust street tree in the Pacific Northwest
This resilient tree thrives in urban settings with minimal fuss—here's how to plant it for lasting privacy.
Choose the Right Location and Prepare the Site
Honey locusts tolerate a range of conditions but perform best in full sun (at least 6 hours daily) with well-draining soil. In the Pacific Northwest's damp climate, avoid low-lying areas where water pools after rain. Test your soil by squeezing a handful—if it forms a tight ball, amend with 2-3 inches of compost to improve drainage.
Call 811 to check for underground utilities before digging. The planting hole should be 2-3 times wider than the root ball but only as deep as the container. Loosen the sides of the hole with a shovel to encourage root spread. I always add a 6-inch layer of gravel at the bottom to prevent compaction, especially in clay-heavy PNW soils.
Plant at the Correct Depth and Stake for Support
Remove the tree from its container and inspect the root ball. If roots are circling, gently tease them apart with your fingers. Position the tree so the top of the root ball sits 1-2 inches above ground level—this prevents stem rot in our region's wet winters. Backfill with native soil, tamping lightly every 6 inches to eliminate air pockets.
Stake only if necessary—honey locusts establish quickly. If staking, use two 4-foot stakes placed 12 inches from the trunk at opposite sides. Secure with soft tree ties (never wire) to allow slight trunk movement. Water deeply after planting to settle the soil and remove the stakes after 12 months to avoid girdling.
Water Deeply and Mulch to Retain Moisture
Water immediately after planting with 10-15 gallons to saturate the root zone. In the PNW's mild summers, water once weekly for the first year, providing 1-2 inches per week. You'll know it's enough when water drains 6 inches deep—stick a screwdriver into the soil to check. Overwatering here causes root rot, so let the top 2 inches dry between waterings.
Apply 3-4 inches of mulch (wood chips or bark) in a 3-foot diameter ring around the base, keeping it 6 inches away from the trunk. This conserves moisture, suppresses weeds, and moderates soil temperature. Replenish mulch annually—it breaks down faster in our damp climate. Avoid plastic mulch; it traps too much moisture and suffocates roots.
Prune for Structure and Monitor for Pests
Prune only to remove dead, crossing, or low-hanging branches in late winter or early spring. Honey locusts are naturally thorny, so wear gloves—those thorns are sharp! Make cuts just outside the branch collar to promote healing. Avoid heavy pruning in the first year; the tree needs all its energy to establish roots.
Inspect for locust borers (common in PNW) by scraping bark for sawdust-like frass. If you spot holes, treat with neem oil in early summer. These trees are generally pest-resistant, but our region's mild winters can encourage borer activity. Healthy trees rarely need intervention, but watch for yellowing leaves—a sign of either overwatering or aphids.
Fertilize Lightly and Prepare for Winter
Skip fertilizer the first year—honey locusts establish better with minimal disturbance. In year two, apply a slow-release, balanced fertilizer (10-10-10) in early spring, spreading it 6 inches from the trunk. Our acidic PNW soils often need a boost, but too much nitrogen encourages weak, disease-prone growth. Follow package rates precisely.
Mulch heavily before winter to protect roots from freeze-thaw cycles. Wrap the trunk with tree guard (not plastic) if rabbits or deer frequent your area—they love young honey locusts. By year three, your tree should be self-sufficient, handling our region's 40-60°F winters with ease. Prune again in late winter to shape for your privacy screen.
Tips & tricks for perfect honey locust street tree establishment
These practical insights will help you avoid common pitfalls and ensure your honey locust thrives in Pacific Northwest conditions.
Site Selection Strategy: In Step 1, when choosing your location, prioritize areas with at least 6 hours of direct sunlight daily—this is non-negotiable for optimal growth. I've seen too many trees struggle in partial shade, where they develop weak, leggy growth. Check sunlight patterns throughout the day, especially in winter when days are shorter. Our PNW's frequent cloud cover can fool you—measure actual sunlight hours, not just sunny days.
Root Ball Preparation: Before planting in Step 2, inspect the root ball for circling roots—this is a common nursery issue that can strangle your tree's growth. If you find them, gently tease them apart with your fingers or a knife. Pro tip: Soak the root ball in water for 10-15 minutes before planting to reduce transplant shock. The 6-inch gravel layer at the bottom of your planting hole is crucial in our region's clay-heavy soils—it prevents compaction that would otherwise restrict root expansion.
Watering Precision: The 10-15 gallons of water immediately after planting in Step 3 is essential, but timing matters too. Water in the early morning to allow foliage to dry before evening—a must in our damp climate to prevent fungal issues. For the weekly watering in the first year, use a rain gauge or tuna can to measure exactly 1-2 inches of water. Overwatering is the #1 killer of young trees here, so let that top 2 inches of soil dry between waterings. I always check moisture with a screwdriver—if it goes in easily, you're good.
Mulching Mastery: When applying that 3-4 inches of mulch in Step 3, create a donut shape—keep it 6 inches away from the trunk to prevent moisture buildup that causes rot. In our wet climate, wood chips break down faster than you'd think, so replenish annually. I've found that cedar mulch works particularly well in PNW—it's naturally rot-resistant and repels pests. Avoid piling mulch against the trunk; it creates a perfect environment for rodents to nest.
Pro Tips for Honey Locust Street Tree
- These practical insights will help you avoid common pitfalls and ensure your honey locust thrives in Pacific Northwest conditions.
- Site Selection Strategy: In Step 1, when choosing your location, prioritize areas with at least 6 hours of direct sunlight daily—this is non-negotiable for optimal growth.
- Root Ball Preparation: Before planting in Step 2, inspect the root ball for circling roots—this is a common nursery issue that can strangle your tree's growth.
Frequently asked questions
Got questions about planting and caring for honey locust street trees in the Pacific Northwest? You’re not alone!
Here are answers to the most common queries—whether you’re a first-time planter or troubleshooting a tricky situation.
How fast does a honey locust tree grow in the PNW?
A honey locust is a fast grower—expect 3–5 feet per year in ideal conditions (well-drained soil, full sun). In the Pacific Northwest’s milder climate, growth may slow slightly in winter but still averages 2–3 feet annually. With proper spacing (30–40 feet from structures), it’ll provide quick privacy and shade!
Are honey locust pods messy? How do I manage them?
Yes, the flat, brown pods can be unsightly but are not harmful. To minimize mess:
Honey locusts are drought- and wet-tolerant, making them perfect for the PNW’s rainy seasons. However, avoid waterlogged soil—ensure proper drainage by planting on a slight slope or amending clay soil with compost. Their deep roots also help prevent erosion on hillsides. Pruning is minimal—focus on:
If thorns are a concern, consider these low-thorn alternatives for privacy:
Pro tip: Mulch heavily around the base to deter sprouting!
Can honey locust trees handle PNW’s wet winters?
Do honey locust trees need pruning? When’s the best time?
Warning: Their thorns make pruning tricky—wear gloves!
What’s a good alternative if I want fewer thorns?
Trade-off: Alternatives may lack honey locust’s fast growth or hardiness.
Wrapping up and next steps
The honey locust street tree is a game-changer for Pacific Northwest landscapes, offering year-round privacy with minimal fuss. 🌳 Its drought tolerance, rapid growth, and resilience make it a top pick for urban and suburban settings—plus, its thorny branches deter pests naturally!
Whether you’re a busy homeowner or a landscaper, this tree delivers beauty and functionality without the high-maintenance hassle.
Ready to transform your space? Start by assessing your yard’s sunlight and soil, then plant with confidence—your future shade (and peace of mind) will thank you! 🌿