
Container Gardens
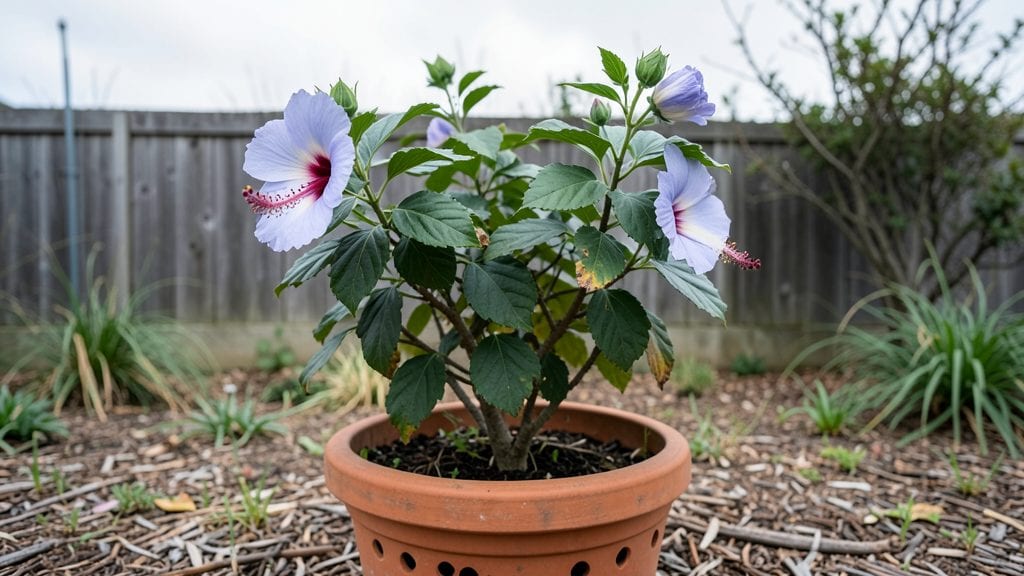
Growing a hibiscus tree in a container in the Pacific Northwest means you can enjoy those bold blooms year after year—even through frost. I’ve spent three winters protecting mine, and the secret isn’t complicated: the right pot, soil, and timing make all the difference.
The first time I saw my hibiscus rebound after winter, I knew I’d cracked the code for cold-climate container gardening.
You’ll need a 15-20 gallon container with drainage, a mix of potting soil and compost for nutrients, and a spot that gets at least 6 hours of sunlight daily—even in winter.
My hibiscus thrives in a south-facing patio corner, where it soaks up winter sun while staying sheltered from wind. The key is balancing moisture and warmth: hibiscus roots need to stay cool but not soggy, especially when temperatures dip below 40°F.
By summer, you’ll be rewarded with 3-foot-tall bushes bursting with blooms in shades of red, pink, and white. Pruning in late winter encourages fresh growth, while regular feeding keeps those flowers coming.
The best part? With proper overwintering—moving pots to a garage or wrapping them in burlap—your hibiscus will bounce back stronger every spring. No more replacing plants every year.
This method works for both tropical and hardy hibiscus varieties, whether you’re growing on a balcony, patio, or even indoors near a sunny window. The only real challenge is remembering to check soil moisture when temperatures swing.
Once you’ve got the routine down, container hibiscus care becomes second nature—and your neighbors will be asking for your secrets.
📚 In This Guide
- What you need
- Instructions
- Tips and common mistakes
- Wrapping up and next steps
What you need
- ● Container: A large, sturdy pot (minimum 18–24 inches in diameter and 18 inches deep) with drainage holes (terracotta or fabric pots work best). For dwarf varieties, a 12-inch pot may suffice.
- ● High-quality potting mix: A well-draining blend like 50% peat moss or coconut coir, 30% perlite or pumice, and 20% compost. Avoid garden soil—it compacts and causes root rot!
- ● Frost-resistant hibiscus variety: Choose Hibiscus syriacus (Rose of Sharon) or Hibiscus moscheutos (Swamp Hibiscus), which tolerate USDA Zones 5–9 with proper care.
- ● Slow-release fertilizer: A balanced, organic fertilizer (10-10-10 or 5-5-5) to nourish roots over 3–4 months.
- ● Mulch: 2–3 inches of pine bark or straw mulch to insulate roots in winter.
- ● Watering can or hose with a gentle spray nozzle: Hibiscus loves moisture but hates soggy soil!
- ● Garden trowel or small shovel: For planting and repotting.
- ● Pruning shears: Sterilized shears for shaping and frost prep.
- ● Container saucer or tray: To catch excess water and protect surfaces.
- ● Frost cloth or bubble wrap: For extra protection during unexpected freezes (below 20°F/-7°C).
- ● Support stake or trellis: If your hibiscus grows tall (some varieties reach 6–10 feet!).
- ○ Liquid fertilizer (optional): A seaweed-based or fish emulsion for a mid-season boost.
Step-by-Step instructions for growing a frost-resistant hibiscus in containers
Here's how I've successfully grown hardy hibiscus in containers through our damp, cool Pacific Northwest summers—with minimal winter stress.
Select the Right Container and Frost-Resistant Variety
Choose a 5-gallon or larger container with drainage holes—hibiscus roots need room to spread and hate soggy feet. I prefer unglazed terra cotta because it breathes better than plastic and helps regulate moisture. For our climate, select Hibiscus syriacus (Rose of Sharon) or Hibiscus moscheutos (Swamp Hibiscus)—both tolerate temperatures down to 15°F once established.
Size matters: A 24-inch diameter pot gives mature roots enough space to store nutrients for winter. If using a smaller container, upgrade to 7+ gallons to compensate. Place a 2-inch layer of gravel at the bottom for drainage—hibiscus roots rot quickly in waterlogged soil.
Prepare a Well-Draining, Nutrient-Rich Soil Mix
Combine equal parts potting soil, perlite, and compost for a mix that drains fast but retains moisture. Hibiscus in containers dry out quicker than in-ground plants, so add 1 cup of slow-release fertilizer (10-10-10) mixed into the top 6 inches of soil. This ensures steady nutrients without burning roots.
Test moisture by squeezing a handful—it should hold together but not drip. Overly dense mixes suffocate roots, while fluffy mixes dry too fast. I always pre-moisten the mix before planting to eliminate air pockets around roots.
Plant and Stake for Wind Resistance
Dig a hole twice as wide as the root ball but no deeper—hibiscus roots need oxygen. Gently tease apart any circling roots (they’ll strangle themselves in containers) and place the plant so the top of the root ball sits 1 inch below the soil line. Fill gaps with your mix, pressing lightly to remove air pockets.
Install a 3-foot bamboo stake immediately after planting—our Pacific Northwest winds will snap leggy stems. Tie the main stem loosely with soft garden twine, leaving room to grow. Mulch the surface with 2 inches of pine bark to insulate roots and retain moisture.
Water Deeply and Adjust for Our Climate
Water until 1 inch of runoff exits the drainage holes—this ensures roots hydrate fully. Hibiscus in containers need 1-2 gallons weekly, but check soil 2 inches deep before watering. In our damp summers, I water every 3-4 days unless rain provides ½ inch. Overwatering causes the yellowing leaves that signal root rot.
Fertilize monthly with half-strength liquid fertilizer from spring through summer. Stop fertilizing by mid-August to harden off growth before winter. In fall, reduce watering to every 7-10 days—dormant roots need less moisture.
Protect from Frost and Winterize Properly
When temperatures drop below 32°F, move containers to a sheltered spot against a south-facing wall. Wrap the pot and roots in burlap and cover the top with frost cloth—this traps 10°F of extra warmth. I’ve seen hibiscus survive 15°F with this method, though flowers may not return until late spring.
Prune dead stems in early spring before new growth starts. Cut back one-third of the oldest wood to encourage bushier growth. Resume regular care once nighttime temps stay above 40°F—your hibiscus will reward you with summer blooms that outshine most container plants.
Tips & tricks for perfect container-grown hibiscus in the Pacific Northwest
A few key strategies will help you thrive with hibiscus in our challenging climate—where soggy summers and freezing winters make container growing tricky.
Root Health is Everything: In Step 1, when selecting your container, prioritize breathability over aesthetics. Unglazed terra cotta may look rustic, but its porous nature prevents the soil from staying too wet—a major cause of root rot in our damp summers. If you choose plastic for its lightweight properties, add an extra 1 inch of gravel at the bottom to improve drainage beyond the standard 2-inch layer mentioned. This creates a buffer zone that keeps roots from sitting in stagnant water.
Soil Science Matters: The equal parts potting soil, perlite, and compost mix in Step 2 is your foundation for success. Here's the pro move: sterilize your potting soil first by baking it in the oven at 200°F for 30 minutes to kill any fungal spores lurking in our Pacific Northwest climate. This prevents the dreaded yellowing leaves that signal root rot before they even appear. Also, consider adding ½ cup of worm castings to the mix for an extra nutrient boost—hibiscus love that gentle, slow-release goodness.
Winter Survival Hacks: When it comes to protecting your hibiscus from frost in Step 5, think beyond just frost cloth. I've found that wrapping the entire container—including the pot—in burlap creates an insulating blanket that maintains 10°F of extra warmth around the roots. For extra protection during our harshest winters, place a thick layer of straw mulch around the base of the plant, extending up to cover the lower stems. This creates a thermal barrier that can push survival limits to 10°F or even slightly lower for established plants.
Pruning for Pacific Northwest Conditions: The early spring pruning in Step 5 is your chance to shape your hibiscus for our windy summers. When cutting back one-third of the oldest wood, make your cuts just above a leaf node at a 45-degree angle. This encourages new growth from the sides, creating a fuller, more wind-resistant plant. I also recommend sterilizing your pruning shears with rubbing alcohol between cuts—this prevents spreading any fungal diseases that might be lurking in our damp climate.
Pro Tips for Hibiscus Tree In Container
- A few key strategies will help you thrive with hibiscus in our challenging climate—where soggy summers and freezing winters make container growing tricky.
- Root Health is Everything: In Step 1, when selecting your container, prioritize breathability over aesthetics.
- Soil Science Matters: The equal parts potting soil, perlite, and compost mix in Step 2 is your foundation for success.
Frequently asked questions
Got questions about growing a hibiscus tree in a container?
You’re not alone! Here are answers to the most common concerns—from frost prep to pruning tips—tailored for Pacific Northwest gardeners.
Can hibiscus trees survive winter in containers in the PNW?
Yes, but with care! Most tropical hibiscus (Hibiscus rosa-sinensis) need winter protection in the PNW. Move pots to a sheltered spot (like a garage or under eaves) before temps drop below 40°F (4°C). Hardy hibiscus (Hibiscus syriacus) can handle frost better but still benefit from mulch or a frost cloth.
How often should I fertilize a potted hibiscus?
Feed your hibiscus every 4–6 weeks during spring and summer with a balanced liquid fertilizer (like 20-20-20) or a slow-release granular. Reduce feeding in fall and avoid fertilizing in winter—overfeeding can stress roots. Pro tip: Flush the soil with water monthly to prevent salt buildup!
When and how should I prune my container hibiscus?
Prune in late winter or early spring (before new growth) to shape the tree and encourage blooms. Cut back 1/3 of the oldest stems to the nearest node, and remove any dead or leggy branches. Avoid heavy pruning in fall—it limits winter hardiness. Bonus: Prune after flowering to promote a second flush of blooms!
Why are my hibiscus leaves yellowing or dropping?
Yellow leaves often signal overwatering (check soil moisture—containers dry faster!) or nutrient deficiency. Brown edges? Likely underwatering or low humidity. Move the pot to indirect light if leaves scorch. Quick fix: Adjust watering (keep soil evenly moist but not soggy) and mist leaves occasionally in dry PNW summers.
What’s the best container size for a hibiscus tree?
A minimum 15–20 gallon pot is ideal for hibiscus—larger roots mean better stability and moisture retention. Ensure the container has drainage holes and use a lightweight mix (like 50% potting soil + 50% perlite) to prevent root rot. Upgrade tip: Add a saucer to catch excess water and protect patios!
Can I grow hibiscus from seeds or cuttings instead of buying a plant?
While possible, cuttings are easier for hibiscus. Take 4–6 inch semi-hardwood cuttings in spring, dip in rooting hormone, and plant in moist perlite. Seeds take 6–12 months to bloom and may not retain parent traits. Alternative: Propagate from store-bought plants—just ask nicely!
Wrapping up and next steps
Growing a hibiscus tree in a container in the Pacific Northwest is totally doable—even with cooler climates and frost! 🌿 With the right frost-resistant variety, proper container setup, and a little TLC, you’ll enjoy vibrant blooms year after year.
Whether you’re a beginner or a seasoned gardener, this guide has given you all the tools to thrive.
Now that you’re ready, take the next step! Pick your favorite hibiscus variety, grab your supplies, and start planting. Before you know it, your patio or balcony will be bursting with color—and maybe even a few sweet treats from those edible varieties. Happy growing! 🌸