
Propagation
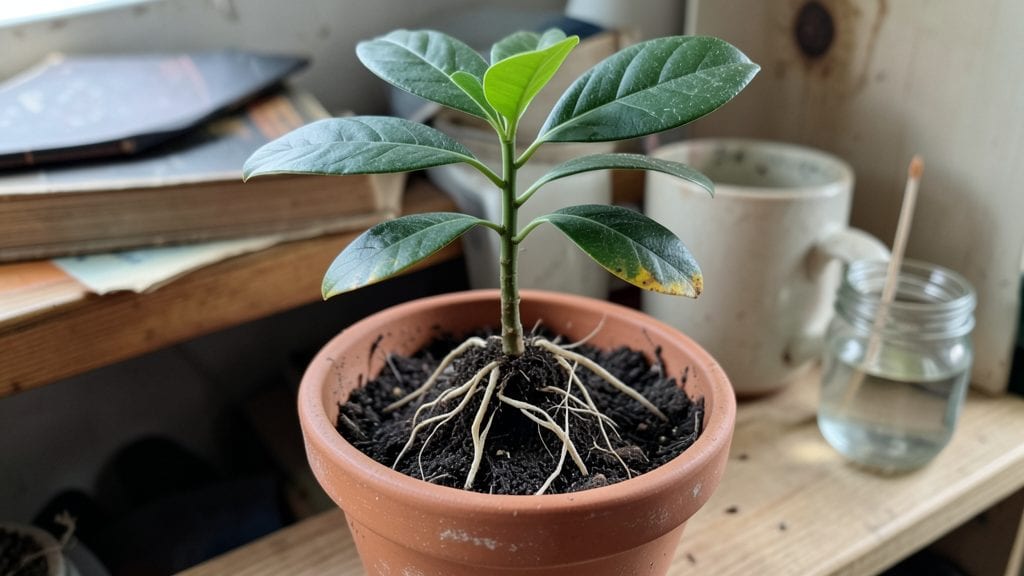
Growing an avocado tree from an avocado pit is easier than you think—just start with a simple soak and a toothpick. 🌱 I’ve nursed three from pits to 6-foot plants, and the key begins there. The magic happens in patience, not perfection.
You’ll need just three supplies: a pit, toothpicks, and a jar of water. No fancy tools—just what’s in your kitchen. The first roots appear in 2-6 weeks, but don’t rush the process.
Let nature handle the hard part while you watch those white roots unfurl like tiny fishing lines.
By year one, you’ll have a 3-foot indoor plant with glossy leaves, and by year three, it’s ready for outdoor life. The real payoff? That first fruit—if you’re lucky—won’t come for 5-10 years, but the journey makes every watering worth it.
Here’s where most people stumble: moldy water or leggy stems. I’ll show you how to spot those red flags early and keep your tree thriving through every stage—from kitchen counter to sunny backyard.
📚 In This Guide
- What you need
- Instructions
- Tips and common mistakes
- Wrapping up and next steps
What you need
- ● 1 fresh avocado pit – Choose one that’s firm but not dried out (💡 Pro tip: Rinse it gently to remove any leftover fruit pulp!)
- ● Toothpicks (3-4) – Standard wooden toothpicks (or small skewers) to stabilize the pit.
- ● Small glass or jar – A clean, clear container (8–16 oz) with a narrow neck (like a mason jar).
- ● Water – Filtered or room-temperature tap water (change weekly).
- ● Potting soil – Well-draining, organic potting mix (avoid garden soil).
- ● Small pot (4–6 inches in diameter) – With drainage holes (terracotta or plastic).
- ● Spray bottle – For misting leaves (keeps humidity high).
- ○ Grow lights (optional but helpful) – LED or fluorescent lights (12–14 hours/day) if natural light is limited.
- ● Rooting hormone – Speeds up root growth (apply to the bottom of the pit before planting).
- ● Humidity dome or plastic wrap – Creates a mini greenhouse effect to retain moisture.
- ● Fertilizer (balanced, diluted) – Start after 2–3 months (e.g., fish emulsion or compost tea).
- ● Support stake or trellis – For when your tree grows taller (6+ months).
- ● Thermometer/hygrometer – Monitors ideal temps (70–85°F) and humidity (50–70%).
Step-by-Step success for growing avocado trees from pit
Here's how I've grown strong, healthy avocado trees from simple kitchen scraps—no green thumb required.
🌱 Step 1: Prepare the Avocado Pit for Germination
Start with a fresh avocado pit that hasn't dried out. Rinse it thoroughly under running water to remove any remaining fruit flesh, then let it air dry completely for about 1 hour. This prevents mold from forming during germination.
I like to use three toothpicks to suspend the pit over a glass of water. Insert the toothpicks about ½ inch from the top, angling them so they rest on the rim of the glass. The bottom ⅓ of the pit should be submerged in about ½ inch of water. This keeps the base moist while allowing air to reach the top.
Place the glass in a warm spot with indirect light—a kitchen counter away from direct sun works perfectly. Check the water level every 2-3 days and top off as needed. You'll see roots emerge from the bottom in 2-6 weeks, depending on temperature and humidity.
💧 Step 2: Monitor Root Growth and Prepare for Planting
Once roots reach about 2-3 inches long, it's time to transition to soil. You'll notice them growing downward and branching slightly. This is your cue that the pit is ready for the next phase.
Fill a small pot—4-6 inches wide—with well-draining potting mix. I mix regular potting soil with 20% perlite to prevent waterlogging, which avocado trees hate. Make a small hole in the center about 2 inches deep and gently place the rooted pit into the hole.
Cover the top half of the pit with soil, leaving the top exposed. Press lightly around the base to secure it. Water gently until moisture seeps from the drainage holes, then let it drain completely. Place the pot in a warm, bright spot with bright indirect light for the first week.
☀️ Step 3: Establish Strong Growth Indoors
After planting, keep the soil consistently moist but never soggy. Stick your finger 1 inch into the soil—if it feels dry, it's time to water. Overwatering at this stage is the fastest way to kill your young tree.
Rotate the pot a quarter turn weekly so the tree grows straight toward the light. You'll see new leaves emerge from the top of the pit in 4-8 weeks. This is your first true growth phase, and it means the tree is thriving.
Once the tree reaches about 6-8 inches tall with a few leaves, it's ready for a slightly larger pot—6-8 inches wide. Use the same well-draining mix and transplant carefully to avoid damaging the roots. Keep it indoors for now, as young avocado trees are sensitive to temperature swings.
🪴 Step 4: Transition to Outdoor Conditions
When nighttime temperatures stay above 50°F consistently, it's safe to start acclimating your avocado tree to outdoor life. Begin by placing it outside in a sheltered spot for 2-3 hours the first day, gradually increasing exposure over 1-2 weeks.
Choose a location with partial shade at first—direct sun can scorch the leaves. Watch for signs of stress like yellowing leaves or wilting. If you notice these, move it back indoors for a few more days before trying again.
Once fully outdoors, place the tree in a spot with morning sun and afternoon shade. Avocado trees love warmth but can't handle extreme heat or cold. Water deeply once a week, letting the top 2 inches of soil dry out between waterings. Fertilize lightly with a balanced houseplant fertilizer every 2 months during the growing season.
Tips & tricks for growing avocado trees from pit
Here's what I've learned from growing multiple avocado trees—these simple tricks make all the difference between success and disappointment.
Germination Setup: Don't rush the initial drying step in Step 1! That 1 hour of air drying is crucial to prevent mold. I've seen pits develop fuzzy mold when skipped, so trust the process. Also, use clear glasses so you can watch those roots develop—it's oddly satisfying!
Root Development: In Step 2, when roots reach 2-3 inches, don't be tempted to transplant too soon. Wait until you see some branching at the base—this indicates a strong root system ready for soil. I've had pits transplant too early and they just sit there without growing.
Soil Mix Matters: The 20% perlite mixture in Step 2 is non-negotiable. Avocado trees hate soggy roots. I've had failures with regular potting soil alone—it stays too wet. Perlite creates that perfect drainage while still holding moisture. Mix it thoroughly before planting.
Pro Tips for Growing An Avocado Tree From An Avocado Pit
- Here's what I've learned from growing multiple avocado trees—these simple tricks make all the difference between success and disappointment.
- Germination Setup: Don't rush the initial drying step in Step 1!
- Root Development: In Step 2, when roots reach 2-3 inches, don't be tempted to transplant too soon.
Frequently asked questions
Got questions?
Growing an avocado tree from a pit is fun but comes with its fair share of curiosity. Here are answers to the most common ones—so you can troubleshoot, plan ahead, and enjoy the journey!
How long does it take for an avocado pit to sprout?
Patience is key! Most avocado pits sprout within 2–8 weeks, depending on warmth, moisture, and consistency. Keep the toothpicks in water, and check regularly—you’ll see tiny roots (and eventually a shoot) emerging. If nothing happens after 2 months, try a fresh pit or adjust your setup.
Can I plant the avocado pit directly in soil instead of water?
Yes, but timing matters! Only plant the pit in soil after roots are 2–3 inches long. Bury the lower half of the pit (where roots are growing) in moist soil, leaving the top exposed. Direct planting can stunt growth or cause rot if done too early.
Why isn’t my avocado pit sprouting? Troubleshooting tips?
Try these fixes if your pit is stubborn:
- Check warmth: Pits need consistent 70–80°F (21–27°C) temps. Move to a sunny windowsill or use a heat mat.
- Refresh the water: Change water every 2–3 days to prevent mold or stagnation.
- Test viability: If the pit is mushy or smells bad, it’s likely rotten—start fresh!
- Poke holes: If the pit is sealed tight, gently scratch the top with a knife to encourage air flow.
Will my indoor avocado tree ever bear fruit?
Indoor trees rarely fruit (they need cold winters and outdoor conditions to pollinate). But don’t lose hope! With time, patience, and a sunny outdoor spot (once established), some trees produce fruit in 5–13 years. Focus on growing a healthy tree first—fruit is a bonus!
Can I grow an avocado tree from any avocado pit?
Technically yes, but store-bought avocados (like Hass) are sterile hybrids and may not grow true to type. For better success, use pits from organic, seed-grown avocados (ask local growers!). Even then, expect variations in size, shape, and fruit quality.
What’s the best time of year to start this project?
Anytime is fine, but spring or early summer gives your tree the longest growing season before winter dormancy. Avoid starting in late fall/winter—limited sunlight slows growth. If you’re impatient, just use a grow light!
Wrapping up and next steps
Growing an avocado tree from a pit is a rewarding journey that blends patience, care, and a little creativity! 🌱 You’ve learned how to nurture your seedling from a humble kitchen scrap into a thriving plant—whether it stays indoors or eventually thrives outdoors.
The key takeaway? Consistency, proper care, and a dash of optimism will turn your tiny pit into a lush, leafy friend.
Now that you’re armed with tips and tricks, why not take the next step? Share your progress with fellow plant enthusiasts, experiment with pruning, or even research varieties to grow. Your avocado tree isn’t just a plant—it’s a living testament to your green thumb. Happy growing! 🌟