Pruning
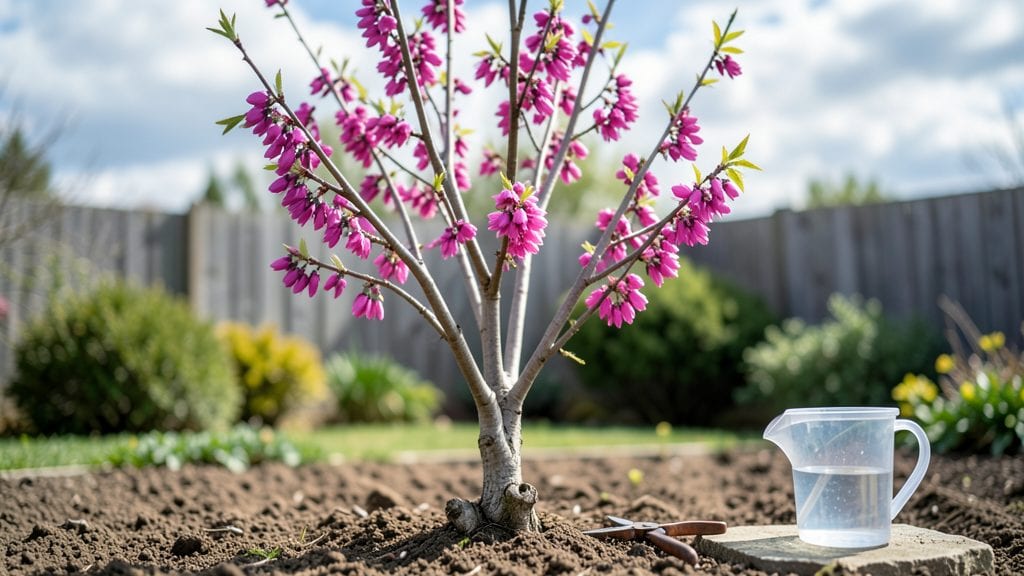
Cultivating a young redbud tree in the Pacific Northwest means waking up to pink clouds of blossoms that defy winter’s chill—something I’ve watched transform bare branches into living art. These trees thrive where others falter, their early spring flowers arriving before the frost even thinks about retreating.
The secret lies in mimicking their native conditions: moist but well-drained soil, partial shade from summer’s intensity, and a spot where they won’t compete with aggressive roots.
Start with a 3-5 gallon container-grown tree (avoid bare-root unless you’re planting in late fall), and dig a hole twice as wide as the root ball but no deeper. Amend the native soil with compost—redbuds hate soggy feet but love nutrients.
Water deeply right after planting, then keep the soil consistently moist for the first year, though they’re surprisingly drought-tolerant once established. A mulch ring (2-3 inches of wood chips) protects roots from temperature swings that PNW winters love to throw.
Pruning feels counterintuitive at first—you’ll resist cutting those delicate branches loaded with blooms, but wait until after flowering to shape the tree. Remove only dead wood or crossing branches; redbuds reward patience with a natural, airy form.
By year three, you’ll see clusters of heart-shaped leaves and—if all goes well—pink blossoms so dense they look painted on. The key is letting the tree grow into its shape rather than forcing it.
Here’s the PNW twist: redbuds handle our wet springs better than most, but avoid planting in low-lying areas where winter water pools. Their bark develops a distinctive exfoliating pattern as they age, and mature trees can reach 20-30 feet—so give them room.
With the right care, you’ll have a tree that blooms reliably for decades, turning your yard into a springtime spectacle before the garden even wakes up.
📚 In This Guide
- What you need
- Instructions
- Tips and common mistakes
- Wrapping up and next steps
What you need
- ● Pruning shears: Bypass pruners (for cuts up to ½ inch in diameter)
- ● Loppers: Bypass or anvil type (for branches ½ to 2 inches thick)
- ● Hand saw: Pruning saw (for thicker branches 2+ inches)
- ● Rubbing alcohol (70%+) or bleach solution: 1 part bleach to 9 parts water (for sterilizing tools)
- ● Gloves: Heavy-duty gardening gloves (to protect from thorns and sap)
- ○ Pruning sealant: Optional but helpful (for larger cuts to prevent disease)
- ● Disposable bags or bucket: (for collecting pruned branches)
- ● Extension pole: (for reaching higher branches safely)
- ● Sharpener: (to keep blades in top condition)
- ● Tree wrap or tape: (to protect young bark from sun scald post-pruning)
- ● Notebook & pencil: (to sketch your pruning plan or mark cuts)
- ● Knowledge of redbud tree growth habits (e.g., blooms on old wood, open-center shape).
- ● Timing: Prune after flowering (late spring/early summer) to avoid removing next year’s blooms.
- ● Weather check: Choose a dry, overcast day to minimize stress on the tree.
How to plant and care for a young redbud tree in the Pacific Northwest
Here’s my battle-tested method for establishing a resilient redbud tree that thrives through PNW’s wet winters and unpredictable frosts.
Choose the Right Planting Site and Prepare the Soil
The Pacific Northwest’s acidic, clay-heavy soils can suffocate young roots, so I always amend the planting hole with 3 inches of compost mixed into the native soil. Redbuds prefer full sun to partial shade—select a spot with at least 6 hours of direct sunlight daily, but protect it from harsh afternoon winds that dry out the soil too quickly.
Dig a hole twice as wide as the root ball but only as deep—planting too deep buries the graft union (if present) and invites rot. Loosen the sides of the hole with a shovel to encourage root spread. If your yard has compacted soil, add a 2-inch layer of coarse sand at the bottom to improve drainage. The goal is loose, well-draining soil that mimics the tree’s native woodland conditions.
Plant the Tree and Water Deeply
Place the redbud tree in the hole so the top of the root ball sits level with the surrounding soil—never mound soil against the trunk. Gently backfill with the amended soil, pressing lightly to remove air pockets but avoiding compaction. I use my hands to pat the soil down in concentric circles around the base, ensuring roots make full contact with the earth.
Water deeply immediately after planting—10 gallons for a 5-gallon container tree—to settle the soil and eliminate air gaps. The soil should drain within 30-60 minutes but remain moist 2 inches below the surface. Mulch with 3 inches of wood chips (not bark) in a 3-foot diameter ring, keeping it 6 inches away from the trunk to prevent rot. This mimics the tree’s natural forest floor and retains moisture during PNW’s frequent rains.
Establish a Watering Schedule for the First Year
Redbuds are drought-tolerant once established, but young trees need consistent moisture to develop strong roots. Water twice weekly during the first growing season, delivering 15-20 gallons per watering—enough to wet the soil 12 inches deep. Check moisture by sticking your finger 2 inches below the surface; if it’s dry, water again. Overwatering is just as harmful as underwatering, so avoid soggy soil.
I always water in the early morning to reduce evaporation and fungal risks. By late summer, taper off to once weekly as the tree enters dormancy. The key is deep, infrequent watering—this encourages roots to grow downward where they’ll find stability. If your summer brings 90°F+ heatwaves, increase to three times weekly until rains return.
Prune and Fertilize for Healthy Growth
Wait until late winter or early spring (before buds swell) to prune your redbud. Remove dead, crossing, or weak branches using clean, sharp pruners, cutting just outside the branch collar. Redbuds bloom on old wood, so avoid heavy pruning—never remove more than 25% of the canopy in a single season. I also thin out crowded branches to improve airflow, which reduces fungal diseases common in PNW’s damp climate.
Fertilize once in early spring with a balanced 10-10-10 formula, applying ½ cup per inch of trunk diameter. For a 1-inch trunk, that’s ½ cup total. Water the area thoroughly after applying to distribute nutrients. Avoid high-nitrogen fertilizers—they promote leafy growth at the expense of flowers. If your tree looks yellow or stunted, a soil test will tell you if it needs iron or other micronutrients.
Protect Against Frost and Winter Stress
The Pacific Northwest’s late spring frosts can damage emerging buds, but redbuds are tougher than most. To safeguard, I water deeply in late fall to build root reserves, then mulch heavily (up to 4 inches) around the base. This insulating layer keeps roots from freezing and thawing, which can crack them. If your winter brings sub-zero temperatures, wrap the trunk with tree guard to prevent rodent damage.
Prune out any frost-damaged branches in early spring—you’ll recognize them by their brown, mushy tips. Redbuds are remarkably resilient; even if a branch dies back, new growth will sprout from the base. The tree’s pink spring blooms are a sure sign it’s recovered from winter stress. By year three, your redbud will be established enough to handle PNW’s climate with minimal intervention.
Tips & tricks for perfectly establishing a young redbud tree
These battle-tested strategies will help your redbud thrive in the Pacific Northwest's challenging climate—no guesswork required.
Soil Preparation Secret: In Step 1, when amending the planting hole with compost, I always mix in a handful of mycorrhizal fungi (available at garden centers) with the compost. These beneficial fungi form symbiotic relationships with redbud roots, enhancing nutrient uptake and drought resistance—especially valuable during PNW's unpredictable rainfall patterns. The 3 inches of compost should be thoroughly mixed into the native soil, not just placed at the bottom of the hole.
Watering Wisdom: The immediate 10-gallon watering after planting in Step 2 is critical, but timing matters just as much. I use a soaker hose placed at the edge of the planting hole to deliver water slowly over 30-45 minutes, ensuring even moisture penetration without creating surface runoff. This mimics natural rainfall patterns and prevents soil compaction from heavy watering.
Mulching Mastery: For Step 2's mulching, I recommend using cedar mulch instead of the generic wood chips mentioned—it naturally repels rodents while breaking down slowly. The 3-inch layer should be spread in concentric circles, gradually tapering to 1 inch at the trunk's edge. This creates a moisture gradient that encourages roots to spread outward rather than staying concentrated near the trunk.
Frost Protection Strategy: In Step 5, when preparing for winter, I add a layer of straw over the mulch before the first hard frost. Straw provides an extra insulating barrier that maintains consistent soil temperatures. For trees in exposed locations, I also install tree wraps with reflective insulation—these create a microclimate that can raise trunk temperatures by 5-10 degrees during cold snaps.
Pro Tips for Young Redbud Tree
- These battle-tested strategies will help your redbud thrive in the Pacific Northwest's challenging climate—no guesswork required.
- Soil Preparation Secret: In Step 1, when amending the planting hole with compost, I always mix in a handful of mycorrhizal fungi (available at garden centers) with the compost.
- Watering Wisdom: The immediate 10-gallon watering after planting in Step 2 is critical, but timing matters just as much.
Frequently asked questions
Got questions about caring for your young redbud tree in the Pacific Northwest? You’re not alone! Here are some of the most common queries—and their straightforward answers—to help you keep your tree thriving.
How soon can I prune my young redbud tree after planting?
Wait at least 6 months before pruning your young redbud tree to let it establish roots. Light shaping (removing dead or crossing branches) is fine, but avoid heavy cuts—this can stress a newly planted tree. Early pruning also risks inviting pests or diseases. Best time to prune: Late winter or early spring, before buds swell.
Is my young redbud tree frost-hardy enough for PNW winters?
Yes! Redbuds are naturally frost-resistant and thrive in the PNW’s cold winters (USDA Zones 5-8). However, young trees (under 3 years old) may need extra protection if temps dip below -10°F. Mulch the root zone with 2-3 inches of organic material (like wood chips) and wrap the trunk with burlap if heavy frost is forecasted.
Should I remove the seed pods after flowering?
Not necessarily! While redbud seed pods can look messy, they’re harmless and even add winter interest. However, if you prefer a cleaner look, remove them in early fall before they dry out. Pro tip: Wear gloves—the pods contain tiny seeds that can stain clothing! For heavy pod production, prune lightly in late winter to encourage fewer flowers (and thus fewer pods) next year.
Why are the leaves on my young redbud tree turning yellow or spotted?
Yellowing or spotted leaves often signal fungal issues (like powdery mildew or leaf spot) or aphid infestations. Improve airflow by pruning dense branches, and water at the base (not overhead) to keep foliage dry. For pests, spray with neem oil or introduce beneficial insects like ladybugs. If the problem persists, test soil pH—redbuds prefer slightly acidic to neutral soil (6.0-7.0).
Can I grow a redbud tree in a container for a few years before planting?
Yes, but it’s not ideal for long-term growth. Redbuds have shallow but expansive root systems, which can become root-bound quickly. If container-grown, use a 5-gallon pot minimum with well-draining soil and repot annually. For best results, transplant to the ground within 1-2 years—they’ll reward you with faster, healthier growth and those stunning spring blooms!
Wrapping up and next steps
Growing a young redbud tree in the Pacific Northwest is a rewarding journey—especially when you embrace its frost-resistant charm and vibrant blooms.
With the right pruning techniques, soil care, and seasonal attention, your tree will thrive for years to come. Now’s the time to roll up your sleeves and give it the love it deserves! 🌸
Your Next Step:
Start by scheduling your first pruning session in late winter or early spring—just as those buds begin to swell. Check your notes, grab your tools, and make it a weekend project. Before you know it, your redbud will be the star of your garden, blooming brighter than ever.