Trees
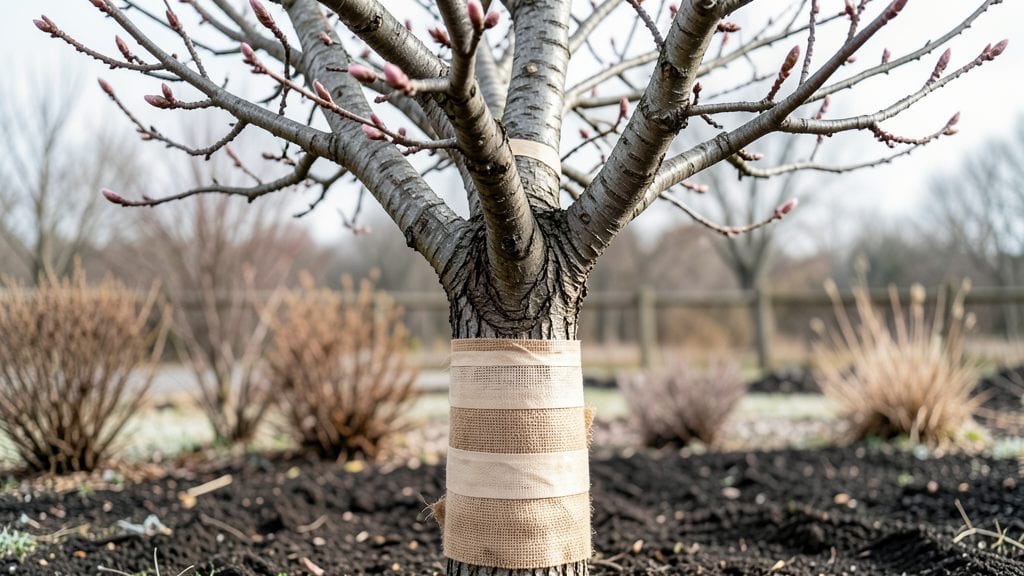
Wrapping fruit trees for winter isn’t just about survival—it’s about giving your trees the best shot at next year’s harvest. After my first winter without protection, my young apple tree bore half the fruit it should have, and the bark showed ugly cracks from freeze-thaw cycles.
That’s when I learned the right wrap can mean the difference between a thriving orchard and a sad, stunted tree.
The key is using breathable materials like burlap or tree wrap—never plastic—that shield bark from harsh winds and temperature swings. You’ll need about 12–18 inches of width per tree, depending on trunk size, plus some sturdy tape or twine to secure it.
The process takes 10–15 minutes per tree, but it’s worth every second to avoid winter damage that can take years to recover from.
By spring, you’ll see the payoff: smooth, unscathed bark and branches ready to burst into leaf. The trees stay healthier, produce more fruit, and resist pests better because their energy isn’t wasted repairing winter wounds.
Plus, it’s a simple way to extend your trees’ lifespan by decades—something every gardener should prioritize.
Timing matters too—wrap trees after the first hard frost but before temperatures drop below 20°F, and remove the wrap as soon as daytime temps hit 50°F in early spring. This keeps your trees safe without trapping moisture or heat that could do more harm than good.
📚 In This Guide
- What you need
- Instructions
- Tips and common mistakes
- Wrapping up and next steps
What you need
- ● Tree wrap or burlap: At least 10–20 feet (depending on tree height) of 3–4 feet wide material. Opt for breathable, non-plastic options like blank">kraft paper or blank">jute.
- ● Staple gun or heavy-duty staples: For securing the wrap tightly (avoid plastic staples—they can damage bark).
- ● Pruning shears or sharp knife: To trim any dead or weak branches before wrapping.
- ● Garden twine or zip ties: For extra reinforcement if needed (especially for larger trees).
- ○ Anti-desiccant spray (optional but helpful): A wax-based spray (like Tree Wound Pruning Seal) to prevent moisture loss.
- ● Reflective bubble wrap or frost cloth: For extra-cold climates (layer over tree wrap for added insulation).
- ● Mulch (straw, wood chips, or leaves): Spread a 3–4 inch layer around the base (keep it 6 inches away from the trunk to avoid rot).
- ● Tree ties or soft cloth strips: To gently secure branches if they’re prone to snapping under snow/ice.
- ● Waterproof marker: To label trees (helpful if you have multiple varieties!).
Step-by-step guide to wrapping fruit trees for winter
Here's how to protect your trees without the mess of plastic—just simple, effective layers.
Choose the Right Wrapping Materials
Start with a breathable, water-resistant fabric like burlap or tree wrap. I like burlap because it lets moisture escape while blocking harsh winds. Avoid plastic wrap—it traps heat and can scorch bark. For extra protection, add a layer of horticultural fleece or even old blankets, but make sure they're not too tight.
Measure the trunk and branches you want to cover. Most fruit trees need protection from the base up to about 6 feet, but taller trees may require higher coverage. Cut your materials to fit snugly, leaving a few inches of overlap for secure wrapping. This ensures no gaps where cold air can sneak in.
Wrap the Trunk and Branches
Begin at the base of the trunk and work your way up. Start with the burlap or tree wrap, overlapping each layer by 2-3 inches to prevent drafts. Secure the material with twist ties, staples, or even strong twine—just avoid anything that could damage the bark. For branches, wrap them individually if they're thick or bundle smaller ones together.
Don't wrap too tightly—you want flexibility for expansion and contraction as temperatures fluctuate. If the material feels restrictive, loosen it slightly. You'll know it's right when the tree can still sway gently in the wind without the wrap tearing. This step is all about balance: protection without suffocation.
Add Insulation for Extra Protection
Once the trunk and branches are wrapped, layer on insulation. Horticultural fleece is ideal because it traps warmth while allowing airflow. If you're using blankets, choose ones made of natural fibers like cotton or wool—they breathe better than synthetic materials. Spread the insulation evenly over the wrapped areas, tucking edges under to keep it in place.
For added defense against rodents or pests, sprinkle a light dusting of diatomaceous earth around the base of the tree before insulating. This deters burrowing animals without harming the tree. The key here is layering: each material plays a role, from wind blocking to heat retention, working together for maximum protection.
Secure and Monitor Through Winter
Once everything is in place, give the wrap a final check to ensure it’s secure but not constricting. If you're in an area with heavy snow, you might want to add stakes to keep the insulation from sagging or sliding off. This is especially important for younger trees, which are more vulnerable to damage.
Check your wrapped trees every few weeks throughout winter. If the insulation gets damp—from snow or rain—remove it to dry before replacing. Moisture trapped against the bark can lead to rot or fungal issues. Keep an eye out for any signs of stress, like cracked bark or dislodged wrapping, and adjust as needed. This proactive approach ensures your trees stay healthy until spring.
Tips & tricks for perfect fruit tree winter wrapping
Here's what nobody tells you about keeping your trees cozy without the common pitfalls.
Material Selection Matters: Burlap is my go-to because it's breathable yet sturdy, but if you're using old blankets, choose ones without chemical treatments. I've learned the hard way that synthetic fabrics can trap moisture against the bark, leading to rot. Test your materials first by checking if they're water-resistant but still allow airflow—hold them up to a light and see if you can see through them slightly. This ensures your trees stay protected without suffocating.
Overlap is Key: When wrapping in Step 2, those 2-3 inch overlaps aren't just suggestions—they're essential for creating a continuous barrier against wind and cold. I've seen trees with gaps where the wrap meets, and those spots often develop frost cracks. Think of it like putting on a jacket: you wouldn't leave gaps at the wrists or neck, right? The same principle applies to your trees. Use a helper to hold the material while you secure it to maintain proper tension.
Flexibility is Critical: The wrap should allow your tree to move naturally with temperature changes. I've had to remove wraps that were too tight because they actually caused more damage than the winter cold. After wrapping, gently push the tree trunk—it should move slightly without resistance. This flexibility prevents the wrap from cutting into the bark as the tree expands and contracts with temperature shifts. Remember, we're protecting, not constricting.
Layering Strategy: Think of your tree wrapping like building a cozy nest—each layer serves a purpose. Start with the wind-blocking burlap, add the insulating fleece, and finish with the outer protective layer. In Step 3, don't skip the diatomaceous earth around the base—it's a game-changer for rodent protection. I've had mice chew through wraps before, but since adding this step, my trees have stayed pest-free. The key is working from the inside out, creating a complete protective system.
Pro Tips for Wrapping Fruit Trees For Winter
- Here's what nobody tells you about keeping your trees cozy without the common pitfalls.
- Material Selection Matters: Burlap is my go-to because it's breathable yet sturdy, but if you're using old blankets, choose ones without chemical treatments.
- Overlap is Key: When wrapping in Step 2, those 2-3 inch overlaps aren't just suggestions—they're essential for creating a continuous barrier against wind and cold.
Frequently asked questions
Got questions about wrapping fruit trees for winter? You’re not alone! Here are some of the most common concerns—and clear, practical answers to help you protect your trees like a pro.
Do I really need to wrap my fruit trees for winter?
Not always! Young, tender trees (especially citrus, peaches, or cherries) benefit the most from protection, while mature, hardy trees often survive without wrapping. Focus on wrapping if your area gets consistent freezing temps below 20°F or if your tree is newly planted. If you’re unsure, observe how your tree handles winter—if it shows signs of frost damage (like cracked bark or dead branches), it’s time to wrap next year!
What’s the best time to wrap fruit trees for winter?
Timing is key! Start wrapping after the first hard frost but before sustained freezing temps (usually late fall, around November in many regions). For most fruit trees, this means wrapping 2–4 weeks before your area’s average first freeze. Remove the wrap in early spring (February–March) once daytime temps consistently stay above freezing—this prevents moisture buildup and mold. Pro tip: Check your local frost dates for precision!
Can I use plastic wrap or old blankets to wrap my fruit tree?
Not ideal! Plastic wrap traps moisture, leading to rot or fungal diseases, while blankets can become waterlogged and heavy. Instead, opt for breathable materials like:
- Burlap sacks (loosely tied)
- Tree wraps (paper-based or fabric)
- Straw or mulch (for trunk protection)
My wrapped tree looks sad—is it dying, or is that normal?
Don’t panic! A wrapped tree might look dormant, wilted, or even brownish under its protective layer, but this is normal. The wrap is blocking sunlight, and the tree is in its natural winter rest phase. If you see:
Most wrapped trees bounce back once unwrapped in spring—just be patient!
Are there any DIY alternatives to commercial tree wraps?
Skip the store-bought wraps with these budget-friendly hacks:
- Cardboard tubes: Cut open and wrap around the trunk (secure with twine). Replace yearly to avoid mold.
- Old towels or t-shirts: Layer loosely around the trunk, leaving room for airflow.
- Pine boughs or straw: Pile around the base for insulation (great for small trees!).
- Bubble wrap: Use sparingly (only for young trunks) and remove in spring to avoid moisture buildup.
Wrapping up and next steps
Wrapping your fruit trees for winter is a simple yet powerful way to shield them from harsh frost while avoiding the drawbacks of plastic.
By using breathable, natural materials like burlap or frost cloth, you’re giving your trees the best chance to thrive come spring—without trapping moisture or suffocating their growth. 🌱❄️
Now that you’re armed with the right techniques and tips, it’s time to roll up your sleeves and get protective! Start by inspecting your trees before the first hard freeze hits, and soon, you’ll be rewarded with healthier branches and bountiful harvests for years to come.
Next step: Gather your supplies and schedule a weekend project—your fruit trees will thank you! 🍏🍎