Pruning
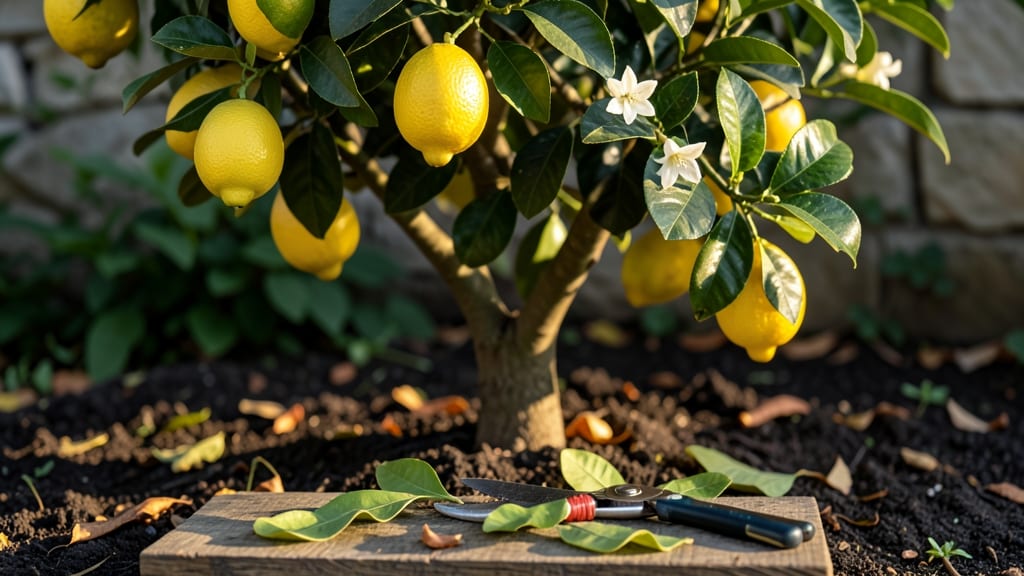
Trimming your lemon tree isn't just about shaping—it's the secret to year-round health and those coveted fruits. ✂️ I learned this the hard way when my first tree produced only bitter lemons after years of neglect.
The right cuts at the right time make all the difference, whether you're dealing with wild growth or stubborn branches that refuse to cooperate.
You'll need just three tools: sharp pruning shears, a small saw for thicker branches, and rubbing alcohol to sterilize cuts. Timing matters most—prune lightly after harvest in late winter or early spring, then do light maintenance trims in summer to encourage new growth.
The goal is to open up the center for airflow while keeping the tree's natural shape intact.
What you'll end up with is a lemon tree that produces more fruit with fewer pests and diseases. Those new shoots you encourage will turn into branches heavy with sweet, fragrant lemons by next season.
Just avoid cutting into old wood (it won't regrow) and never remove more than one-third of the tree at once.
After trimming, give your tree a light fertilizer and consistent water—about 1 inch per week—to help it recover. The best part? You can do this in small sessions over months, so there's no rush. Now let's get those branches under control before they take over your kitchen!
📚 In This Guide
- What you need
- Instructions
- Tips and common mistakes
- Wrapping up and next steps
What you need
- ● Pruning shears (bypass or anvil type): Choose sharp, high-quality shears (4–6 inches) for clean cuts on smaller branches. Disinfect with rubbing alcohol between cuts to prevent disease.
- ● Pruning saw (for thicker branches): A curved-tooth pruning saw (8–10 inches) works best for branches over ½ inch thick. Avoid cheap saws—they can tear wood.
- ● Gloves (cut-resistant): Protect your hands with gardening gloves (preferably with reinforced palms) to avoid thorns and blisters.
- ● Ladder or step stool: Ensure stability when reaching higher branches. A lightweight, sturdy ladder (6–8 feet) is ideal for most lemon trees.
- ○ Disinfectant (optional but recommended): 70% isopropyl alcohol or a 10% bleach solution (1 part bleach to 9 parts water) to sterilize tools and cuts.
- ● Sharpie or pruning sealant: A permanent marker to mark cuts before trimming or pruning wax to seal larger wounds (½ inch or thicker).
- ● Trash bags or bucket: Collect pruned branches and leaves for compost or disposal.
- ● Hand pruners with a hook: Great for grabbing and cutting small, hard-to-reach branches.
- ● Extension pole pruners: For tall or sprawling trees (10–15 feet), reducing the need for ladders.
- ● Tree pruning spray (copper-based): Apply to cuts if your tree is in a high-disease-risk area.
- ● Camera or phone: Snap before-and-after photos to track progress and spot issues early.
Instructions for trimming lemon tree: year-round health with precision cuts
Here's my go-to method for keeping lemon trees productive, pest-free, and full of fruit.
✂️ Step 1: Understand the Right Time for Each Cut
Lemon trees need three distinct trimming sessions: late winter (just before new growth starts), summer (after harvest), and light maintenance throughout the year. I always start with late winter cuts—this is when you shape the tree's structure. Wait until after the last frost but before buds swell, usually February-March in most climates.
Summer trimming focuses on removing spent blossoms and thinning crowded branches to improve airflow. Never cut more than 25% of the tree's foliage in one session—this stresses the tree and reduces fruit production. Watch for water sprouts (thin, fast-growing shoots) and dead or diseased branches year-round, removing them immediately.
✂️ Step 2: Gather the Right Tools and Sanitize
You'll need sharp bypass pruners for clean cuts, loppers for thicker branches, and a pruning saw for any limbs over ½ inch thick. I always sanitize my tools with 70% rubbing alcohol or a 10% bleach solution before and after use—this prevents spreading disease between cuts. Dull tools crush branches, which invites infection, so sharpen your blades annually.
Wear gloves (thorny lemon trees don't play nice) and have a bucket and trash bag ready for debris. I also keep a small notebook handy to sketch the tree's shape before cutting—this helps me visualize the final structure. Never trim when the tree is wet; clean cuts heal faster in dry conditions.
✂️ Step 3: Remove Dead, Diseased, or Crossing Branches First
Start at the bottom of the tree and work upward. Look for dead branches (no green leaves, brittle wood) and diseased wood (black spots, oozing sap, or fungal growth). Cut these back to healthy green wood—you'll see a clear color change where the disease ends. Remove any branches that cross or rub against each other, as these create wounds that attract pests.
Make your cuts at a 45-degree angle just above an outward-facing bud or leaf node. This encourages new growth to sprout in the right direction. If a branch is too thick to cut cleanly with pruners, use your pruning saw—but avoid tearing the bark. I always step back after each cut to check the tree's balance; uneven cuts can leave it top-heavy.
☀️ Step 4: Shape the Tree for Light and Airflow
Open the center of the tree to let sunlight reach the inner branches—this is where most fruit develops. Aim for a rounded, vase-like shape rather than a dense canopy. Remove any suckers (shoots growing from the base or trunk) immediately, as they drain energy from fruit production. Thin out overly crowded branches to improve airflow, which reduces humidity and fungal diseases like powdery mildew.
For fruit-bearing branches, trim back last year's growth by about ⅓ to encourage new, vigorous shoots. You'll see small buds forming where you want new growth—these will become next year's blossoms. Avoid cutting into old wood (wood older than 3 years), as lemon trees fruit best on current season's growth.
🌿 Step 5: Finish with Light Maintenance Cuts
After the main trimming, do a final walk-around to remove any small water sprouts or weak, leggy growth. These compete with fruit production for energy. I also check for splits or cracks in the bark—these can be sealed with pruning wax to prevent disease entry. Water the tree deeply after trimming to help it recover, but avoid overwatering for the first week—this gives the cuts time to callus over.
Step back and admire your work! A well-trimmed lemon tree should have open branches, even sunlight distribution, and no dead or crossing limbs. You'll notice new buds forming within 2-4 weeks—this is your sign that the tree is responding well. Repeat the process in summer to remove spent blossoms and thin out any new overgrowth.
Tips & tricks for perfect lemon tree trimming
These simple but powerful strategies will help you trim your lemon tree like a pro every season.
Timing is Everything: In Step 1, I can't stress enough how critical the February-March window is for late winter trimming. If you miss it, you risk cutting into next year's buds or encouraging new growth too early. Check your local frost dates—some climates can trim as late as April. For summer trimming, I always wait until after the main harvest to avoid removing potential fruit.
Tool Prep Matters: Before you even touch your tree, take 10 minutes to properly sanitize your tools as described in Step 2. I've seen many gardeners skip this step and end up with fungal infections spreading through their entire yard. Keep a small spray bottle with your rubbing alcohol solution handy for quick sanitizing between cuts on different branches. Sharp tools are just as important—dull blades tear wood, creating larger wounds that heal poorly.
Visual Cues for Healthy Cuts: When making those 45-degree angle cuts in Step 3, look for the subtle color change between healthy and diseased wood. Healthy wood should be bright green just under the bark, while diseased wood often appears darker or has black streaks. Another trick: tap branches with your pruners—healthy branches make a solid sound, while hollow or diseased ones sound dull. This helps you identify hidden problems before they become visible.
Seasonal Shape Maintenance: After your initial shaping in Step 4, I recommend doing a quick visual check every 4-6 weeks throughout the year. Look for any new suckers growing from the base or water sprouts growing vertically. These compete with fruit production and should be removed immediately. Think of your lemon tree like a well-maintained hedge—consistent light maintenance prevents major overgrowth.
Pro Tips for Trimming Lemon Tree
- These simple but powerful strategies will help you trim your lemon tree like a pro every season.
- Timing is Everything: In Step 1, I can't stress enough how critical the February-March window is for late winter trim...
- Tool Prep Matters: Before you even touch your tree, take 10 minutes to properly sanitize your tools as described in S...
Frequently asked questions
Got questions about trimming your lemon tree? You’re not alone! Here are answers to common concerns to keep your citrus thriving—no guesswork required.
When is the best time to trim a lemon tree?
The ideal time is late winter or early spring (just before new growth starts). This helps avoid frost damage and promotes healthy blooming. Light trimming can also happen in summer to shape the tree, but avoid heavy cuts then—it stresses the plant.
How do I know which branches to cut?
Look for:
- Dead/diseased branches (brown, brittle, or oozing sap).
- Crossing or rubbing branches (they compete for sunlight and can damage each other).
- Overcrowded growth (trim to improve airflow and sunlight penetration).
- Suckers or water sprouts (fast-growing shoots at the base or trunk—remove these first!).
Focus on open-center shaping to encourage fruit production.
Will trimming my lemon tree reduce fruit yield?
Not if done correctly! Proper pruning increases fruit quality and quantity by:
- Improving air circulation (reduces fungal diseases).
- Directing energy to remaining branches (bigger, sweeter lemons!).
- Opening the canopy to sunlight (essential for flowering).
Warning: Avoid cutting more than 25-30% of the tree in one session—this can shock the plant.
What if my lemon tree doesn’t bloom after trimming?
Lemon trees need a balance of light and stress to flower. Try these fixes:
- Ensure it gets 6+ hours of sunlight daily.
- Fertilize with citrus-specific food (high in nitrogen in spring, phosphorus in fall).
- Check for overwatering—soggy roots prevent blooming.
- Wait 6-8 weeks after trimming for new growth before expecting flowers.
If it’s still stubborn, your tree might need a harder prune (but do this gradually).
Can I trim a lemon tree in a pot the same way?
Yes! Potted lemon trees follow the same rules, but with extra caution:
- Trim lightly—root-bound trees are more sensitive.
- Repot every 2-3 years to refresh soil and roots.
- Watch for over-pruning, which stresses small trees faster.
Use the same tools (sterilized shears, pruning saw), but reduce cuts by half compared to in-ground trees.
Wrapping up and next steps
Trimming your lemon tree isn’t just about keeping it neat—it’s the secret to vibrant growth, bountiful fruit, and long-term health. 🌿 With the right tools, timing, and techniques, you can transform your tree into a thriving, productive powerhouse.
Whether you’re a seasoned gardener or just starting, every careful cut brings you closer to that dream harvest of juicy, homegrown lemons!
Ready to take the next step? Grab your pruners, schedule your first trim, and watch your lemon tree flourish! 🍋 For extra confidence, revisit our FAQs or share your progress with fellow gardeners—you’ve got this!