
Pruning
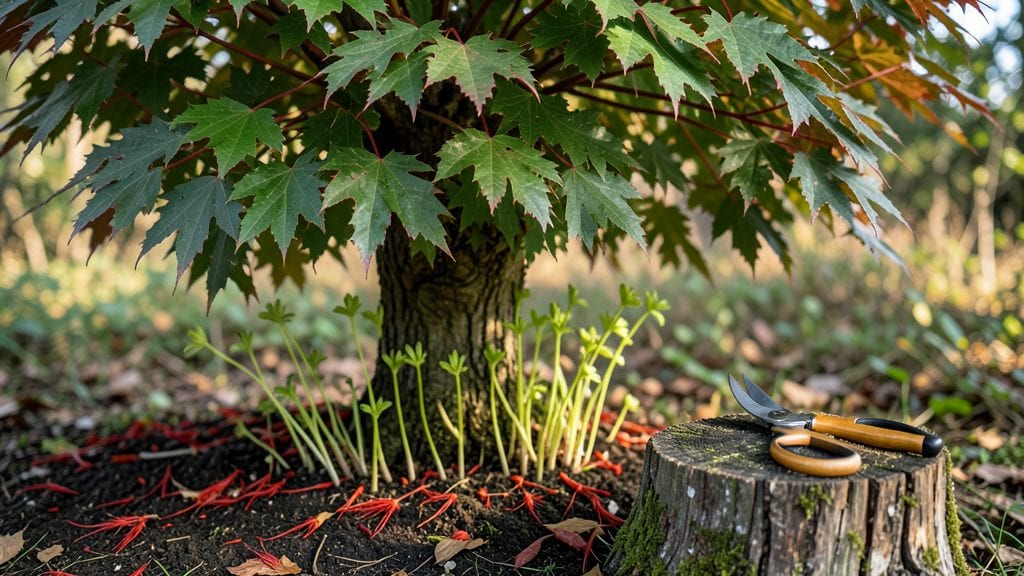
Proper tree sucker removal is the key to keeping your trees healthy and strong—without the messy, weak growth that drains energy from the main trunk. 🌳 I’ve spent years watching these aggressive shoots steal nutrients from my oak and maple, and once you learn the right technique, it’s like giving your tree a spa day.
The secret isn’t brute force; it’s timing, the right cuts, and knowing when to leave them alone.
You’ll need sharp pruners, a ladder (for higher suckers), and a little patience—no fancy tools required. The best time to tackle them is late winter or early spring, when the tree is dormant but about to wake up.
A quick, clean cut at the base, just above a bud or branch collar, prevents disease and encourages the tree to heal faster. Over-pruning here is a common mistake, so we’ll focus on what to remove and what to leave behind.
After a season of proper sucker removal, your tree will reward you with vibrant foliage, stronger branches, and even better fruit or flowers. The key is consistency—don’t let those suckers grow more than a few inches before you address them, or they’ll become a permanent eyesore.
Think of it as weeding for your tree’s roots.
For large or valuable trees, when in doubt, call an arborist—some suckers signal deeper issues like stress or disease. But for most backyard trees, this method works like a charm. Let’s get those suckers under control before they take over your tree’s energy.
📚 In This Guide
- What you need
- Instructions
- Tips and common mistakes
- Wrapping up and next steps
What you need
- ● Pruning shears or loppers: Bypass pruners (for clean cuts on small suckers) or loppers (for thicker growth, 20–24" blades). Sharpness is key!
- ● Pruning saw: A curved-tooth hand saw (8–10" blade) for stubborn, woody suckers. Avoid cheap saws—they dull fast!
- ● Rubbing alcohol (70% or higher): 1 small bottle to sterilize tools between cuts and prevent disease spread.
- ● Gloves: Heavy-duty work gloves (gardening or pruning-specific) to protect from thorns, sap, and debris.
- ● Ladder or step stool: Sturdy, extendable (if suckers are high up). Safety first—never stand on wobbly surfaces!
- ● Disposable bags or bucket: For collecting debris. 1–2 large bags or a 5-gallon bucket works well.
- ○ Tree wound dressing (optional): Pruning sealant (like Tanglefoot Tree Wound Pruning Seal) for large cuts. Note: Many experts skip this—clean cuts heal faster!
- ● Pole saw: For high-reaching suckers without climbing.
- ● Safety glasses: Protects eyes from flying debris.
- ● Knee pads: If you’re kneeling frequently.
- ● Spray bottle with soapy water: Helps clean tools mid-job.
- ● Notebook & pen: To sketch a pruning plan if tackling a complex tree.
Instructions for tree sucker removal: pruning secrets for clean, healthy trees
Here’s how I tackle suckers—those stubborn shoots that rob your tree’s energy and clutter its trunk.
✂️ Step 1: Identify and Time Your Pruning
Suckers are those fast-growing shoots sprouting from the base of your tree or along its trunk. They’re easy to spot: thin, upright stems with small leaves. The best time to remove them is late winter or early spring, just before new growth begins. This gives your tree a strong start without competing with these energy thieves.
If you’re dealing with a small number of suckers, you can tackle them anytime during the growing season, but avoid pruning in fall—it can leave wounds vulnerable to disease. I always check for suckers after a heavy rain; they grow fastest when the soil is moist.
🪴 Step 2: Gather the Right Tools
You don’t need fancy equipment—just a few basics. Grab a sharp pruning saw for thicker suckers (over ½ inch in diameter) and hand pruners for thinner ones. A pair of gloves will protect your hands from splinters and sap. I also keep a disinfectant spray (like 70% rubbing alcohol) handy to clean tools between cuts—this prevents spreading disease.
If the suckers are clustered near the base, a bypass pruner works best for clean cuts. For larger suckers, a pruning saw with a fine-tooth blade prevents tearing the bark. Never use hedge trimmers—they crush stems and leave jagged wounds that invite pests.
✂️ Step 3: Cut Suckers at the Base
Make your first cut just above a bud or branch collar—the swollen area where the sucker meets the trunk or root. This ensures the wound heals properly. For thick suckers, cut in two steps: First, make an undercut about ¼ inch away from the trunk, then a top cut just outside the branch collar. This prevents tearing.
If the sucker is very close to the trunk, angle your cut slightly away from it to create a smooth slope. Avoid leaving stubs—these can regrow or rot. I like to dispose of the cuttings immediately (don’t compost them) to prevent reinfestation or disease spread.
🌿 Step 4: Monitor and Repeat as Needed
Suckers are persistent, so check your tree every 2-4 weeks during the growing season. New ones often pop up after rain or warm spells. If you see a sucker re-emerging from the same spot, it might be coming from a root sucker—dig carefully around the base to expose and cut the root if needed.
For stubborn repeat offenders, consider applying a tree wound sealant (like pruning paint) to larger cuts to speed healing. But here’s the thing—I only use it on cuts over 1 inch in diameter. Smaller wounds heal faster on their own if you’ve made clean cuts.
☀️ Step 5: Boost Tree Health Post-Pruning
After removing suckers, give your tree a deep watering to help it recover. Focus on the root zone, letting water seep in slowly. If your tree looks stressed (yellowing leaves, wilting), it might need a balanced fertilizer (like 10-10-10) applied in early spring. Avoid heavy fertilizing right after pruning—it can stress the tree further.
Keep an eye out for pests or disease in the weeks following pruning. Healthy trees handle suckers better, so mulch around the base (but not touching the trunk) with 2-3 inches of organic mulch to retain moisture and suppress weeds. This keeps your tree’s energy focused on growth, not fighting off invaders.
Tips & tricks for perfect tree sucker removal
Here's what I've learned after years of battling these pesky growths—simple tricks that'll keep your trees strong and your yard looking its best.
Timing is Everything: Late winter or early spring is your golden window for pruning suckers because that's when trees are just waking up from dormancy. This timing gives your tree a head start on the growing season without competing with these energy vampires. If you must prune during the growing season, do it on a cloudy day—the sun can stress freshly pruned trees. I've seen trees recover beautifully when pruned at the right time, but those pruned in fall often develop infections from exposed wounds.
Tool Selection Matters: Never underestimate the importance of sharp tools. A dull pruning saw or hand pruners will crush stems instead of making clean cuts, which can damage the tree's bark and create entry points for disease. I keep my tools sharpened and always disinfect them between trees—this simple step prevents spreading fungal infections. For thick suckers over ½ inch, a pruning saw with fine teeth is worth the investment; it makes the job cleaner and faster than trying to hack through with hand pruners.
Root Sucker Rescue Strategy: When you see suckers popping up in the same spot repeatedly, you're likely dealing with root suckers. These require a different approach: carefully dig around the base to expose the root, then cut it cleanly at the base. I've had to do this with particularly stubborn trees, and while it takes more effort, it's the only way to stop the cycle. For trees with extensive root sucker problems, consider consulting an arborist—they can assess whether the tree is healthy enough to recover from this invasive growth.
Post-Pruning Care: After removing suckers, don't just walk away! Give your tree a deep watering focused on the root zone—this helps it recover from the stress of pruning. I've noticed that trees I water properly after pruning show new growth within weeks, while neglected ones take much longer to bounce back. Also, keep an eye out for pests like borers or fungal signs in the weeks following pruning. A healthy tree is your best defense against future sucker problems.
Pro Tips for Tree Sucker Removal
- Here's what I've learned after years of battling these pesky growths—simple tricks that'll keep your trees strong and your yard looking its best.
- Timing is Everything: Late winter or early spring is your golden window for pruning suckers because that's when trees are just waking up from dormancy.
- Tool Selection Matters: Never underestimate the importance of sharp tools.
Frequently asked questions
Got questions about tree sucker removal?
You’re not alone! Here are the most common concerns—plus clear, actionable answers to keep your trees thriving.
What are tree suckers, and why should I remove them?
Tree suckers are aggressive, fast-growing shoots that sprout from the base or roots of mature trees. They steal nutrients and water from your main tree, weakening its growth and making it more susceptible to disease. Removing them early ensures your tree stays strong and healthy while maintaining a tidy landscape.
When is the best time of year to remove tree suckers?
The ideal time is late winter or early spring (just before new growth starts). This minimizes stress on the tree and prevents suckers from re-establishing. Avoid pruning in extreme heat or drought—wait for cooler, moist conditions to reduce shock. For stubborn suckers, a second round in summer may be needed.
Can I remove tree suckers myself, or should I hire a pro?
Small, accessible suckers can be removed with basic tools like pruners or a handsaw. However, if suckers are thick, numerous, or near roots/structures, hire a certified arborist. They’ll use proper techniques (like cutting at the base) to avoid damaging the main tree or inviting pests.
Will removing suckers kill my tree or harm its growth?
No—removing suckers actually benefits your tree! When done correctly, it redirects energy to the main trunk and canopy, promoting stronger growth. Just avoid over-pruning (never remove more than 25% of foliage at once) and use sterilized tools to prevent disease. Think of it like giving your tree a nutrient boost!
My suckers keep coming back—what’s the fix?
Persistent suckers often signal underlying issues like stress, poor soil, or root damage. Try these fixes:
- Improve soil health: Add compost or mulch around the base (keep mulch 3–4 inches away from the trunk).
- Water deeply: Drought-stressed trees produce more suckers.
- Apply root pruning: If suckers are near the root flare, consult an arborist to assess root health.
- Use sucker control paint: A copper-based sealant on fresh cuts can deter regrowth.
Pro Tip: Label your work!
If you’re unsure which shoots are suckers vs. new growth, mark them with flags before pruning. This helps track regrowth and ensures you’re targeting the right areas. A quick photo before/after also helps monitor progress over time!
Wrapping up and next steps
Removing tree suckers doesn’t have to be a daunting task—with the right tools, timing, and technique, you can keep your trees thriving and your yard looking its best! 🌳✨ Whether you’re tackling stubborn growth or maintaining long-term health, consistency is key.
Now that you’re armed with pruning secrets, grab those shears, and get ready to transform your trees into showstopping centerpieces.
Your next step? Schedule a regular pruning session—aim for late winter or early spring—and watch your trees flourish year after year. Happy pruning! 🌿💪