Propagation
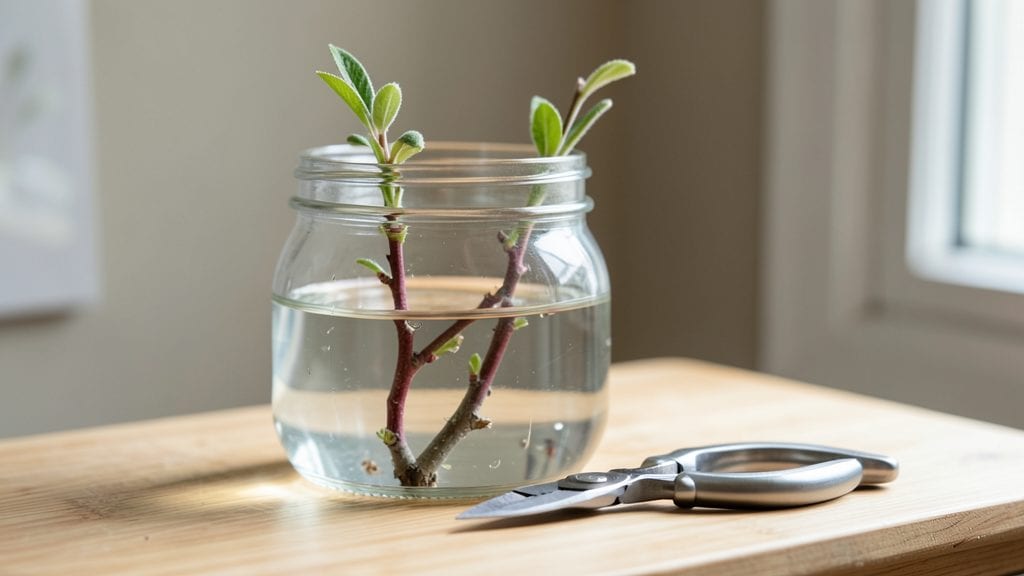
Turning a single cutting into your own fruit orchard starts with the right technique. 🌳 I’ve propagated apple, peach, and citrus trees from cuttings—and the first step is choosing whether to grow from seed, layering, grafting, or simply rooting a stem.
The tools are simple: sharp pruners, rooting hormone, and a clear plastic bag for humidity. For fruit trees, grafting often gives the fastest, most reliable results, especially when working with heirloom varieties. My first grafted apple tree bore fruit in just two years—something seed-grown trees rarely match.
Timing matters most: take softwood cuttings in late spring or hardwood cuttings in winter. Layering works best with flexible branches, while grafting thrives when both rootstock and scion are dormant. Mistakes happen, but even a 60% success rate means you’ll end up with multiple trees from just a few attempts.
Whether you’re growing a backyard citrus grove or a shade tree, these methods scale from small spaces to full orchards. The key is patience—your first harvest might take a few years, but the payoff is worth every season of waiting.
📚 In This Guide
- What you need
- Instructions
- Tips and common mistakes
- Wrapping up and next steps
What you need
- ● Rooting Hormone (powder or gel) – 1 small bottle (4–8 oz) to boost root growth.
- ● Sharp Pruning Shears – 1 pair (sterilized) for clean cuts.
- ● Well-Draining Potting Mix – 5–10 gallons (perlite, vermiculite, or coconut coir blend).
- ● Rooting Trays or Pots – 6–12 small containers (4–6" diameter) with drainage holes.
- ● Plastic Bags or Humidity Dome – 1–2 to maintain moisture.
- ● Spray Bottle – 1 for gentle watering.
- ● Grafting Tools (if grafting) – 1 grafting knife + rubber bands or grafting tape.
- ● Sunlight or Grow Lights – Bright, indirect light (6+ hours/day) for propagation.
- ● Watering Can – 1 small for occasional deep watering.
- ● Misting System – For automated humidity control.
- ● Heat Mat – To speed up rooting in cooler climates.
- ● Label Tags – To track tree varieties.
- ● Compost or Fertilizer – For transplanting (low-nitrogen, 5-10-5 ratio).
- ● Grafting Clamp – For secure grafts.
Step-by-step instructions for propagating trees and fruit trees
Here's my foolproof method for turning cuttings into strong, healthy trees.
🌱 Step 1: Select and Prepare Healthy Cuttings
Choose semi-hardwood cuttings in late spring or early summer when growth is active but not too tender. Look for new growth that's about pencil-thick with at least 3-4 leaf nodes. Use clean, sharp pruners to make a 45-degree angle cut just below a node—this increases surface area for root growth.
Remove all but the top 2-3 leaves to reduce water loss. Dip the cut end in rooting hormone to encourage root development. I like to work on a clean surface and keep a spray bottle handy to mist the cuttings as I prepare them—this prevents wilting while I get everything ready.
💧 Step 2: Set Up a Moisture-Retentive Growing Medium
Fill a clean container with a mix of 50% perlite and 50% peat moss or coconut coir. This combination holds moisture while allowing airflow to prevent rot. Moisten the mix until it feels like a damp sponge—not soggy, but with no dry spots. I like to work the moisture in by hand to avoid compacting the mix.
Insert each cutting about 2-3 inches deep, making sure at least one node is below the soil line. Space them 2-3 inches apart to allow room for root development. Gently firm the medium around each cutting to eliminate air pockets that could rot the stems.
☀️ Step 3: Provide Ideal Growing Conditions
Place the container in a location with bright, indirect light—think filtered sunlight or a shaded windowsill. Avoid direct sun, which can dry out the cuttings too quickly. Maintain 65-75°F temperatures for best results. If your home runs cooler, consider using a simple heat mat to keep the roots warm.
Mist the cuttings daily to maintain high humidity, and keep the growing medium consistently moist but never waterlogged. You'll know moisture is right when the surface looks slightly damp but not glistening. After about 4-8 weeks, check for root growth by gently tugging on the cuttings—resistance means roots are forming.
🌿 Step 4: Transplant Established Cuttings
Once roots are 2-3 inches long and new growth appears, it's time to transplant. Choose a location with well-draining soil and partial shade for the first year. Dig holes slightly larger than the root ball and space plants 10-12 feet apart to allow room for growth.
Water deeply after transplanting to help settle the soil and reduce transplant shock. Mulch around the base with 2-3 inches of organic mulch to retain moisture and regulate soil temperature. Keep the area consistently moist for the first few weeks to encourage root establishment.
Tips & tricks for perfect tree propagation
Here's what nobody tells you about turning cuttings into thriving trees—these tricks make all the difference.
The Cutting Angle Matters: That 45-degree angle cut in Step 1 isn't just decoration—it's crucial! The larger surface area increases root growth potential. Use a ruler or protractor if you're not confident eyeballing it. I've ruined cuttings by making straight cuts, so don't make my mistake: the angle should be steep enough to expose the cambium layer just beneath the bark.
Rooting Hormone Hack: After dipping your cuttings in rooting hormone, let them sit for 30 seconds before planting. This gives the hormone time to adhere properly. I like to gently roll the cut end in the powder or gel while holding it at the angle—this ensures full coverage. For extra insurance, I sometimes dip the cut end in a bit of water after applying the hormone to help it stick better.
Medium Moisture Secret: The damp sponge consistency in Step 2 is your goal—it should hold together when squeezed but not drip water. Too wet and you risk rot; too dry and roots won't form. I test moisture by grabbing a handful: if water drips between my fingers, it's too wet. If it crumbles, it needs more moisture. The right balance is key to successful propagation.
Transplant Timing: Wait until you see new growth at the top of your cuttings before transplanting—this is your sign that roots have formed. I check by gently tugging on the cuttings: if they resist slightly, roots are developing. Don't rush this step! Transplanting too soon can shock the delicate new roots, setting back your progress by weeks.
Pro Tips for Propagating Trees And Fruit Trees
- Here's what nobody tells you about turning cuttings into thriving trees—these tricks make all the difference.
- The Cutting Angle Matters: That 45-degree angle cut in Step 1 isn't just decoration—it's crucial!
- Rooting Hormone Hack: After dipping your cuttings in rooting hormone, let them sit for 30 seconds before planting.
Frequently asked questions
Got questions about propagating trees and fruit trees?
You’re not alone! Whether you're a beginner or just looking for a quick tip, here are some of the most common queries—and their answers—to help you grow a thriving orchard from scratch.
What’s the best time of year to take cuttings for propagation?
The ideal window is late spring to early summer (May–June in most regions), when new growth is vigorous but not yet hardened off. For fruit trees like apples or peaches, semi-hardwood cuttings (partially mature but still flexible stems) work best. Avoid taking cuttings after a hard frost or during extreme heat.
Do I need rooting hormone, or can I skip it?
While not always mandatory, rooting hormone dramatically increases success rates (especially for tricky species like citrus or figs). For beginners, use a gel or powder with auxin (like IBA) on the cut end before planting. If you skip it, opt for easy-to-root varieties like willow, poplar, or certain fruit trees (e.g., pomegranate).
How long does it take for cuttings to root?
Patience is key! Most cuttings show roots in 4–8 weeks, but some (like avocado) can take 2–3 months. Keep the soil moist, provide humidity (via a plastic bag or propagator), and avoid overwatering. Gently tug the cutting after 6 weeks—if resistance meets your fingers, roots are likely forming!
Can I propagate fruit trees from store-bought fruit?
Not reliably! Seeds from grocery-store fruit (like apples or oranges) often won’t grow true to the parent tree’s variety. For consistent results, use grafted cuttings or buy certified nursery stock. Exception: Some tropical fruits (e.g., mango, papaya) can be grown from seed, but expect slower growth and potential differences in flavor.
My cuttings are turning yellow or mushy—what’s wrong?
Yellowing leaves or soft stems usually signal overwatering or fungal rot. Reduce moisture, ensure pots have drainage holes, and avoid letting cuttings sit in soggy soil. If mold appears, treat with a fungicide (like neem oil) and improve airflow. Pro tip: Use a mix of perlite or sand to boost drainage!
What’s the easiest fruit tree to propagate for beginners?
Start with figs, citrus (like Meyer lemons), or pomegranates—they root readily from cuttings. For a challenge, try apricots or cherries (they benefit from rooting hormone). Avoid finicky varieties like persimmons or blueberries unless you’re experienced!
Wrapping up and next steps
Propagating trees and fruit trees is a rewarding journey that connects you to nature while expanding your green space—one cutting at a time! 🌱 Whether you’re growing citrus from a single branch or nurturing an apple sapling, patience and care turn small efforts into lush, bountiful orchards.
Now that you’re armed with the right techniques and answers to common questions, there’s no better time to start than today!
Ready to take the next step? Pick a tree variety, gather your supplies, and begin propagating. Your future orchard—or even just a beautiful new tree—is waiting for your green thumbs! 🌳✨