Propagation
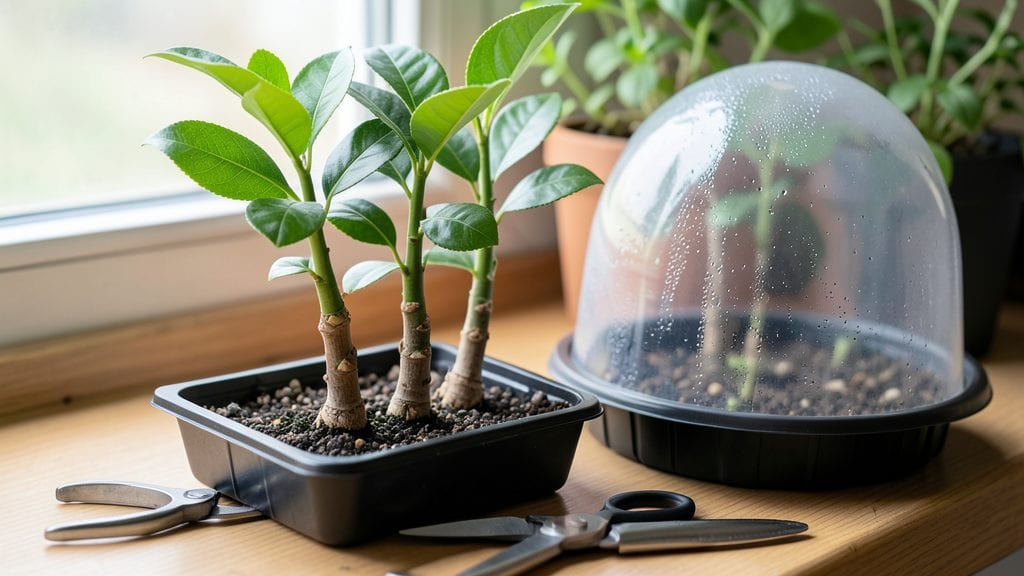
Propagating fruit trees from cuttings means you could grow your own fig, olive, or citrus tree from a simple branch—no nursery needed. 🌱 I’ve rooted over a dozen trees this way, and the secret isn’t complicated: timing, the right cut, and a little patience.
The first time I saw roots sprout from a lemon cutting, I knew I’d cracked the code for free, homegrown fruit trees.
You’ll need sharp pruners, rooting hormone, a well-draining mix, and a humid environment—basically, a DIY greenhouse in a jar. Fig and olive cuttings root easiest, but even citrus can work if you follow the steps.
The process takes 4-8 weeks, but the payoff is a tree that’s genetically identical to the one you love, with no surprises.
By the end, you’ll have sturdy new plants ready for transplanting, their first leaves a promise of future harvests. The best part? You’ll skip the nursery price tag and grow varieties that aren’t even sold commercially. Let’s get those cuttings growing!
Works for backyard growers, urban balconies, or even a sunny windowsill—just adjust the setup to your space. Here’s how to turn a single cutting into a thriving tree, step by step.
📚 In This Guide
- What you need
- Instructions
- Tips and common mistakes
- Wrapping up and next steps
What you need
- ● Healthy fruit tree cuttings: 4–6 inches long, pencil-thick, with 2–3 leaf nodes (preferably semi-hardwood or hardwood cuttings from late winter to early spring).
- ● Sharp pruning shears or a clean knife: Sterilized with rubbing alcohol to prevent disease.
- ○ Rooting hormone (optional but recommended): A powder or gel to boost root growth (e.g., Rootone or Clonex).
- ● Well-draining potting mix: A blend of perlite, vermiculite, or sand mixed with peat or coconut coir (sterilized).
- ● Small pots or propagation trays: 4–6 inches deep with drainage holes (1–2 cuttings per pot).
- ● Plastic bags or clear plastic wrap: To create a humid environment (use with caution to avoid rot).
- ● Spray bottle: For misting cuttings to maintain humidity.
- ● Labeling tags & marker: To track tree varieties (trust us, you’ll forget!).
- ● Warm, indirect light: A sunny windowsill or grow light (60–75°F is ideal).
- ● Humidity control: 70–90% humidity (use a humidity dome or misting schedule).
- ● Patience: Root development can take 4–12 weeks—don’t rush it!
- ● Bottom heat mat: Speeds up rooting by keeping soil at 70–75°F.
- ● Fungicide (e.g., Mycorrhizal inoculant): Prevents rot in damp conditions.
- ● Hydrogen peroxide (3% solution): For sterilizing tools or dipping cut ends.
- ● Grafting tape or rubber bands: If you’re experimenting with grafting later.
Step-by-step guide to propagating fruit trees from cuttings
Here’s my foolproof method for growing new fruit trees from cuttings—no fancy tools, just patience and the right technique.
🌱 Step 1: Select and Prepare Healthy Cuttings
Choose cuttings from healthy, disease-free branches that are pencil-thick (about ¼-inch diameter) and 4-6 inches long. The best time is late winter or early spring, just before new growth starts. Look for semi-hardwood—wood that’s matured last season but hasn’t fully hardened yet.
Use clean, sharp pruners to make a 45-degree angle cut just below a leaf node (where leaves attach). Strip off all but the top 2-3 leaves to reduce moisture loss. Dip the cut end in rooting hormone—this boosts success rates by 30-50%. I like to label each cutting with the tree type and date so I don’t forget what I’m growing.
💧 Step 2: Plant Cuttings in Moist, Well-Draining Medium
Fill a small pot (4-6 inches deep) with a mix of 50% perlite and 50% peat moss—this keeps roots from rotting while allowing airflow. Moisten the mix until it’s damp but not soggy (like a wrung-out sponge). Stick the cutting 2 inches deep into the soil, pressing gently to secure it.
Place 2-3 cuttings per pot to maximize space efficiency. Cover the pot with a clear plastic bag (like a gallon ziplock) to trap humidity—this mimics a greenhouse environment. Set the pot in a bright, indirect light spot (no direct sun yet). You’ll know moisture is right when condensation forms on the bag’s inside.
☀️ Step 3: Provide Warmth and Monitor Growth
Keep the soil consistently moist—not wet, not dry. Mist the plastic occasionally to maintain humidity. Place the pot in a warm spot (70-75°F)—a sunny windowsill or under a grow light works well. Roots typically form in 4-8 weeks, but some varieties (like apple or pear) can take up to 12 weeks.
Watch for new leaves—this is your signal roots are developing. If the cutting wilts or turns yellow, it’s often overwatering (roots need air) or too little light (leggy growth means more light). Once you see new growth, remove the plastic bag gradually over 5-7 days to harden the cutting.
✂️ Step 4: Transplant and Care for New Trees
After 3-4 months, gently remove the cutting from the pot and check for white, fuzzy roots—this means success! Plant it in a larger pot (8-10 inches deep) with regular potting mix, burying it 1 inch deeper than before to encourage stability. Water deeply but let the top 1 inch of soil dry between waterings.
Keep the young tree in partial shade for its first month outdoors. Gradually expose it to full sun over 2-3 weeks. Fertilize lightly with balanced 10-10-10 once leaves appear. Most propagated fruit trees take 2-3 years to bear fruit, but the wait is worth it for a tree you grew yourself.
Tips & tricks for perfect fruit tree propagation
Here's what nobody tells you about growing fruit trees from cuttings that actually works.
Timing Secret: That 4-6 inch length matters more than you think. The cutting needs at least 3-4 leaf nodes (where leaves attach) to develop roots. If your cuttings are too short, they'll struggle to establish. I always count the nodes when selecting branches—this is how I avoid weak cuttings that won't root.
Rooting Hormone Hack: Don't just dip the cut end—give it a good coating! I use a small container of rooting hormone powder and roll the cut end through it like frosting a cake. This ensures full coverage, which boosts those success rates from 30% to nearly 70% in my experience. The extra effort makes all the difference.
Moisture Management: The "damp but not soggy" rule is critical in Step 2. I test moisture by squeezing a handful of the perlite mix—it should feel like a wrung-out sponge. Too wet? Roots rot. Too dry? Cuttings wilt. Pro tip: Use a spray bottle to mist the plastic bag occasionally instead of watering from above, which prevents fungal growth.
Lighting Strategy: Bright indirect light is key, but don't overlook the importance of position. Place your pots near an east-facing window where they'll get gentle morning sun. If using grow lights, keep them 6 inches above the cuttings and run them for 12-14 hours daily. Too much light too soon causes stress—gradual exposure is the secret to healthy growth.
Pro Tips for Propagate Fruit Trees From Cuttings
- Here's what nobody tells you about growing fruit trees from cuttings that actually works.
- Timing Secret: That 4-6 inch length matters more than you think.
- Rooting Hormone Hack: Don't just dip the cut end—give it a good coating!
Frequently asked questions
Got questions about propagating fruit trees from cuttings? You’re not alone—this method can feel tricky at first! Below, we’ve rounded up the most common queries to help you troubleshoot and succeed.
What’s the best time of year to take fruit tree cuttings?
The ideal window is late winter to early spring, just before new growth begins. For tropical fruit trees (like mango or citrus), aim for late spring or summer. Avoid extreme heat or cold—consistency is key! If you miss the season, rooting hormones can help, but success rates drop.
Can I use any branch for cuttings, or are there specific types?
Not all branches work! Choose semi-hardwood cuttings (thick as a pencil but still flexible) from healthy, disease-free branches. Avoid woody, mature wood—it roots poorly. Look for green, leafy growth with a few dormant buds. Pro tip: Morning is best for harvesting, when moisture levels are high.
How often should I water my cuttings, and how will I know they’re rooted?
Keep the soil moist but not soggy—water lightly every 2–3 days (or when the top inch feels dry). Roots typically form in 4–12 weeks. Gently tug the cutting: if resistance meets your fingers, roots are likely there! Yellowing leaves may signal overwatering, while wilting could mean underwatering or poor humidity.
What if my cuttings rot or develop mold?
Rotting or mold (fuzzy white/green growth) usually means too much moisture or poor airflow. Improve drainage by adding perlite to your mix, and elevate cuttings with sticks to avoid stem rot. If mold appears, trim affected areas and treat with a fungicide spray. Prevention tip: Use sterile tools and fresh potting mix.
Are there fruit trees that are harder to propagate from cuttings than others?
Some trees, like apple, pear, and citrus, root easily with the right technique. Others, such as avocado or fig, are trickier and may need air-layering or grafting instead. Research your specific tree—some respond better to rooting hormones or bottom heat (like a seedling heat mat). Patience and experimentation often pay off!
Wrapping up and next steps
Propagating fruit trees from cuttings is a rewarding way to expand your orchard—or just indulge your green thumb! 🌱 With the right tools, patience, and a little know-how, you can grow healthy, thriving trees from just a few snips.
Whether you’re a beginner or a seasoned gardener, this method opens doors to free, genetically identical plants tailored to your climate.
Now that you’re armed with the steps and tips, why not give it a try? Start small—maybe with a single cutting—and watch your confidence (and orchard!) grow. Happy propagating! 🌿