Pruning
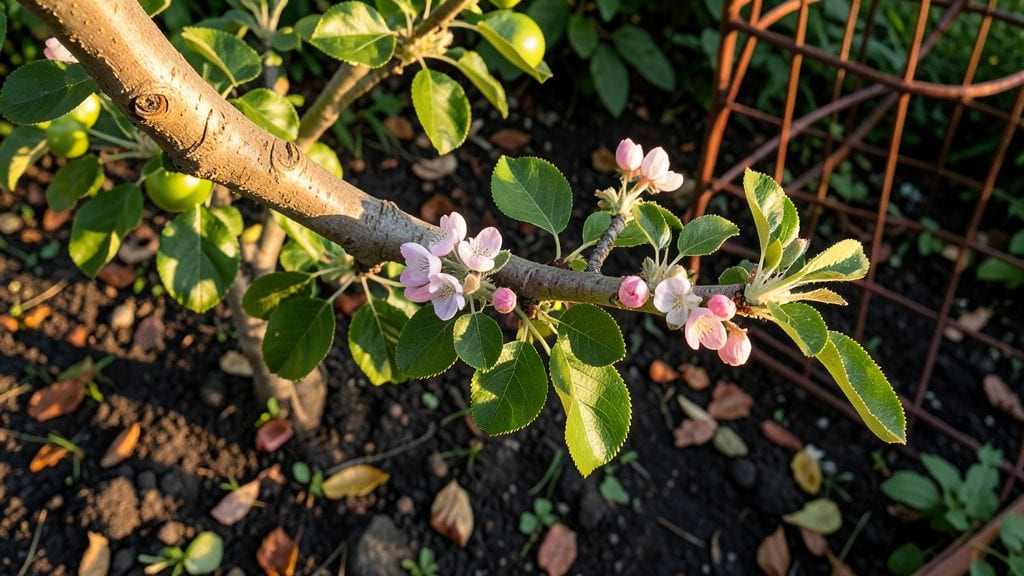
This apple tree branch holds the key to your tree’s future—three simple cuts now will unlock a bountiful harvest next year, but timing is everything. ✂️ I learned this the hard way after pruning my first tree in January—only to realize I’d missed the best time.
The key is understanding when to prune (and when to leave branches alone) to balance growth and fruit production.
You’ll need just three tools: sharp pruning shears, loppers for thicker branches, and rubbing alcohol to sterilize cuts. The process takes 30-60 minutes depending on tree size, and the right cuts encourage stronger branches that bear heavier fruit loads. Even beginners can master this with the right approach.
By summer, you’ll see new growth where you made cuts—thicker stems, more leaves, and fewer weak limbs. The tree’s energy shifts from supporting dead wood to producing juicier apples and a stronger structure. Proper pruning also prevents disease by improving airflow through the canopy.
This method works for young trees, mature orchards, and even neglected trees needing revival. Whether you’re shaping a dwarf variety or a standard-sized tree, the same principles apply. Let’s get those branches in shape for a better harvest next year.
📚 In This Guide
- What you need
- Instructions
- Tips and common mistakes
- Wrapping up and next steps
What you need
- ● Pruning shears: Bypass pruners (for cuts up to ½-inch thick), sharp and clean—disinfect with rubbing alcohol between cuts to prevent disease.
- ● Loppers: 1 pair (for branches ½-inch to 2-inches thick), with bypass blades for precision.
- ● Pruning saw: 1 saw (for branches 2+ inches thick), with a fine-tooth blade to avoid tearing bark.
- ● Gloves: 1 pair of cut-resistant, breathable gloves (gardening or pruning-specific).
- ○ Ladder: Optional but helpful—extendable or sturdy enough to reach high branches safely.
- ● Rubbing alcohol (70%+): Small bottle to sterilize tools between cuts.
- ○ Tree wound paint: Optional but recommended for cuts larger than ½-inch to prevent decay (choose a natural, non-toxic option like horticultural sealing wax).
- ● Disposable bags: 1-2 heavy-duty bags for collecting pruned branches (check local regulations for disposal).
- ● Know your tree’s age & variety: Young trees (under 5 years) need light shaping cuts, while mature trees may require structural pruning. Research your apple tree’s specific needs!
- ● Timing: Prune in late winter/early spring (dormant season) for best results, or immediately after harvest for summer light pruning.
- ● Weather check: Choose a dry, calm day—avoid pruning if rain or wind is forecasted.
- ● Safety first: Wear closed-toe shoes and eye protection (safety glasses).
- ● Clear the area of pets, kids, and bystanders—falling branches can be heavy!
- ○ Map your cuts: Optional but smart—sketch a rough plan of branches to remove (aim for open center shape to improve airflow and sunlight).
- ● 🔥 Always cut at a 45-degree angle just outside the branch collar (the swollen area where the branch meets the trunk).
- ● ✨ Avoid over-pruning! Never remove more than 25% of the tree’s foliage in one session.
- ● 🌡️ Watch for signs of disease: If you see cankers, oozing sap, or fungal spots, prune those branches last and disinfect tools thoroughly.
Step-by-Step guide to strategic apple tree branch pruning
Here’s the method I’ve used for years to keep apple trees thriving—no guesswork, just precise cuts.
✂️ Step 1: Identify and Remove Dead or Diseased Wood
Start by scanning the tree for branches that are completely brown, brittle, or oozing sap—these are dead or diseased and must go. I always prune these first, regardless of season, because they drain energy from healthy growth. Use sharp pruning shears for smaller branches and loppers for anything thicker than a pencil.
Cut just outside the branch collar (the swollen area where the branch meets the trunk) at a 45-degree angle. This prevents water from pooling and rotting the wound. If you see mushrooms or cankers on the branch, disinfect your tools with 70% rubbing alcohol between cuts to avoid spreading disease.
✂️ Step 2: Thin the Canopy for Airflow and Light
Next, focus on thinning out crowded branches—look for ones that cross, rub against each other, or grow inward. These compete for sunlight and airflow, inviting fungal infections. I target branches that are less than ½ inch thick for removal, as thicker branches require more recovery time.
Make your cuts just above an outward-facing bud (about ¼ inch above) to encourage new growth that angles outward. This opens up the canopy, letting sunlight reach the center of the tree where fruit develops. Avoid cutting more than 25% of the tree’s canopy in one season—this stresses the tree unnecessarily.
✂️ Step 3: Shape for Structure and Future Fruit Bearing
Now, refine the tree’s shape by removing upward-growing branches (called "water sprouts") and weak, spindly growth. These drain energy and disrupt the tree’s natural framework. Use hand pruners for small branches and pruning saws for anything larger than 2 inches in diameter.
For structural branches, aim to leave 3-5 main scaffold branches spaced evenly around the trunk. Cut back any that grow at narrow angles (less than 45 degrees) to the trunk—these are prone to breaking. Seal larger cuts (over 2 inches) with pruning sealant to reduce sap loss, but skip it on small cuts—research shows it’s unnecessary for most fruit trees.
⏰ Step 4: Time Your Cuts for Seasonal Success
The best time to prune depends on your goal: dormant season (late winter/early spring) is ideal for structural shaping, while summer pruning controls growth and improves fruit quality. If you’re pruning in fall, do it at least 6 weeks before frost to allow wounds to heal before winter stress sets in.
After pruning, water deeply to help the tree recover, especially if you’ve made large cuts. I also apply a layer of mulch (2-3 inches) around the base, keeping it 6 inches away from the trunk to retain moisture and regulate soil temperature. Avoid heavy pruning in early spring—new growth will be vulnerable to late frosts.
Tips & tricks for strategic apple tree pruning
Here's what I've learned after years of perfecting this method—small details that make all the difference between a healthy tree and one that struggles.
Tool Precision: Sharp tools are non-negotiable. Dull pruners tear bark instead of making clean cuts, creating larger wounds that invite disease. I keep a small file in my toolkit to sharpen blades between uses—it takes 30 seconds and prevents weeks of recovery time for your tree. For branches over 2 inches thick, use a pruning saw with fine teeth to avoid crushing the wood.
Seasonal Strategy: The timing in Step 4 matters more than you'd think. Dormant season pruning (late winter/early spring) stimulates new growth, while summer pruning focuses on fruit quality. If you must prune in fall, stick to the 6-week rule before frost—this gives wounds time to heal before winter stress. I've seen trees recover beautifully when pruned right, but poorly timed cuts can lead to winter dieback.
Visual Cues for Cuts: When making cuts in Step 2 and Step 3, look for these signs: healthy buds should be plump and green, not shriveled or brown. The branch collar should be clearly visible—it's that swollen ridge where the branch meets the trunk. If you can't see it, you're cutting in the wrong place. I always make a small notch in the bark above my cut line to mark where I'll aim, especially when working high up in the tree.
Recovery Protocol: After pruning, the 2-3 inch mulch layer in Step 4 isn't just decoration—it's crucial for moisture retention and temperature regulation. Water deeply immediately after pruning to help the tree recover, especially if you've made large cuts. I've noticed trees pruned in dry conditions show better recovery when given this extra hydration boost. For large wounds over 2 inches, apply pruning sealant only to the outer edge—not the entire wound surface—as research shows this actually slows healing.
Pro Tips for Apple Tree Branch
- Here's what I've learned after years of perfecting this method—small details that make all the difference between a healthy tree and one that struggles.
- Tool Precision: Sharp tools are non-negotiable.
- Seasonal Strategy: The timing in Step 4 matters more than you'd think.
Frequently asked questions
Got questions about pruning your apple tree branch? You’re not alone!
Here are some of the most common concerns—plus quick, actionable answers to keep your tree thriving year-round.
When is the best time to prune apple tree branches?
Prune dormant branches in late winter (before buds swell) or lightly after harvest in summer. Avoid heavy pruning in fall—it invites disease. Pro tip: Winter pruning promotes robust spring growth, while summer cuts control size and shape.
Can I prune apple tree branches in winter? What if it’s freezing?
Yes! Prune during dormancy (Dec–Feb), but avoid extreme cold (<20°F). Wait for a mild day (30–50°F) to reduce stress on the tree. If branches are brittle, prune in stages—don’t force cuts in freezing temps.
What if my apple tree branch is dead or diseased?
Remove deadwood (no bark, hollow centers) and diseased branches (mushrooms, ooze, or discolored bark) immediately—sterilize tools with 70% alcohol between cuts. Burn or bag infected branches do not compost them!
How do I know if I’m pruning too much or too little?
Aim to remove no more than 25% of the tree’s canopy per year. Too much? You’ll see stunted growth or weak fruit. Too little? Overcrowding leads to pests/disease. Focus on open centers and outward-facing branches for airflow.
What can I do with the pruned branches after cutting?
Use them for firewood (dry for 6+ months), compost (if disease-free), or DIY projects (like trellises!). Avoid mulching diseased branches. Small twigs make great herb starter sticks—just bury them in soil!
Wrapping up and next steps
Pruning your apple tree branch isn’t just about keeping things tidy—it’s the secret to a thriving, fruit-bearing tree year after year!
By mastering the three strategic cuts (dormant, post-harvest, and summer thinning), you’ll boost airflow, sunlight, and fruit quality while preventing disease. Your efforts today will reward you with bountiful harvests tomorrow!
Ready to take action? Grab your pruners and schedule your first pruning session—whether it’s shaping those branches now or planning for next winter. Every cut counts! 🌳✂️