Pruning
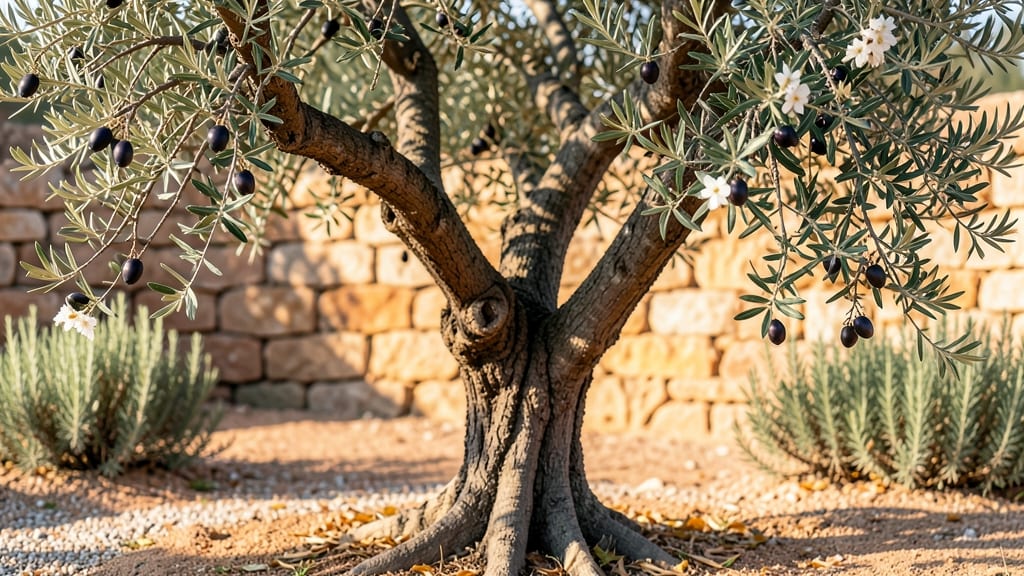
Late-winter olive tree branch pruning is your secret weapon for bushier growth next season. I’ve revived struggling olive trees with just a few strategic cuts—no fancy tools or horticultural degree required.
The key is timing: prune right before new growth starts, and you’ll encourage thick, sturdy branches that produce more fruit and leaves.
You’ll need sharp pruning shears, rubbing alcohol to sterilize cuts, and a clear day to assess your tree. Focus on removing dead, crossing, or weak branches first—these are the ones stealing energy from your olive’s best growth.
The goal isn’t perfection; it’s shaping the tree to thrive in your climate, whether you’re in Zone 7 or 10.
By late spring, you’ll see fresh green shoots where you made cuts, and those branches will fill out with dense foliage. The tree won’t just look better—it’ll be stronger, more productive, and better able to handle drought or pests.
Plus, the pruned branches can root in water for new plants (more on that later).
This method works for both young trees and mature ones, though older trees need gentler shaping. Start small if your olive is new to pruning—confidence comes with practice, and your tree will thank you for the care.
📚 In This Guide
- What you need
- Instructions
- Tips and common mistakes
- Wrapping up and next steps
What you need
- ● Pruning shears: Bypass pruners (sharp, clean, and sterilized with rubbing alcohol or bleach solution). Size: 6-8 inches for medium branches.
- ● Loppers: For thicker branches (½–1½ inches in diameter). Look for: Long handles (24–30 inches) for leverage.
- ○ Hand saw: Pruning saw with fine teeth (for branches larger than 1½ inches). Optional: Bypass saw for cleaner cuts.
- ● Gloves: Heavy-duty, cut-resistant gloves (gardening or pruning-specific). Why? Olive branches have thorns!
- ● Disinfectant: 70% isopropyl alcohol or 10% bleach solution (1 part bleach to 9 parts water) to sterilize tools between cuts.
- ○ Sealing wax or pruning paste: (Optional but highly recommended for cuts larger than ½ inch to prevent disease.)
- ● Bucket or bag: For collecting pruned branches (5-gallon capacity or larger).
- ● Weather: Prune on a dry, cloudy day (avoid frost or extreme heat). Ideal temps: 40–65°F (4–18°C).
- ● Timing: Late winter (just before new growth starts, typically February–March in most climates).
- ● Safety gear: Safety glasses (to shield from debris) and long sleeves/pants (for protection).
- ● Tree health check: Inspect the olive tree for signs of disease (e.g., black knots or oozing sap) before pruning.
- ● Sharpen your tools: Dull blades tear bark—use a file to keep edges razor-sharp.
- ● Label cuts: Use a marker to tag branches for removal if you’re unsure (snap a photo first!).
- ● Compost or mulch: Repurpose pruned branches as mulch or compost (olive wood breaks down slowly but enriches soil!).
Instructions for late-winter olive tree branch pruning
Here's how to rejuvenate your olive tree with precise cuts that encourage fuller growth.
Identify and Mark Branches for Removal
Start by examining your olive tree for branches that need attention. Look for dead, diseased, or crossing branches—these are your first targets. Dead branches are brittle and snap easily when bent, while diseased ones may show dark spots or oozing sap. Crossing branches rub against each other, creating wounds that invite pests and disease.
Use a permanent marker to circle the branches you plan to remove. This prevents second-guessing mid-cut and ensures you don’t accidentally prune the wrong branch. Focus on branches that are thinner than a pencil or those growing inward toward the center of the tree, as these block sunlight and air circulation.
Gather Tools and Prepare the Workspace
Before making any cuts, gather your tools: a pair of sharp bypass pruners for branches up to ½ inch thick, and a pruning saw for thicker branches. Sterilize your tools with rubbing alcohol to prevent spreading disease between cuts. Lay down a tarp or old sheet below the tree to collect fallen debris and make cleanup easier.
Work on a dry day when temperatures are above 40°F—olive trees handle pruning best in mild weather. Avoid pruning during frost or extreme heat, as stress from cutting combined with temperature extremes can harm the tree. If you’re working on a ladder, ensure it’s stable and positioned on level ground.
Make Clean Cuts at the Right Angle
For branches up to ½ inch thick, use your pruners to cut just outside the branch collar—the swollen area where the branch meets the trunk. The cut should be at a 45-degree angle, sloping away from the trunk. This angle helps rainwater run off the wound instead of pooling and rotting the tissue.
For thicker branches, use your pruning saw to make a clean cut without tearing the bark. Avoid leaving stubs—these are entry points for disease. After cutting, step back and inspect the tree’s shape. Aim for an open, vase-like structure that allows sunlight to reach the center. Olive trees thrive with good airflow, so avoid overcrowding branches.
Thin Out and Shape for Balanced Growth
Remove one-third of the tree’s oldest branches to encourage new growth. Focus on branches that are overcrowded or growing in the wrong direction. Cutting back these branches stimulates the tree to produce younger, more vigorous shoots. You’ll see new buds forming along the remaining branches within a few weeks.
Step back frequently to assess the tree’s balance. The goal is to maintain a natural shape while improving airflow and sunlight penetration. Avoid heavy pruning on one side—this can cause the tree to lean or grow unevenly. If you’re unsure about a cut, take a photo first and compare it to reference images of properly pruned olive trees.
Clean Up and Monitor Recovery
After pruning, rake up all fallen debris and dispose of it in a sealed bag. This prevents pests and diseases from lingering near the tree. Apply a thin layer of mulch around the base of the tree, keeping it 2-3 inches away from the trunk to prevent moisture buildup. Water the tree deeply to help it recover from the stress of pruning.
Monitor the tree over the next few weeks for signs of new growth. You should see fresh buds appearing along the pruned branches by early spring. If you notice any unusual wilting, dark spots, or oozing sap, isolate the affected area and treat it with a fungicide if necessary. With proper care, your olive tree will reward you with bushier, healthier growth by summer.
Tips & tricks for perfect olive tree branch pruning
Late-winter pruning can transform your olive tree into a lush, productive beauty—here’s how to avoid common pitfalls and get professional results.
Tool Sharpness Matters: Dull pruners create jagged cuts that tear bark and invite disease. Test your tools by making a clean cut through a pencil—if it crushes instead of slices, sharpen your blades first. For thicker branches, a pruning saw with fine teeth will give you cleaner cuts without tearing. I learned this the hard way after struggling with stubborn branches that kept splitting.
Branch Collar Preservation: When making cuts in Step 3, never remove the branch collar—the swollen area where the branch meets the trunk. This tissue contains healing cells that protect the tree from infection. Cut just outside the collar at a 45-degree angle to allow water to run off while preserving this crucial area. Think of it as the tree's natural bandage.
Pruning Timing Secrets: Late winter (just before buds swell) is ideal because the tree's energy is stored, not actively growing. If you miss this window, avoid pruning during summer heat or winter frost—both extremes stress the tree. In warmer climates, you can prune year-round, but always choose a dry day above 40°F for best results. The tree's recovery depends on these conditions.
Visual Pruning Guide: Before making any cuts, step back and visualize the tree's natural shape. Olive trees thrive with an open, vase-like structure that allows sunlight to reach all branches. Remove branches that grow inward or cross others—these are the ones blocking light and air circulation. I keep a reference photo of properly pruned olive trees on my phone to compare against my own work.
Pro Tips for Olive Tree Branch
- Late-winter pruning can transform your olive tree into a lush, productive beauty—here’s how to avoid common pitfalls ...
- Tool Sharpness Matters: Dull pruners create jagged cuts that tear bark and invite disease. Test your tools by making ...
- Branch Collar Preservation: When making cuts in Step 3, never remove the branch collar—the swollen area where the bra...
Frequently asked questions
Got questions about pruning your olive tree branch? Here are some of the most common ones—and their answers—to help you get started with confidence!
When is the best time to prune an olive tree branch?
Late winter (just before new growth starts) is ideal for olive trees. This timing promotes vigorous spring regrowth while avoiding frost damage. Avoid pruning in fall or summer, as it can stress the tree or invite pests. If you missed late winter, early spring is your next best bet!
How much should I trim off an olive tree branch?
Remove no more than 25-30% of the tree’s total foliage in a single session. For branches, cut back to an outward-facing bud or lateral branch to encourage bushier growth. Avoid "topping" (cutting the main trunk)—this harms the tree’s structure. Think of it as a gentle haircut, not a buzz cut!
What if my olive tree branch isn’t growing after pruning?
Patience is key! Olive trees are slow growers. If you pruned correctly (clean cuts, healthy tools, proper timing), new shoots should appear in 4-8 weeks. If not, check for over-pruning, disease (like fungal spots), or poor soil drainage. A light fertilizer with nitrogen can also help stimulate growth.
Can I use olive tree branches for anything else besides pruning?
Pruned branches are great for cooking (olive wood imparts a mild flavor), crafts (wreaths, centerpieces), or even composting. Just ensure they’re disease-free. For cooking, soak branches in water for 24 hours to remove bitterness before using in stews or grilling.
What should I do if I accidentally prune too much?
Don’t panic! Olive trees are resilient. If you’ve over-pruned, focus on watering deeply and avoiding stress (like heavy fertilizing). New growth will be slower, but the tree should recover. For severe cases, consult a local arborist—they’ve seen it all!
Still unsure? Drop your question in the comments—we’re happy to help!
Wrapping up and next steps
An olive tree branch thrives on the right touch—late-winter pruning isn’t just about shaping, it’s about inviting vitality. By cutting back dead wood, opening the canopy, and encouraging new growth, you’re setting the stage for a healthier, bushier tree.
Remember, patience and precision pay off—your olive tree will reward you with lush foliage and abundant harvests in the seasons to come! 🌿
Ready to roll up your sleeves? Grab your tools, mark those branches, and get pruning! Start with just one section of your olive tree this year, observe how it responds, and build confidence as you expand your skills. Happy gardening!