Trees
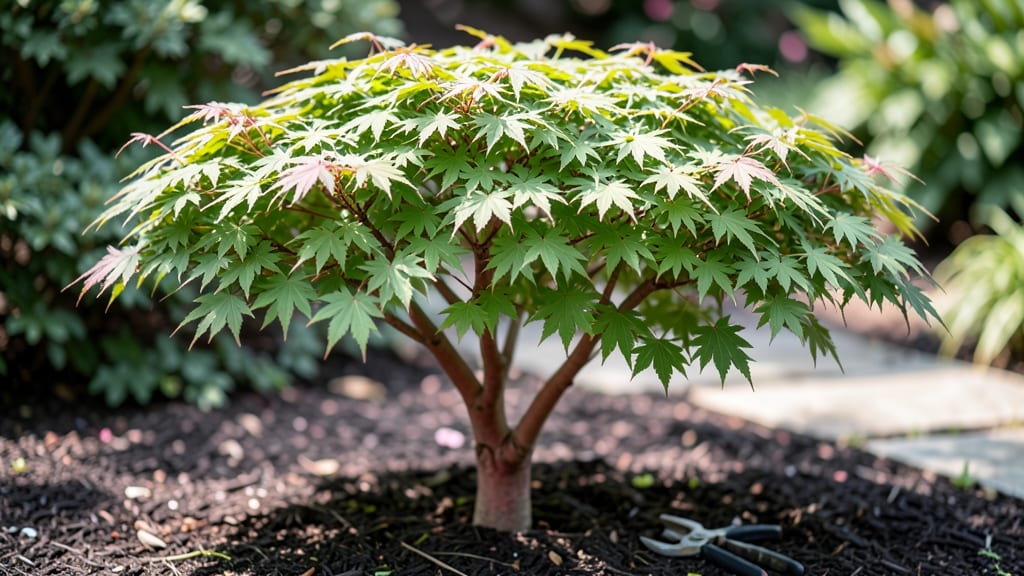
Japanese maple trees with vibrant green foliage are the Pacific Northwest's secret weapon for year-round color. 🌿 I've pruned these stunners for years, and the key to keeping their leaves lush and bright—even through our damp winters—is timing and technique.
Most gardeners over-prune in spring, which stresses the tree and dulls the color, but a few strategic cuts in late winter or early spring actually enhances that signature green.
The magic starts with sharp pruning shears and a clear goal: open up the canopy to let light filter through. Japanese maples hate heavy shade on their own branches, so aim to remove no more than 25% of the foliage in any one session.
This keeps the tree healthy while preserving that bright, sunlit green we all love. The right tools and a little patience make all the difference—no need for fancy equipment, just clean cuts and a steady hand.
What you'll end up with is a tree that looks like it stepped out of a Japanese garden, with delicate branches and leaves that stay vibrant green from spring through fall. The pruning also encourages new growth, which means more of those signature leaves next season.
Plus, you'll avoid the common mistake of pruning too late, which can leave your tree vulnerable to winter damage or fungal issues.
This method works for all Japanese maple varieties—whether you've got a dwarf 'Crimson Queen' or a towering 'Bloodgood'—as long as you adapt the cuts to their size and growth habit.
The Pacific Northwest's cool, wet climate actually makes these trees easier to prune than in hotter regions, so don't let the rain hold you back. Let's get those branches looking their best!
📚 In This Guide
- What you need
- Instructions
- Tips and common mistakes
- Wrapping up and next steps
What you need
- ● Pruning shears: Bypass pruners (sharp, 6–8" blades) for small branches.
- ● Loppers: 1–2 pair (8–12" blades) for thicker branches (½"–1.5" diameter).
- ● Pruning saw: 1 handheld saw (for branches >1.5" diameter).
- ● Disinfectant: 70% isopropyl alcohol or 10% bleach solution (1 part bleach, 9 parts water) to sterilize tools.
- ● Gloves: Heavy-duty, cut-resistant gloves (to protect from thorns and sap).
- ● Rag or paper towels: For cleaning tools between cuts.
- ○ Pruning sealant: Optional but helpful (e.g., tree wound dressing) for large cuts.
- ● Extension pole: For hard-to-reach branches (10–15 ft).
- ● Ladder: Sturdy, 3-sided ladder (if tree is >10 ft tall).
- ● Marking twine or flags: To tag branches for removal.
- ● Work boots: With ankle support (PNW soil can be muddy!).
- ● Safety glasses: To shield eyes from debris.
- ● Notebook & pen: For tracking pruning notes (e.g., branch sizes, dates).
- ● Knowledge: Familiarize yourself with Japanese maple pruning basics (e.g., when to prune, how to avoid over-thinning).
- ● Weather check: Prune on a dry, calm day (avoid rain or wind).
- ● Tree health: Ensure your tree is dormant (late winter/early spring) for best results.
- ● Local regulations: Check if your area requires permits for large tree work.
How to prune Japanese maple trees for lush green growth
Here's the proven method I use to keep my Pacific Northwest Japanese maples thriving through winter and summer.
✂️ Step 1: Prune During Dormancy for Best Results
Late winter or early spring—just as buds begin to swell—is the ideal time to prune your Japanese maple. This timing ensures you remove dead wood while leaving healthy growth intact. I always wait until after the last frost but before new leaves emerge, usually between February and March in the PNW. Pruning during dormancy minimizes stress on the tree and reduces disease risk.
Start by removing any dead, diseased, or crossing branches first. These are easy to spot—they'll be brown, brittle, or growing toward the center of the tree. Use clean, sharp pruning shears to make cuts just outside the branch collar, the swollen area where the branch meets the trunk. This ensures proper healing and prevents unsightly stubs.
🌿 Step 2: Thin and Shape for Airflow and Light Penetration
Japanese maples benefit from selective thinning to improve airflow and sunlight exposure. Focus on removing branches that grow inward or rub against others. These branches compete for resources and can create weak points in the tree's structure. I like to step back frequently and visualize the tree's natural shape—aim for an open, balanced canopy that lets light reach all branches.
When shaping, cut back to a healthy bud or lateral branch rather than making flush cuts. This encourages new growth in the right direction. For larger branches over ½ inch thick, use pruning saws to avoid tearing the bark. Always make clean cuts at a slight angle to prevent water from pooling and causing rot.
☀️ Step 3: Encourage New Growth with Strategic Cuts
To maintain vibrant green foliage, focus on rejuvenating older branches by cutting them back to younger, more vigorous growth. Select branches that show signs of slowing down—fewer leaves, thinner stems, or sparse foliage. Cut these back to a strong lateral branch or bud, usually about ¼ to ⅓ of the branch's length. This stimulates new growth while preserving the tree's overall structure.
Watch for water sprouts—fast-growing, upright shoots that appear along branches or trunks. These steal energy from the rest of the tree, so remove them entirely at the base. You'll see healthier, denser foliage develop within a few growing seasons as the tree redirects its energy to stronger branches.
⏰ Step 4: Clean Up and Monitor for Recovery
After pruning, gather all clippings and dispose of them properly to prevent disease spread. I always sterilize my pruning tools with rubbing alcohol between cuts to keep bacteria and fungi at bay. Once finished, give your Japanese maple a deep watering to help it recover from the stress of pruning, especially if the weather is dry.
Monitor the tree closely over the next few weeks for signs of stress—yellowing leaves, wilting, or oozing sap at pruning sites. These are normal reactions, but if they persist, your cuts may have been too severe. Japanese maples are resilient, though, and with proper care, you'll see fresh green growth emerging within 4-6 weeks. This is your signal that the pruning was successful.
Tips & tricks for pruning Japanese maple trees
Pruning your Japanese maple can transform its health and appearance—here's what I've learned to make the process even more effective.
Timing is Everything: In Step 1, don't rush to prune just because the weather is warm. The PNW's unpredictable spring means frost can still occur. Check your local frost dates and wait until buds begin to swell but haven't yet opened. This window—typically late February to March—gives you the perfect balance between removing dead wood and preserving new growth. I've learned this the hard way after seeing new buds damaged by unexpected late frosts.
Branch Selection Strategy: When thinning in Step 2, look beyond just the obvious crossing branches. Pay special attention to branches growing toward the center of the tree or those that create dense clusters. These create shaded areas that prevent sunlight from reaching inner leaves. I like to use a small mirror on a stick to check hard-to-see spots—it's amazing how many problem branches I've missed without this simple tool. Always prioritize removing branches that are thinner than a pencil first, as these are easier for the tree to recover from.
Cutting Technique for Healthy Growth: In Step 3, when making your strategic cuts, remember the "one-third rule" for rejuvenating branches. Cutting back to a strong lateral branch or bud about one-third of the branch's length stimulates vigorous new growth. For thicker branches, use the three-cut method: make your first cut about 6 inches from the trunk, then a second cut 3 inches from the first, and finally remove the branch cleanly. This prevents bark tearing and creates a smoother healing process. I've seen dramatic improvements in foliage density after applying this method consistently.
Post-Pruning Care: After completing all your cuts in Step 4, don't just walk away! Japanese maples appreciate a little extra attention during recovery. I've found that applying a thin layer of arborist's wood glue to larger cuts (over ½ inch thick) helps seal the wound and prevents disease entry. Also, consider wrapping the trunk with tree wrap if you're in a particularly windy area—this protects against sun scald that can occur during the tree's recovery period. Monitor your tree's progress by marking the longest new leaf on each branch with a small piece of colored tape—this gives you a clear visual reference for tracking growth.
Pro Tips for Japanese Maple Trees Green
- Pruning your Japanese maple can transform its health and appearance—here's what I've learned to make the process even...
- Timing is Everything: In Step 1, don't rush to prune just because the weather is warm. The PNW's unpredictable spring...
- Branch Selection Strategy: When thinning in Step 2, look beyond just the obvious crossing branches. Pay special atten...
Frequently asked questions
about keeping your Japanese maple trees green in the Pacific Northwest’s chilly climate—plus pruning hacks!Why is my Japanese maple losing its green leaves early in PNW winters?
Japanese maples (especially Acer palmatum) may drop leaves early due to cold shock or drought stress. The PNW’s wet winters can also cause fungal issues like anthracnose. Prune in late winter (after dormancy) to improve airflow and reduce moisture buildup. Mulch heavily to protect roots!
When’s the best time to prune for cold-hardy green foliage in the PNW?
Prune late winter to early spring (February–March) when the tree is dormant but before new growth starts. Avoid pruning in fall or winter—this risks sunscald or dieback from late frosts. Pro tip: If you must prune in summer, do it early morning to reduce stress!
Can I prune a Japanese maple too much? How do I avoid over-pruning?
Yes! Over-pruning stresses the tree, weakening its ability to stay green. Stick to the “1/3 rule”: Never remove more than 1/3 of the canopy in one season. Focus on dead, diseased, or crossing branches first. For green varieties, prioritize air circulation to prevent fungal spots.
What’s a good cold-hardy alternative if my Japanese maple struggles with PNW winters?
If your maple battles cold or wet conditions, try these PNW-friendly alternatives with green foliage:
- Bloodgood Japanese Maple (Acer palmatum ‘Bloodgood’) – Hardy to Zone 5, deep red but cold-tolerant.
- Emperor I Japanese Maple (Acer palmatum ‘Emperor I’) – Zone 5-6, glossy green, and drought-resistant.
- Amur Maple (Acer ginnala) – Native to cold regions, Zone 3-8, and thrives in shade.
All three handle PNW’s wet winters better than some delicate varieties!
My Japanese maple’s leaves are yellowing—is it dying, or just adjusting to PNW weather?
Yellowing can mean nutrient deficiency (common in acidic PNW soil), overwatering, or root rot. Check for:
- Healthy roots (not mushy or black).
- Well-draining soil (amend with compost if clay-heavy).
- Balanced fertilizer (use iron supplements if chlorosis is severe).
If the tree is otherwise vigorous, it’s likely just adjusting to seasonal changes!
Wrapping up and next steps
Japanese maple trees with their stunning green foliage are a dream for Pacific Northwest gardeners—especially when cared for with precision pruning. 🌿 Whether you're trimming for shape, health, or winter resilience, the key is patience and the right tools.
Now that you’re armed with expert tips, go ahead and give your tree the TLC it deserves!
Ready to take the next step? Schedule a pruning session on a mild day, and don’t forget to monitor your tree’s growth throughout the seasons. Happy gardening!