Pruning
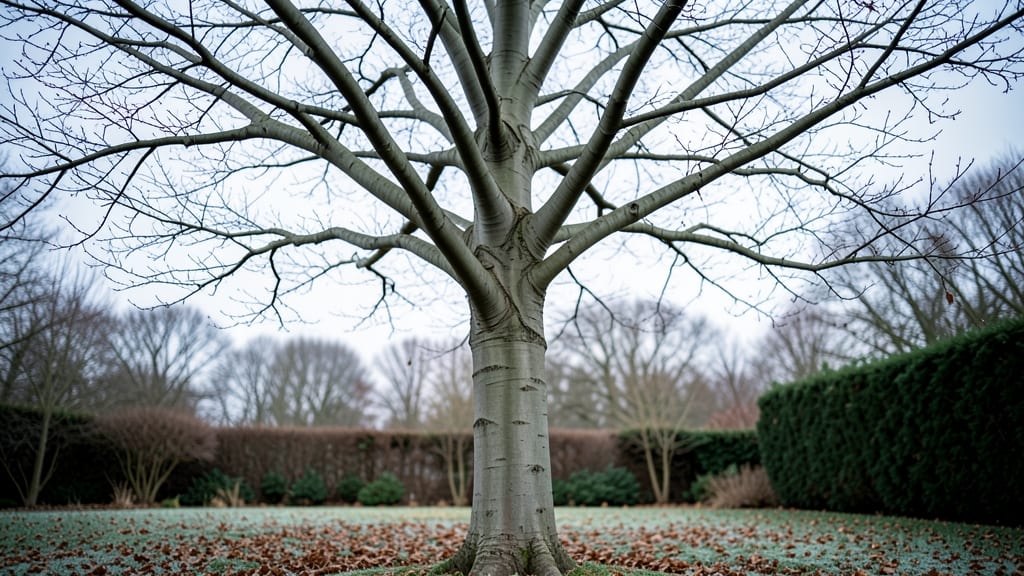
Winter pruning your maple tree isn’t just about shaping—it’s about setting up a stronger spring comeback. 🌳 I’ve learned that late-season trimming, done right, helps maples heal faster and resist winter stress. The key is timing: prune after the first hard frost but before the ground freezes solid.
Most people wait until spring, but maples actually handle winter pruning better than many trees. They bleed less sap when dormant, and the clean cuts promote fresh growth as soon as temperatures rise. Just avoid heavy pruning if your winters are brutal—stick to light shaping or removing dead branches.
You’ll see the difference next spring: fewer suckers, better branch structure, and leaves that emerge vibrant green instead of sparse or yellowed. The right cuts now mean less cleanup later and a tree that looks like it’s been professionally tended.
Works for all maple varieties—sugar, red, or silver—just adjust the timing slightly based on your frost dates. Here’s how to do it without stressing the tree or yourself.
📚 In This Guide
- What you need
- Instructions
- Tips and common mistakes
- Wrapping up and next steps
What you need
- ● Pruning shears: Sharp, bypass shears (for cuts up to ½ inch thick). Pro tip: Clean blades with rubbing alcohol to prevent disease spread! 💡
- ● Loppers: Heavy-duty, bypass loppers (for branches ½ to 2 inches thick). Look for ergonomic handles for comfort.
- ● Pruning saw: A curved-tooth saw for branches 2+ inches thick. Carbon steel blades hold up best in winter.
- ● Ladder: Extension ladder (20–30 ft) with non-slip feet. Safety first: Always have a spotter! ⚠️
- ● Work gloves: Cut-resistant gloves (e.g., Mechanix or Wagner) to protect hands from thorns and splinters.
- ○ Disposable pruning bags: 3–5 gallon-sized bags for collecting debris. Optional: Use a tarp beneath the tree to catch fallen leaves.
- ● Hand sanitizer or rubbing alcohol: For sterilizing tools between cuts (prevents bacterial/fungal spread).
- ● Measuring tape: 10–25 ft tape for assessing branch size and spacing.
- ● Pole saw: For high branches without a ladder (16–20 ft reach).
- ● Tree wound dressing: Not recommended for maples (they seal wounds naturally), but useful for other species.
- ● First-aid kit: Bandages, antiseptic wipes, and tweezers for minor cuts.
- ● Camera or phone: To document pruning progress or before/after shots!
- ● Hot cocoa & snacks: Because winter pruning deserves a reward. ☕🍪
Step-by-Step instructions for late-season maple tree pruning
Here's how to trim your maple trees in winter for healthier spring growth—no guesswork, just clear steps.
✂️ Step 1: Choose the Right Time and Conditions
Prune maples between late winter and early spring, ideally when the tree is fully dormant but before buds begin to swell. This is usually February through March in most climates, though exact timing depends on your region's last frost date. I wait until temperatures stay consistently above 32°F to avoid stressing the tree with cold snaps.
Pick a calm, dry day for trimming—windy or rainy conditions can stress the tree and make cuts heal poorly. If you're unsure about timing, look for brown, brittle leaves still clinging to branches and no visible buds on the twigs. This confirms dormancy and the perfect window for pruning.
🌿 Step 2: Gather Tools and Safety Gear
You'll need clean, sharp pruning tools—a pruning saw for thick branches over 1 inch in diameter, loppers for branches between ½ to 1 inch, and hand pruners for smaller cuts. Disinfect your tools with rubbing alcohol or a 10% bleach solution to prevent spreading disease between cuts.
Wear gloves (pruning can be messy, and maple sap is sticky), long sleeves, and eye protection—maple branches can snap unpredictably. I also keep a first-aid kit nearby, just in case. Lay down drop cloths or tarps under the tree to catch falling branches and debris, making cleanup easier later.
✂️ Step 3: Identify and Remove Dead or Damaged Branches
Start by scanning the tree for dead, diseased, or crossing branches. Dead branches are brittle, hollow, or lack bark, while diseased ones may show discoloration, fungal growth, or oozing sap. Use your pruners or saw to make clean, angled cuts just outside the branch collar—the swollen area where the branch meets the trunk.
Remove any branches that are rubbing against each other or growing inward, as these can create wounds and weaken the tree over time. If you're unsure whether a branch is dead, scratch the bark with your fingernail—live wood will have a greenish layer beneath, while dead wood will be dry and brown.
☀️ Step 4: Thin the Canopy for Better Airflow and Light
Next, focus on thinning the canopy by selectively removing branches to improve airflow and sunlight penetration. Aim to remove no more than 25% of the tree's foliage in a single session—over-pruning stresses maples and can lead to weak growth. Start at the outer edges of the tree and work your way inward.
Look for branches that are crowded or growing too close together. Use your pruners to make cuts just above a bud or lateral branch that grows in the direction you want the tree to fill. Avoid cutting back to a stub—this invites decay and weakens the tree. Step back frequently to assess the tree's shape and ensure you're maintaining a balanced, open canopy.
🪴 Step 5: Clean Up and Apply Wound Treatment (If Needed)
After pruning, rake up and dispose of all debris—leaving branches on the ground can harbor pests and diseases. Wipe down your tools with rubbing alcohol again to prevent contamination. For larger wounds (over 2 inches in diameter), consider applying wound dressing or pruning sealant to protect the tree, though many arborists argue this isn't strictly necessary for maples.
Water the base of the tree deeply if your region has experienced dry spells, but avoid overwatering—maples prefer well-drained soil. Mulch around the tree's drip line (the edge of the tree's canopy) with 2-4 inches of organic mulch, keeping it 6 inches away from the trunk to prevent rot. This helps retain moisture and regulates soil temperature as spring approaches.
Tips & tricks for perfect maple tree winter pruning
A few key tricks will help you avoid common mistakes and make your late-season maple pruning more effective than ever.
Timing is Everything: The February-through-March window is critical because it's when maples are fully dormant but before sap starts flowing heavily. I've seen people prune too early when branches are still brittle from cold snaps—this can cause unnecessary stress. Look for that perfect balance: no visible buds but still some brown leaves clinging to branches. This tells you the tree is ready for pruning without risking excessive sap flow.
Tool Sharpness Matters: Dull tools crush branches instead of making clean cuts, which creates larger wounds that take longer to heal. I always sharpen my pruning saw and loppers before starting—you can test sharpness by making a clean cut through a small branch. If you're getting jagged edges, stop and sharpen immediately. A little extra time here prevents big problems later.
Cutting Technique Prevents Disease: When removing branches in Step 3, always make your cuts just outside the branch collar—the swollen area where the branch meets the trunk. This is where the tree's natural healing begins. I've seen too many people cut flush to the trunk, which creates open wounds that invite fungal infections. For branches over 2 inches thick, make the cut at a slight angle to help water run off and prevent rot.
Canopy Thinning Strategy: In Step 4, remember that removing no more than 25% of the foliage is key. I like to visualize the tree's shape from all sides as I work—step back every few cuts to check for balance. Focus on removing branches that are growing inward or crossing others, as these create weak points. The goal is to create an open, airy canopy that allows sunlight to reach all parts of the tree evenly.
Pro Tips for Maple Tree In Winter
- A few key tricks will help you avoid common mistakes and make your late-season maple pruning more effective than ever.
- Timing is Everything: The February-through-March window is critical because it's when maples are fully dormant but before sap starts flowing heavily.
- Tool Sharpness Matters: Dull tools crush branches instead of making clean cuts, which creates larger wounds that take longer to heal.
Frequently asked questions
about maple tree winter pruning—because even the pros have questions! Here’s what you need to know before grabbing those shears.When is the exact best time to prune a maple tree in winter?
The ideal window is late winter, after the worst cold snaps but before buds swell—typically February to early March in most U.S. zones. Prune too early (like January), and you risk frost damage; wait too late (April), and you’ll encourage early sap flow or pest activity. Check your local frost dates for precision!
Will pruning a maple tree in winter kill it?
Not if done correctly! Maple trees are dormant in winter, so they won’t bleed sap excessively (unlike spring pruning). However, avoid heavy pruning—stick to removing no more than 25% of the canopy to prevent stress. Pro tip: Cut branches just above a bud or lateral branch to encourage healthy regrowth. Warning: Never prune during extreme cold or ice storms.
How do I stop sap from bleeding after winter pruning?
Maple sap bleeding is normal but can be messy. To minimize it:
- Prune on cooler days (below 40°F) to slow sap flow.
- Use clean, sharp tools to make quick cuts—ragged edges bleed more.
- Apply pruning sealant (like Tanglefoot Tree Wound Pruning Seal) to cuts wider than ½ inch.
- Avoid pruning sugar maples in late winter if you’re harvesting sap for syrup!
Most bleeding stops within a few days to weeks.
Can I prune a young maple tree the same way as a mature one?
Not quite! Young maples (under 10 years old) need gentle shaping to establish a strong structure. Focus on:
- Removing dead, crossing, or rubbing branches first.
- Avoid heavy topping—it weakens the tree long-term.
- Prune to open the canopy for airflow (prevents disease).
Mature trees can handle more aggressive pruning (like removing large limbs), but always prioritize structural integrity over aesthetics.
What if I miss winter pruning? Can I still do it in spring?
Yes, but with caveats! Spring pruning (March–April) is riskier because:
- Maples bleed sap heavily, which can stress the tree.
- You’ll miss the dormant season’s natural healing advantage.
- Pests (like borers) are more active, so sanitize tools thoroughly.
If you must prune in spring, do it early and focus on removing only dead/diseased wood. For heavy pruning, winter is still best!
Wrapping up and next steps
Winter is the perfect time to give your maple tree the care it needs for a vibrant, healthy spring! By pruning now—when the tree is dormant—you’re not only shaping its structure but also promoting stronger growth and preventing pests or disease.
Remember, timing, technique, and tools are key, so take your time and enjoy the process. 🌳✨
Ready to transform your maple tree? Grab your pruners and get started—your future spring blooms will thank you! For more tips, check out our guide on maple tree care year-round.