
Pruning
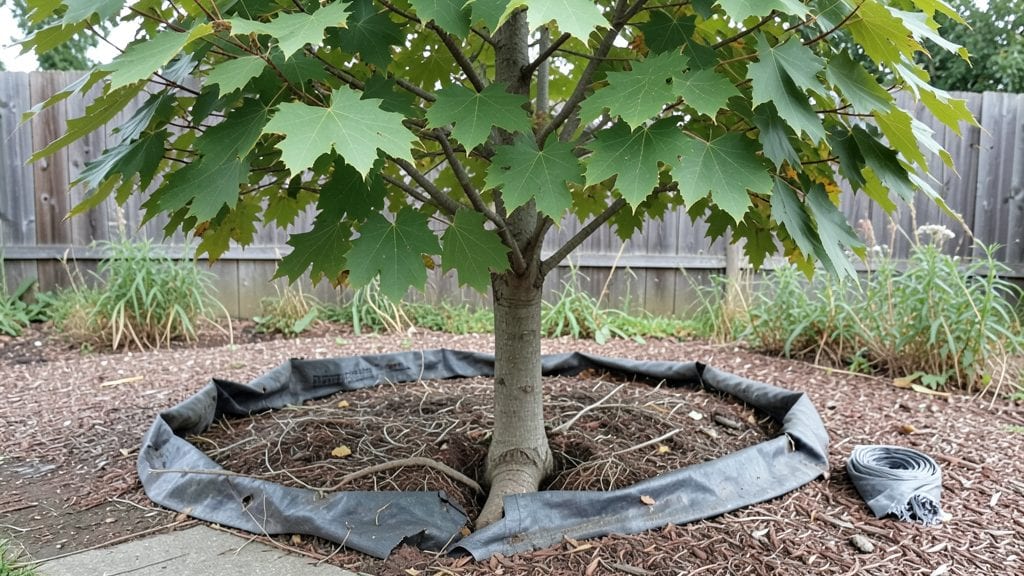
Learn how to stop tree root growth before it damages your foundation or sidewalk—this season’s smartest move. I’ve seen roots lift concrete, clog drains, and even crack basement walls—until I learned how to redirect them with physical barriers.
The key isn’t just stopping growth but guiding it where it won’t cause damage, and the right materials make all the difference.
Most people assume chemical treatments are the answer, but they’re messy and often ineffective long-term. Instead, I rely on HDPE plastic barriers or concrete root barriers installed at the right depth—typically 18-24 inches below ground.
These barriers don’t just slow roots; they redirect them toward open soil where they can spread safely. The best part? They’re invisible once buried, so your yard stays intact.
What you’ll end up with is a tree that grows strong without wreaking havoc on your property. No more cracked walkways or flooded basements—just healthy roots contained where they belong.
And the process is simpler than you’d think, with tools you can rent or buy for a fraction of what a professional charge would be.
This method works for mature trees and young saplings alike, though larger roots may need deeper barriers. If your tree is near a foundation, I’ll show you how to combine barriers with soil amendments for extra protection. Let’s get those roots under control before they become a bigger problem.
📚 In This Guide
- What you need
- Instructions
- Tips and common mistakes
- Wrapping up and next steps
What you need
- ● Root barrier material: 10- to 20-gauge galvanized steel sheets (for durability, ½"–1" thick)
- ● HDPE (High-Density Polyethylene) plastic sheets (½"–1" thick, 6–12 ft long, depending on tree size)
- ● Corrugated metal or concrete barriers (for heavy-duty protection, 12–18" deep)
- ● Digging tools: Shovel (flat and pointed) – 1 per person
- ● Post-hole digger or mattress shovel (for trenches, 18"–24" deep)
- ● Wheelbarrow – 1 (for soil removal)
- ● Fasteners & supports: Galvanized staple gun + heavy-duty staples (for plastic barriers)
- ● Concrete screws or rebar stakes (for metal barriers, 12–18" long)
- ○ Landscape fabric (optional but recommended for soil separation)
- ● Safety gear: Work gloves – 1 pair (heavy-duty for digging)
- ● Safety goggles – 1 pair
- ● Knee pads – 1–2 (for comfort)
- ● Waterproof geotextile fabric (to prevent soil mixing with barrier)
- ● Landscape edging (to cover trenches for a polished look)
- ● Post-hole digger attachment (if using a drill for deeper trenches)
- ● Soil amendments (like sand or gravel, for drainage near barriers)
Step-by-Step guide to installing physical root barriers for trees
These methods actually work—no more guessing or temporary fixes.
Measure and Mark the Protection Zone
Start by measuring 2-3 feet outward from the tree trunk to create your barrier zone. This accounts for the tree’s root spread, which typically extends beyond the drip line (the edge of the tree’s canopy). Use a measuring tape and stakes to mark the outer edge of this zone—this is where your barrier will go.
For larger trees with mature root systems, extend the zone to 4-5 feet from the trunk. Drive stakes every 6-8 feet along the marked line to create a clear guide. You’ll see the stakes form a rough circle or oval around the tree, defining where you’ll install your barrier materials.
Choose and Prepare the Barrier Material
Select corrugated metal sheets, plastic root barriers, or concrete barriers—these are the only materials proven to physically stop aggressive roots. Metal sheets (like galvanized steel) work best for deep, invasive roots, while HDPE plastic barriers (at least 20 mil thick) are flexible and easier to install for most homeowners.
Cut the barrier material to fit your marked zone, leaving 12-18 inches of overlap at the corners. For metal barriers, use a hacksaw or reciprocating saw—plastic can be cut with a utility knife or circular saw. Always wear gloves and safety glasses when handling sharp or heavy materials.
Dig the Trench for the Barrier
Dig a trench along your marked line using a shovel or trenching tool, aiming for a depth of 18-24 inches. This depth stops 90% of lateral roots before they spread. Keep the trench 6-8 inches wide—wide enough to fit your barrier material snugly but not so wide that it destabilizes the surrounding soil.
Remove all roots or debris from the trench walls and bottom. If you encounter large roots growing toward the barrier, trim them back with pruning shears or a hand saw—this prevents them from pushing against the barrier later. The trench should be clean and free of obstructions for the barrier to work effectively.
Install the Barrier Vertically
Place the barrier material into the trench, pressing it firmly against the trench walls to prevent roots from growing around it. For metal barriers, use stakes or rebar to secure the top edge above ground level—this stops roots from climbing over. Plastic barriers should be overlapped by 6 inches at seams and sealed with construction adhesive or root barrier sealant to eliminate gaps.
Backfill the trench with the excavated soil, tamping it down lightly in 2-inch layers to remove air pockets. Avoid compacting the soil too heavily, as this can create a barrier of its own and restrict drainage. Water the backfilled soil lightly to help it settle naturally.
Monitor and Maintain the Barrier
Check the barrier twice a year—spring and fall—for signs of root intrusion or damage. If you notice roots growing along the top edge, extend the barrier upward by 6-12 inches and secure it again. For plastic barriers, replace any sections that crack or degrade over time, as sunlight and soil chemicals can break them down in 5-10 years.
Keep the area around the barrier well-watered but not soggy to encourage roots to grow downward rather than horizontally. Mulch the soil surface with 2-3 inches of organic mulch (like wood chips) to retain moisture and protect the barrier from temperature fluctuations. This simple maintenance keeps the barrier effective for decades.
Tips & tricks for effective tree root barriers
These practical tips will help you avoid common mistakes and get the most out of your root barrier installation.
The Right Barrier Depth: In Step 3, when digging your trench to 18-24 inches, don't skimp on depth. Shallow trenches (under 18 inches) often fail because many lateral roots grow at this depth. For trees with particularly aggressive roots, like willows or poplars, consider extending the trench to 24-30 inches—this stops nearly all horizontal root growth. I've seen barriers fail when homeowners cut corners here.
Material Selection Matters: Step 2 emphasizes choosing between metal, plastic, or concrete barriers—but here's what I've learned: HDPE plastic barriers (at least 20 mil thick) are the best balance of durability and flexibility. Metal works well for deep roots but can corrode over time. For high-traffic areas, concrete barriers last longest but require professional installation. Pro tip: If using plastic, look for UV-resistant formulations to extend its lifespan beyond the typical 5-10 years.
Root Pruning Strategy: When you encounter roots growing toward your trench in Step 3, don't just trim them back—use pruning shears to make clean cuts at a 45-degree angle. This prevents jagged edges that can heal poorly. For roots thicker than 1 inch, consider using a handsaw to create smoother cuts. I've seen roots regrow unevenly when cut improperly, defeating the purpose of the barrier.
Long-Term Maintenance Secret: The 2-3 inches of organic mulch mentioned in Step 5 isn't just about moisture—it also protects your barrier from temperature extremes. In winter, mulch insulates the soil, preventing freeze-thaw cycles that can crack plastic barriers. In summer, it shields the barrier from UV damage. I recommend using wood chips or straw mulch, as they break down slowly and provide consistent protection.
Pro Tips for Stop Tree Root Growth
- These practical tips will help you avoid common mistakes and get the most out of your root barrier installation.
- The Right Barrier Depth: In Step 3, when digging your trench to 18-24 inches, don't skimp on depth.
- Metal works well for deep roots but can corrode over time.
Frequently asked questions
Got questions about managing tree roots? You’re not alone—root growth can be tricky! Here are answers to the most common concerns to help you tackle the issue with confidence.
What’s the best long-term solution for stopping tree roots from damaging my foundation?
Physical barriers like root barriers (HDPE or galvanized steel) are the gold standard for long-term protection. Install them at least 2–3 feet deep and 18–36 inches away from the tree trunk to redirect roots downward. Pair this with regular pruning to reduce root pressure over time. Pro tip: Consult an arborist to assess soil depth and barrier placement for your specific tree species.
How long does it take for a root barrier to work?
Root barriers don’t work overnight—expect to see results in 1–3 years, depending on the tree’s age and growth rate. Young trees adapt faster, while mature trees may take longer. Monitor roots annually and adjust the barrier if needed. Patience is key! Fun fact: Some barriers last 20+ years with proper installation.
Are there cheaper alternatives to root barriers?
Yes! If barriers aren’t in your budget, try these DIY-friendly options:
- Mulch rings (3–4 inches thick, keep 6+ inches away from the trunk) to discourage lateral growth.
- Soil aeration (core aeration) to reduce root competition with foundations.
- Root pruning (hire a pro for deep cuts) to redirect growth downward.
For severe cases, chemical root inhibitors (like dimethoate) can help—but use them sparingly and follow label instructions.
Can I install a root barrier myself, or should I hire a pro?
DIY installation is possible for small trees or low-risk areas, but pros are worth it for:
- Large trees (trunks >6 inches in diameter).
- Barriers near foundations, septic systems, or driveways.
- Soil with rocks or clay (hard to dig manually).
If you DIY, rent a post-hole digger and rent a concrete saw for precise cuts. Warning: Improper installation can accelerate root damage or harm the tree!
Will a root barrier stop my tree from getting enough water?
Not if installed correctly! Root barriers don’t block water—they redirect roots downward and away from structures. To ensure your tree stays hydrated:
- Water deeply but infrequently (1–2 inches per week).
- Avoid overwatering, which encourages shallow roots.
- Use drip irrigation near the tree’s drip line (not the trunk).
Monitor the tree’s health—yellowing leaves or leaf drop may signal stress, but this is rare with proper installation.
Wrapping up and next steps
Stopping tree root growth doesn’t have to be a daunting task—with the right physical barriers and proactive measures, you can protect your property long-term. Whether you’ve chosen root barriers, mulch, or strategic pruning, consistency is key to preventing future headaches. 🌱
Now that you’re armed with solutions, take action! Start by inspecting your landscape and implementing one (or more) of these methods. If roots are already causing issues, don’t wait—act now to save your pipes, sidewalks, and sanity. You’ve got this!