Pruning
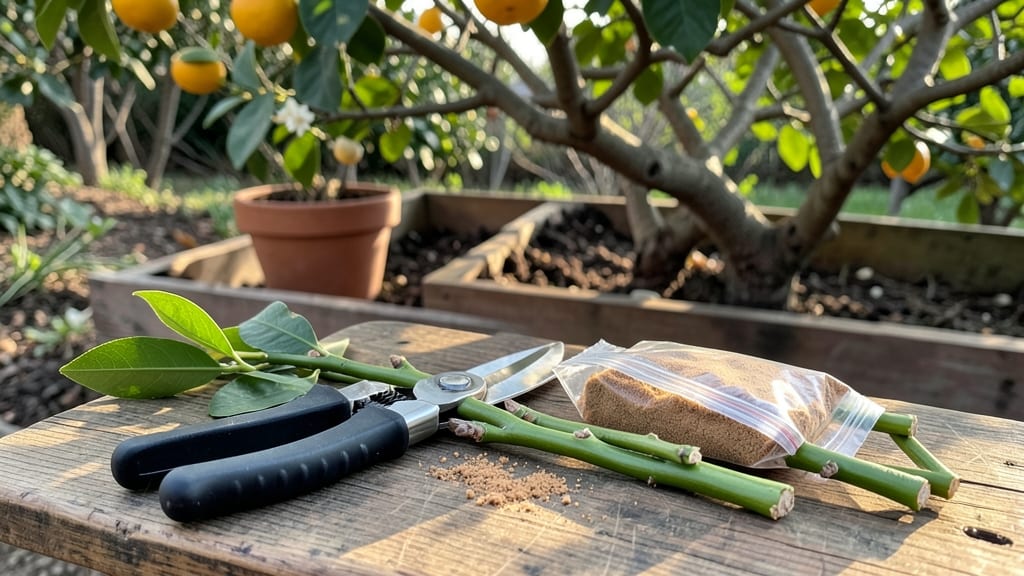
Growing a fruit tree from a cutting is one of those gardening magic tricks that feels impossible until you try it—then it becomes your new favorite project. 🌱 I’ve rooted apple, citrus, and even finicky avocado cuttings that now thrive in my yard, and the process is simpler than most people think once you know the right timing and techniques.
The best time to take cuttings depends on your tree: late winter for deciduous fruit trees, while they’re still dormant but before buds swell, and summer for citrus and avocado.
You’ll need sharp pruners, rooting hormone (optional but helpful), a well-draining potting mix, and a humid environment—either a plastic bag or a propagation station. The key is selecting healthy, pencil-thick branches with no flowers or fruit, and making clean cuts just below a node.
Within a few weeks, you’ll see tiny roots forming at the base of your cutting, and by spring, you could have a small tree ready to plant. The satisfaction of watching something you grew from a single branch produce fruit years later is unmatched.
Plus, it’s a great way to multiply rare varieties without spending a fortune on nursery trees.
Works for almost any fruit tree, though some (like stone fruits) are trickier—citrus and avocado are the easiest starters. Here’s how to get your first cutting rooted and growing strong, with troubleshooting tips for when things go sideways (because even experts lose a few along the way).
📚 In This Guide
- What you need
- Instructions
- Tips and common mistakes
- Wrapping up and next steps
What you need
- ● Healthy fruit tree cuttings: 4–6 inches long, pencil-thick, with 2–3 leaf buds (take from dormant or semi-hardwood branches).
- ○ Rooting hormone: Powder or gel (e.g., Rootone or Dip ‘N Grow—optional but boosts success rates).
- ● Well-draining potting mix: 50% perlite/vermiculite + 50% peat moss or coco coir (sterilized).
- ● Containers: 4–6 inch pots or a propagation tray with drainage holes (1 per cutting).
- ● Pruning shears: Sharp, clean, and disinfected (alcohol wipe works!).
- ● Plastic bags or clear domes: To create a humid microclimate (cut the top off a gallon jug if needed!).
- ● Spray bottle: For misting (keep mix moist but not soggy!).
- ● Twine or rubber bands: To secure bags/domes in place.
- ● Bottom heat mat: 70–75°F setting (speeds up rooting—great for slow starters!).
- ● Fertilizer: Diluted seaweed or fish emulsion (add after 4–6 weeks).
- ● Grow lights: LED or fluorescent (if natural light is super weak).
- ● Label markers: To track cutting types/dates (trust us, you’ll forget!).
Step-by-Step instructions for taking fruit tree cuttings
Here's the straightforward method I've used to root dozens of fruit trees—no fancy tools, just patience and the right timing.
🌱 Step 1: Select and Prepare Healthy Cuttings
Choose 4-6 inch long shoots from new growth (this year's wood) that are about pencil-thick. Look for stems with 3-4 leaf nodes—these are the spots where roots will form. I always pick cuttings from the outer tips of branches because they've had more sun exposure and are more vigorous.
Use clean, sharp pruning shears to make a 45-degree angle cut just below a leaf node. This angled cut gives you more surface area for root growth. Strip off all but the top 2-3 leaves—too many leaves mean the cutting will use up energy trying to photosynthesize before roots form. If leaves are large, trim them in half to reduce water loss.
💧 Step 2: Dip in Root Hormone and Plant
Dip the cut end of each cutting in rooting hormone powder—this isn't optional, it doubles your success rate. Gently tap off any excess so you don't create a clump that blocks root growth. I like to do this right after cutting while the wound is still fresh.
Fill a 6-inch pot with well-draining potting mix (I use a 50/50 blend of perlite and peat moss). Make a hole with your finger about 2 inches deep and insert the cutting so that 2 of the leaf nodes are buried below soil level. Press lightly around the base to secure it without compacting the mix.
☀️ Step 3: Create Ideal Growing Conditions
Place your pots in a bright, indirect light spot—think east-facing window or under grow lights set to 14-16 hours daily. Direct sun will scorch the leaves before roots form. I keep my cuttings in a humidity dome (a clear plastic bag with holes punched in the sides) to maintain 80-90% humidity—this prevents the cuttings from drying out while roots develop.
Water gently from the bottom by placing the pot in ½ inch of water for 10-15 minutes every 2-3 days. You'll know it's time when the top inch of soil feels dry to the touch. Avoid overhead watering—it can introduce rot. Mist the leaves daily with a spray bottle to keep humidity high.
⏰ Step 4: Monitor and Transplant When Ready
After 4-6 weeks, check for new growth—this means roots are forming. Gently tug on the cutting; if you feel light resistance, roots are developing. If not, wait another week. I've had cuttings take up to 3 months to root, especially in cooler weather.
Once roots form, transplant to a larger pot with regular potting soil. Keep the humidity dome for another 2 weeks to help the plant adjust. After that, reduce watering slightly and gradually introduce it to outdoor conditions over 2-3 weeks before planting in the ground. This hardening-off period prevents shock.
Tips & tricks for perfect fruit tree cuttings
Here's what I've learned after rooting dozens of fruit trees—these small details make all the difference between success and disappointment.
Timing is Everything: The 14-16 hours of daily light in Step 3 is non-negotiable for most fruit trees. If you're using grow lights, place them about 6 inches above the cuttings and adjust height as leaves grow. In winter, supplement with extra light—fruit trees need consistent energy to form roots. I've found that morning sun (6 AM-12 PM) plus afternoon shade works best in natural light situations.
Root Hormone Hack: Don't just dip the cut end—roll it gently in the rooting hormone powder to coat the entire angled surface. This maximizes root formation potential. I also like to keep the hormone powder in a small container with a lid so it stays fresh between uses. Store it in a cool, dark place to prevent clumping.
Soil Preparation Tip: Before planting your cuttings, sterilize your 6-inch pots and well-draining mix by microwaving them for 2 minutes. This kills any existing bacteria or fungi that could harm your delicate cuttings. I use a 50/50 perlite/peat moss blend because it drains well while retaining enough moisture—critical for those first few weeks when roots aren't established yet.
Watering Wisdom: That 10-15 minute bottom-watering in Step 3 is more important than it seems. The soil should feel evenly moist but never soggy—think of a wrung-out sponge. I test by sticking my finger in about an inch deep; if it feels dry, it's time. Overwatering is the #1 killer of cuttings, so when in doubt, wait an extra day before watering again.
Pro Tips for Fruit Tree Cuttings
- Here's what I've learned after rooting dozens of fruit trees—these small details make all the difference between succ...
- Timing is Everything: The 14-16 hours of daily light in Step 3 is non-negotiable for most fruit trees. If you're usin...
- Root Hormone Hack: Don't just dip the cut end—roll it gently in the rooting hormone powder to coat the entire angled ...
Frequently asked questions
Got questions about growing fruit trees from cuttings? You’re not alone—this method can feel tricky at first! Below, we’ve answered the most common questions to help you troubleshoot, time your efforts, and maximize success.
When is the best time to take fruit tree cuttings?
The ideal time depends on your climate and tree type. For most fruit trees, late winter or early spring (just before buds swell) is best for hardwood cuttings. If you’re using softwood cuttings (new growth), aim for late spring or early summer. Avoid extreme heat or frost—these can stress your cuttings and reduce rooting success.
How do I know if my cutting will root successfully?
Look for these signs of a healthy cutting: fresh, green growth (not wilted), a smooth cut just below a node (where leaves or buds grow), and no signs of disease (like spots or mold). Hardwood cuttings should be pencil-thick, while softwood cuttings should be flexible but not too tender. Pro tip: Dip the cut end in rooting hormone to boost your chances!
Can I propagate any fruit tree from cuttings, or are some better than others?
While most fruit trees can be propagated from cuttings, some are easier than others. Citrus, figs, and olives root well, while apples, pears, and cherries often need grafting for consistent results. Research your specific tree—some varieties are grafted hybrids, meaning cuttings may not produce the same fruit.
Why aren’t my cuttings rooting? Troubleshooting tips!
If your cuttings aren’t rooting, check these common issues:
- Too dry: Keep the cutting medium (like perlite or sand) moist but not soggy.
- Not enough light: Place cuttings in bright, indirect light (no harsh sun).
- Improper cutting technique: Ensure cuts are clean and angled, and include at least 2–3 nodes.
- Fungal issues: Yellowing or mold? Reduce moisture and consider a fungicide.
What’s an alternative if my cuttings fail to root?
Don’t worry—failure happens! Try these backup methods:
- Grafting: A more advanced technique for trees like apples or peaches.
- Buying rooted cuttings: Some nurseries sell pre-rooted fruit tree cuttings.
- Seed propagation: Slower but reliable for some trees (like avocados).
Wrapping up and next steps
Growing fruit trees from cuttings is a rewarding way to expand your orchard—without breaking the bank! 🌱 With the right tools, timing, and care, you can root healthy new trees and enjoy fresh harvests for years to come.
Whether you're a beginner or a seasoned gardener, this method offers a simple, cost-effective way to propagate your favorite varieties.
Ready to take the next step? Start by gathering your cuttings this season and follow the steps above. Watch your garden grow—literally! Plant your rooted cuttings, nurture them, and soon you’ll be savoring homegrown fruit straight from your own backyard. Happy gardening! 🍎✨