Propagation
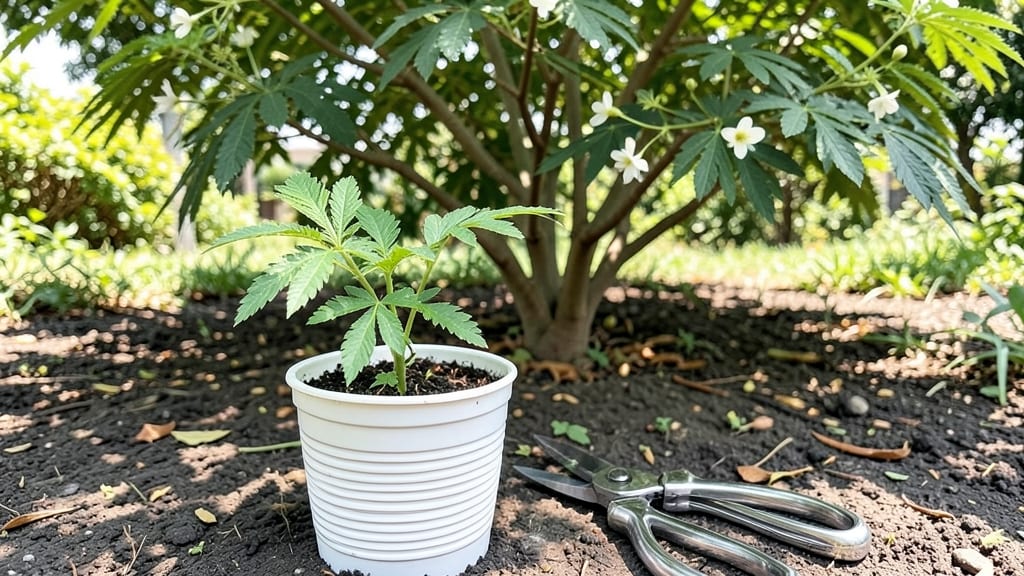
Growing a moringa tree from cuttings is the fastest way to get a productive plant—root growth happens in just 3 weeks if you follow the right steps.
I learned this the hard way after my first batch of cuttings took twice as long to root, but now I’ve perfected the process for reliable, speedy results. The secret lies in selecting the right cuttings and creating the ideal conditions, whether you’re rooting in water or soil.
You’ll need just a few simple supplies: sharp pruning shears, a clean container, rooting hormone (optional but helpful), and either water or a well-draining soil mix. The best cuttings come from healthy, semi-hardwood branches—about pencil-thick and 6-8 inches long.
Avoid woody stems or overly green tips, as they root poorly. Once you’ve got your cuttings ready, the real magic happens in the next phase, where humidity and warmth become your best friends.
Within 2-3 weeks, you’ll see tiny white roots forming, and by week 4, your cuttings will be ready to transplant. The leaves stay vibrant, the growth is rapid, and you’ll have a thriving young tree in no time.
Whether you’re growing for nutrition, shade, or just the joy of watching something grow this fast, this method delivers results that feel almost too good to be true.
Works best in warm climates but adapts well to indoor setups with grow lights. The key is patience and consistency—no need for fancy equipment, just the right technique. Let’s get those cuttings rooted!
📚 In This Guide
- What you need
- Instructions
- Tips and common mistakes
- Wrapping up and next steps
What you need
- ● Moringa cuttings: 4–6 healthy, semi-hardwood stems (6–12 inches long, about pencil-thick). Choose young, green branches from a mature moringa tree.
- ○ Rooting hormone (optional but helpful): A small bottle (e.g., Clonex or Rootone) to speed up root development.
- ● Well-draining potting mix: A 5–10 gallon container filled with a mix of 50% perlite, 30% coconut coir, and 20% compost.
- ● Small pots or trays: 4–6 individual pots (4–6 inches in diameter) or a seedling tray with drainage holes.
- ● Clear plastic bags or domes: To create a humid environment (e.g., a gallon-sized ziplock bag or a propagation dome).
- ● Spray bottle: For misting cuttings (8–12 ounces with a fine mist nozzle).
- ● Scissors or pruning shears: Sharp and clean (sterilize with rubbing alcohol).
- ● Watering can or cup: For gentle watering (avoid over-saturating the soil).
- ● Humidity tray: A shallow tray with pebbles and water to boost moisture levels.
- ● Grow lights or sunny windowsill: If your space lacks natural light (moringa thrives in bright, indirect light).
- ● Soil moisture meter: To monitor moisture without overwatering.
- ● Label markers: To track cutting dates and progress.
Step-by-Step instructions for growing moringa from cuttings
Here’s how to get roots in just three weeks—no fancy equipment needed.
🌱 Step 1: Select and Prepare Healthy Cuttings
Choose 4-6 inch long cuttings from non-flowering branches—these root fastest. Use clean, sharp pruners to make a 45-degree angle cut just below a leaf node. This angled cut increases surface area for root growth. Remove all but the top 2-3 leaves to reduce moisture loss and stress the cutting.
Strip the lower 1-2 inches of leaves from the stem. Submerge the cut end in room-temperature water for 10-15 minutes to hydrate the cells before planting. This step is critical for root initiation—dry cuttings struggle to establish roots. I like to work in the morning when humidity is higher, giving the cutting a better chance to settle in.
💧 Step 2: Root in Water or Moist Medium
Fill a small glass or jar with 2-3 inches of water—just enough to submerge the cut end. Place the cutting in so only the lower 1 inch is underwater. Change the water every 2-3 days to prevent bacterial growth. Roots should appear in 10-14 days if conditions are right. You’ll see tiny white tendrils forming first, then longer roots growing downward.
For faster results, use a moist rooting medium like perlite or sand instead of water. Mix equal parts perlite and coconut coir, moisten until damp (not soggy), and insert the cutting 1 inch deep. Keep the medium consistently moist—not dripping, just damp to the touch. A clear plastic bag over the cutting traps humidity and speeds rooting, but remove it once roots appear to prevent mold.
☀️ Step 3: Provide Ideal Conditions for Root Growth
Place your cuttings in bright, indirect light—no direct sun yet. A south-facing window works well, but avoid hot afternoon rays. Maintain a temperature between 70-80°F for optimal rooting. If your home runs cooler, a seedling heat mat under the container keeps roots warm and active.
Check moisture daily. Water or mist the cutting every 2-3 days until the soil feels slightly damp 1 inch down. Overwatering suffocates roots, while underwatering stalls growth. You’ll know it’s ready when roots reach 2-3 inches long—time to transplant. I tap the container gently to encourage root spread before moving to soil.
🪴 Step 4: Transplant to Soil and Encourage Growth
Fill a 6-inch pot with well-draining potting mix—moringa hates soggy roots. Mix in 20% perlite to improve aeration. Dig a hole 1 inch deeper than the root ball and place the cutting at a 45-degree angle for stability. Firm soil around the stem to eliminate air pockets.
Water deeply until it drains from the bottom, then reduce to every 3-4 days. Keep the cutting in partial shade for 1 week to minimize transplant shock. After that, gradually introduce morning sun for 2-3 hours daily, increasing exposure over 2 weeks. You’ll see new leaves in 2-3 weeks—a sign the cutting has fully adapted.
⏰ Step 5: Maintain and Monitor for Fast Growth
Once established, fertilize with a balanced liquid fertilizer (10-10-10) every 4 weeks to encourage leafy growth. Moringa grows fastest in full sun, so move it outdoors after the last frost. Prune leggy growth to encourage bushier development—pinch back new growth by 1/3 to stimulate branching.
Watch for yellowing leaves—this signals overwatering or nutrient deficiency. Adjust care immediately: reduce watering or add a potassium-rich fertilizer. With proper care, your cutting will reach 3-4 feet in its first season, ready for harvest. I harvest young leaves regularly to encourage continuous growth—just snip the tender tips and let the plant keep producing.
Tips & tricks for fast moringa root growth
Here's how to supercharge your moringa cuttings and get roots in record time—no green thumb required!
Timing Secret: That 10-15 minute water soak in Step 1 is non-negotiable for root initiation. I've seen cuttings that skipped this step take twice as long to root—sometimes they never even sprout roots! Use room-temperature water (cold water shocks the cells, hot water cooks them). Pro tip: If you're working with multiple cuttings, prepare your water in a bowl while you're making your cuts so everything stays ready to go.
Medium Matters: While water works, the perlite/coconut coir mix in Step 2 creates a more stable environment. The secret here is keeping that medium "damp to the touch" but not soggy—think of a wrung-out sponge. I like to use a spray bottle to mist the mix every other day rather than soaking it, which prevents root rot. For the water method, I've found clear jars with measurement markings help track that 1-inch submerged line perfectly.
Light and Heat Hack: That 70-80°F temperature range in Step 3 is crucial—moringa roots grow faster in warmth. If your home runs cooler, place your cutting setup on top of your fridge or near a sunny window during the day. For light, I've had great success with a simple LED grow light on a timer for 12 hours a day if natural light isn't sufficient. The key is avoiding direct sun until transplanting—it burns tender new growth.
Transplanting Trick: When you're ready to transplant in Step 4, give your cutting's roots a little workout before moving. Gently tap the container to encourage the roots to spread out more—this creates a stronger root ball. I also make sure to water the transplant hole before placing the cutting in, then firm the soil around it to eliminate air pockets that can strangle new roots.
Pro Tips for Grow Moringa Tree From Cutting
- Here's how to supercharge your moringa cuttings and get roots in record time—no green thumb required!
- Timing Secret: That 10-15 minute water soak in Step 1 is non-negotiable for root initiation. I've seen cuttings that ...
- Medium Matters: While water works, the perlite/coconut coir mix in Step 2 creates a more stable environment. The secr...
Frequently asked questions
Got questions about growing moringa from cuttings?
You’re not alone! Here are some of the most common concerns—plus quick, actionable answers to help you succeed.
How long does it take for moringa cuttings to root?
With the right conditions (moisture, warmth, and indirect light), moringa cuttings can root in 2–3 weeks. Some may even sprout roots in just 10 days if kept consistently damp and in a humid environment. Patience is key—avoid overwatering, which can rot the cuttings before roots form!
Can I grow moringa from cuttings year-round?
Moringa thrives in warm weather (70–90°F), so the best time to propagate is during spring or early summer. In cooler climates, wait until after the last frost. If you must try in winter, use a heat mat or grow lights to mimic ideal conditions—but expect slower rooting.
What if my moringa cutting turns yellow or wilts?
Yellowing or wilting usually signals overwatering, root rot, or stress. Check your cutting’s base—if it’s mushy, trim the affected part and replant in fresh, well-draining soil. For wilting, ensure it’s in bright, indirect light and reduce watering until new roots establish. A 50% humidity environment (like a plastic bag setup) can help!
Do I need rooting hormone for moringa cuttings?
Not necessarily! Moringa cuttings root easily without hormone, thanks to their fast growth. However, if you’re struggling, a natural rooting hormone (like cinnamon powder or aloe vera gel) can boost success. Just dip the cut end for 5–10 seconds before planting.
Can I grow moringa indoors from cuttings?
Place your cutting in a sunny windowsill (south-facing is best) or under a grow light for 12+ hours daily. Use a small pot with drainage and keep humidity high (try a pebble tray). Just be prepared to transplant outdoors later—moringa loves full sun and can get leggy indoors.
Wrapping up and next steps
Growing a moringa tree from cuttings is a rewarding and fast process—with patience and the right care, you’ll see roots in just three weeks! 🌱 Remember, healthy cuttings, proper rooting hormones, and consistent moisture are your best friends.
Once your moringa thrives, you’ll enjoy its nutrient-packed leaves and stunning foliage for years.
Now that you’re ready to start, take the next step: grab your cuttings, follow the steps, and watch your little sapling grow into a vibrant, life-giving tree. Happy growing! 🌿✨