Pruning
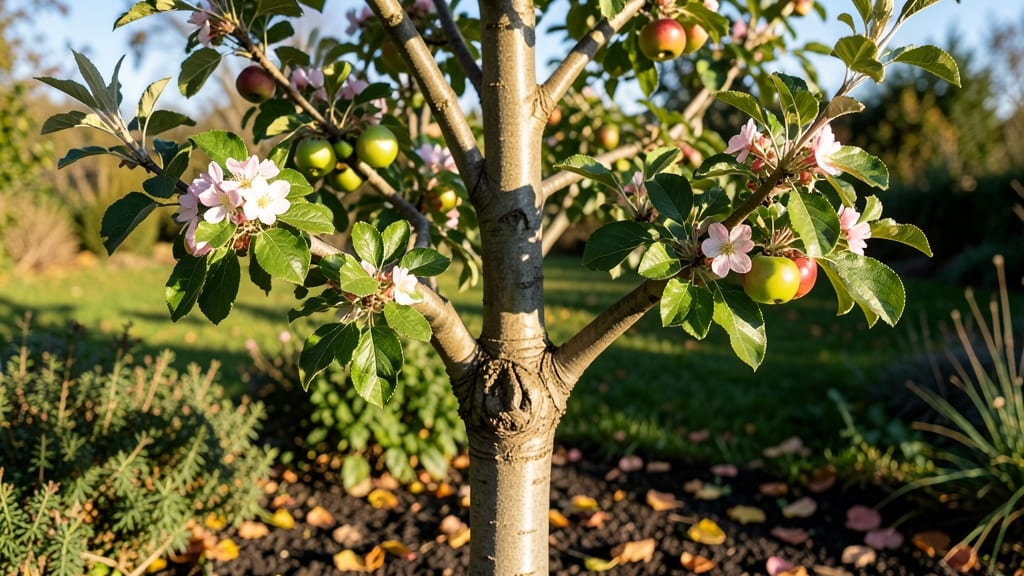
Grafting apple trees transforms your orchard with stronger roots and fruit that stays true to the variety you love. 🌳 I’ll never forget the first time I saw my grafted ‘Granny Smith’ produce perfect, tangy apples after years of struggling with weak nursery stock.
The process feels like surgery for plants—but with the right technique, you’ll get results that outperform store-bought trees.
Timing matters most: whip-and-tongue grafts work best in late winter when trees are dormant but sap is flowing, while cleft grafting suits early spring. You’ll need sharp tools, grafting tape, and a scion wood cutting from a healthy tree.
Even beginners can master this with a little practice—my first graft took root after just three weeks of careful care.
What you’ll end up with is a tree that grows faster, resists disease better, and produces fruit identical to the parent plant. Imagine biting into crisp, sweet apples from your own grafted tree instead of generic grocery store varieties. The satisfaction comes from knowing every step was yours.
Whether you’re working with dwarf rootstock for small spaces or standard trees for full-size harvests, this method adapts easily. Let’s get those scions ready—your future orchard starts with a single cut.
📚 In This Guide
- What you need
- Instructions
- Tips and common mistakes
- Wrapping up and next steps
What you need
- ● Scion Wood: Healthy, dormant apple tree branches (¼" thick, 6–12" long) from a desired cultivar.
- ● Rootstock: 1–3-year-old apple rootstock (bare-root or potted, compatible with your scion).
- ● Grafting Knife: Sharp, clean knife (like a Felco #1 or Okatsune).
- ● Pruning Shears: For trimming excess branches.
- ● Grafting Tape or Rubber Bands: To secure the graft (½" wide, stretchy).
- ○ Pruning Sealant: (Optional) Wound paint or tree sealant to prevent disease.
- ○ Grafting Wax: (Optional) For sealing cuts on scions.
- ○ Plastic Bag or Polyethylene: (Optional) To create a humid environment post-graft.
- ○ Grafting Clamp: (Optional) For extra stability on larger rootstocks.
- ● Access to healthy scion wood (collect in late winter/early spring or store refrigerated).
- ● A clean workspace (sterilize tools with rubbing alcohol).
- ● Knowledge of apple tree compatibility (avoid grafting unrelated species).
- ● Patience! Grafts take 4–8 weeks to heal before transplanting.
Step-by-Step instructions for grafting apple trees
Ready to create a hardier apple tree? This method ensures stronger roots and better fruit production.
🪴 Step 1: Select and Prepare Your Scion and Rootstock
Choose a healthy scion—this is the branch containing the variety you want to grow—from a mature apple tree. It should be about ¼-inch thick and free of disease. The rootstock, a young tree with strong roots, should be roughly the same thickness. Cut both the scion and rootstock at an angle just above a bud, leaving a 2-3 inch section with at least 3-4 buds.
Here's the thing—timing matters. Perform this step when both the scion and rootstock are dormant, typically in late winter or early spring. Keep the cut ends moist by wrapping them in a damp paper towel inside a plastic bag until you're ready to graft. You'll notice the cambium layer, a thin green ring just under the bark, on both the scion and rootstock—this is where the magic happens.
✂️ Step 2: Make the Grafting Cuts
Use a sharp grafting knife to make a 1-inch vertical cut down the center of both the scion and rootstock. The cuts should be clean and smooth, exposing the cambium layer on both sides. Angle the cuts slightly so they fit together like puzzle pieces. I like to make a 30-degree angle on the scion and a matching angle on the rootstock to ensure a snug fit.
Don't rush this step. A tight fit between the cambium layers is essential for successful grafting. If the pieces don't align perfectly, you'll see gaps where the cambium isn't touching—this can lead to failure. Test the fit by gently pressing the scion into the rootstock. It should hold firmly without slipping out.
💧 Step 3: Secure the Graft
Wrap the grafted union tightly with rafting tape or plastic graft tape, starting just below the graft and working upward. The tape should hold the scion firmly against the rootstock without crushing it. Leave the top bud exposed—this is where new growth will emerge. Seal the entire graft with rafting wax to prevent drying and infection. The wax acts like a protective bandage, keeping moisture in and contaminants out.
I know it seems weird, but don't over-tighten the tape. You want it snug enough to hold the scion in place, but not so tight that it restricts growth. If you press too hard, you'll see the bark dimple or crack—this is a sign you've gone too far. Once sealed, place the grafted tree in a shady, sheltered spot to protect it from direct sunlight and harsh winds.
☀️ Step 4: Monitor and Care for the Grafted Tree
Keep the soil around the grafted tree consistently moist but not soggy. Water deeply every 2-3 days until new growth appears, which should happen within 4-6 weeks. You'll see the first sign of success when the top bud swells and breaks through the tape. This is your signal that the graft has taken and the scion is growing.
Remove the tape once the grafted union has healed and new growth is 2-3 inches tall. At this point, the tree should be ready to transition to its permanent location. Prune any competing shoots from the rootstock below the graft to direct the tree's energy into growing the scion. This ensures your apple tree develops strong, healthy branches and produces the variety you've chosen.
Tips & tricks for perfect apple tree grafting
A few pro insights that'll help you avoid common pitfalls and boost your success rate.
Scion Selection Tip: When choosing your scion in Step 1, look for branches that are ¼-inch thick with smooth, unblemished bark. Avoid any branches that show signs of disease, insect damage, or excessive sap—these can compromise your graft's success. I've found that scions from trees with the same or similar rootstock varieties often produce better results. Also, collect scions when the tree is dormant (late winter/early spring) as instructed, but don't let them dry out—store them in a damp paper towel in the fridge until you're ready to graft.
Precision Cutting: In Step 2, the 30-degree angle on your cuts is crucial for a tight fit. I recommend using a sharp grafting knife and making your 1-inch vertical cut with one smooth motion—don't hesitate or saw back and forth. The cambium layer (that green ring) should align perfectly when you join the scion and rootstock. If you see gaps, gently adjust the pieces until they fit like puzzle pieces. I've ruined several grafts by rushing this step, so take your time—it's worth the extra few minutes.
Tape Application Strategy: When securing your graft in Step 3, start wrapping just below the graft and work upward, overlapping each turn by about half its width. The tape should be snug but not tight enough to indent the bark. I've learned the hard way that over-tightening can restrict growth. Once wrapped, seal with grafting wax—this creates a moisture barrier that prevents drying. Place your grafted tree in partial shade for the first week to reduce stress on the newly joined parts. After that, gradually introduce it to more sunlight.
Post-Graft Care: In Step 4, those 2-3 days between waterings are crucial—you want the soil to stay consistently moist but never soggy. I've seen many grafts fail because of either too much or too little water. Watch for the top bud to swell after about 4-6 weeks, which is your first sign of success. When new growth reaches 2-3 inches, it's time to remove the tape. Be patient—rushing this process can damage the delicate new growth. Prune any competing shoots from the rootstock below the graft to ensure all the tree's energy goes into growing your chosen variety.
Pro Tips for Graft Apple Tree
- A few pro insights that'll help you avoid common pitfalls and boost your success rate.
- Scion Selection Tip: When choosing your scion in Step 1, look for branches that are ¼-inch thick with smooth, unblemished bark.
- Precision Cutting: In Step 2, the 30-degree angle on your cuts is crucial for a tight fit.
Frequently asked questions
Got questions about grafting apple trees? You’re not alone—this process can feel tricky at first! Below are answers to the most common questions to help you feel confident before diving in.
What’s the best time of year to graft an apple tree?
The ideal time is late winter or early spring (just before buds swell), when the tree is dormant but sap is starting to flow. This gives your graft the best chance to heal and establish roots. Avoid grafting in extreme heat or cold—aim for 50–60°F (10–15°C) for optimal success.
Can I graft any apple variety onto any rootstock?
Not all combinations work! Compatibility depends on the rootstock’s species (e.g., Malus domestica for most apples) and the scion’s variety. For example, dwarfing rootstocks (like M.9) pair well with standard apple varieties, but tropical or crabapple scions may fail. Always check compatibility charts or ask a local nursery for expert advice.
How do I know if my graft took?
Success signs include:
- New growth sprouting from the graft union (not the rootstock or scion alone).
- A slight swelling or callus forming around the graft site.
- Healthy leaves emerging within 4–6 weeks (if grafted in spring).
What’s the easiest grafting method for beginners?
The whip-and-tongue graft is the most beginner-friendly! It’s simple, fast, and works well for small branches (up to ½-inch thick). Just make clean, angled cuts on both the scion and rootstock, then interlock them with a tiny "tongue" for extra surface area. Wrap with grafting tape or rubber for support.
Do I need to protect my graft from pests or weather?
Yes! Cover the graft with rafting wax or grafting tape to seal moisture and deter pests. In cold climates, add a layer of mulch around the base to insulate roots. Avoid overwatering—keep soil moist but not soggy until new growth appears. A simple plastic bag (removed after a few weeks) can also help retain humidity.
What if my rootstock is too small or too large for the scion?
Size matters! For small rootstocks (<¼-inch thick), use whip grafts or bud grafting. For thick rootstocks (>¾-inch), try cleft grafting or bridge grafting. If the scion is too large, make a longer cut on the rootstock to accommodate it—just ensure at least 1–2 inches of overlap.
Wrapping up and next steps
Grafting your apple tree is a rewarding way to boost its health, extend its lifespan, and enjoy bigger, tastier harvests—all while saving money! Whether you're reviving an old tree, experimenting with new varieties, or simply deepening your gardening skills, this technique opens up endless possibilities. 🌱
Now that you’re armed with the knowledge, roll up your sleeves and get grafting! Start small with a single tree, and soon you’ll be sharing your green-thumb success with neighbors (or even trading cuttings at your local orchard meetup).
Happy growing—and may your future apple harvests be plentiful and delicious! 🍏✨
- Next step: Pick a sunny day, gather your tools, and begin with a confident first cut!