Pruning
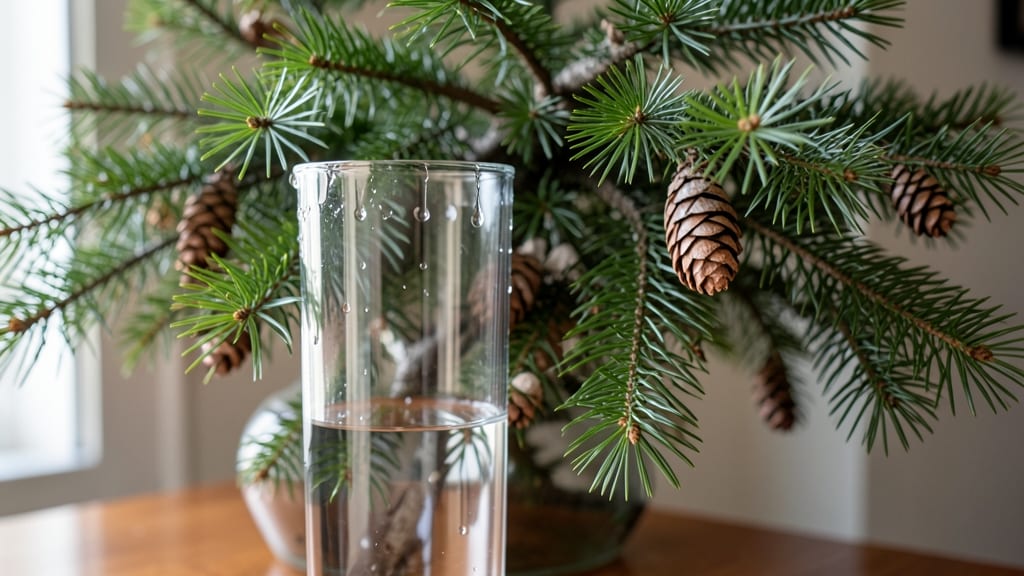
Christmas tree branches in a vase bring that fresh-cut pine scent and rustic charm into your home long after the holidays end. 🌲 After trimming our tree last year, I realized how stunning those branches looked in a simple glass vase—like a mini forest captured in time.
The best part? You don’t need fancy supplies or pruning skills to create this effortless holiday centerpiece.
Start by selecting branches with a mix of needle lengths and some natural twists—they’ll add texture and movement to your arrangement. A clean cut at the base ensures they stay fresh for weeks, and a shallow water reservoir in the vase prevents them from drying out too quickly.
For extra flair, tuck in pinecones, cranberries, or even a few sprigs of eucalyptus for a layered, forest-like look.
This arrangement works indoors or out, whether you’re dressing up a dining table, mantel, or even a front porch. The scent alone makes any space feel cozy, and the versatility means you can adapt it to match your decor—minimalist, farmhouse, or even glamorous.
Once you’ve mastered the basics, you’ll find endless ways to play with colors, textures, and seasonal accents.
Pro tip: Swap out branches every few days to keep them looking fresh, and don’t shy away from adding a few dried flowers or ribbons for a personalized touch. The possibilities are as endless as the branches themselves—so get creative and enjoy the process!
📚 In This Guide
- What you need
- Instructions
- Tips and common mistakes
- Wrapping up and next steps
What you need
- ● Christmas tree branches: 3–5 medium-sized branches (12–24 inches long), freshly pruned for the best texture and scent. Pro tip: Choose branches with a mix of needle lengths for visual interest!
- ● Clear or decorative vase: 6–12 inches in diameter, with a narrow neck (e.g., glass, ceramic, or even a repurposed bottle).
- ● Water: Enough to fill the vase base (2–4 cups, depending on branch thickness).
- ○ Floral preservative (optional but recommended): 1 packet or 1 tsp to extend freshness (3–5 days).
- ● Decorative elements: Mini pinecones, berries, or cinnamon sticks for texture.
- ● Twine, lace, or ribbon to tie branches together.
- ● Fairy lights or small LED candles for ambiance.
- ● Pruning tools: Sharp pruners or shears to trim branches to size.
- ● Hot glue gun or floral tape: For securing branches if needed.
- ● Spray bottle with water: To mist branches and keep them hydrated.
- ● Fresh branches: Prune within 24 hours of use for maximum freshness.
- ● Clean workspace: A table or surface covered with newspaper or a cloth.
- ● Patience: Arrange branches mindfully for a balanced, natural look!
Step-by-Step instructions for creating a rustic Christmas tree branch centerpiece
Here's how to transform simple evergreen branches into a fragrant, elegant holiday display that fills your home with seasonal charm.
🪴 Step 1: Gather and Prepare Your Branches
Head outside and collect 4-6 healthy pine, fir, or spruce branches that are 12-24 inches long with fresh, vibrant needles. Look for branches with a natural taper—thicker at the base and tapering to a delicate tip. Avoid branches with brown or sparse needles, as they won't hold up well in the vase. I like to mix branch sizes for visual interest, with one or two slightly longer pieces as focal points.
Once you've selected your branches, give them a quick shake to remove any loose needles or debris. Trim the ends at a 45-degree angle with sharp pruning shears to help them absorb water more easily. This small step makes all the difference in how long your centerpiece stays fresh. Place the trimmed branches in a bucket of room-temperature water until you're ready to arrange them—this prevents them from drying out while you work.
✂️ Step 2: Clean and Condition the Vase
Choose a vase that complements your holiday decor—think rustic ceramic, glass with a textured finish, or even a repurposed mason jar for a cozy touch. Before arranging your branches, give the vase a thorough cleaning with warm, soapy water to remove any dust or residue. Rinse it well and let it air-dry completely. A clean vase ensures your branches stay hydrated and looking their best.
For extra longevity, add 1 tablespoon of floral preservative (or a pinch of sugar and a splash of bleach for DIY) to the vase's water. This helps prevent bacterial growth and keeps the branches fresh for 2-3 weeks. If you're using a decorative vase without a wide opening, consider placing a hydration sleeve or even a plastic wrap-covered wire inside to create a water reservoir. This hidden trick works wonders for maintaining moisture in tight spaces.
🌿 Step 3: Arrange the Branches for Balance and Texture
Start by placing the thickest branch in the center of the vase as your foundation. This creates a natural focal point and helps balance the arrangement. Next, add the longest branches at an angle, fanning them out slightly to create movement. Think of this as a mini evergreen tree—you want a mix of upright and cascading branches to mimic the look of a real tree.
Fill in the gaps with shorter branches and smaller sprigs, tucking them into any empty spaces. Pay attention to the needle density—denser areas at the base and lighter, airier sections toward the top create a beautiful gradient. Step back occasionally to check your progress. The goal is a full yet natural look, not a rigid, overstuffed arrangement. If a branch feels too heavy, trim it slightly to lighten the look.
💧 Step 4: Hydrate and Secure the Arrangement
Once you're happy with the arrangement, carefully trim the branch stems again to 6-8 inches long to ensure they reach the water in the vase. Place them in the vase one at a time, adjusting as needed to maintain balance. If the branches start to wilt or droop, gently bend them to reshape them—evergreens are surprisingly flexible when fresh. For extra stability, use floral tape or twine to loosely secure the stems together at the base, but avoid tying them too tightly, which can restrict water flow.
Fill the vase with room-temperature water until the stems are fully submerged. Tap the branches gently to remove any air bubbles that might block water absorption. Place your centerpiece in a cool, draft-free spot away from direct heat sources like fireplaces or radiators. This keeps the branches hydrated and prevents them from drying out prematurely. A little spritz of water on the needles every few days will keep them looking lush and fragrant.
☀️ Step 5: Add Finishing Touches for Holiday Magic
Now comes the fun part—personalizing your centerpiece to match your holiday decor. Scatter pinecones, cinnamon sticks, or dried orange slices among the branches for texture and scent. Add a few sparkling berries or small white lights for a touch of elegance. If you're going for a rustic look, wrap the vase in burlap or twine and tie it with a red ribbon. For a more modern vibe, pair it with metallic accents or glass ornaments.
Here's the thing—this centerpiece isn't just about looks. The fresh pine scent will fill your home, creating a cozy atmosphere that feels like a holiday hug. Swap out branches every 7-10 days to keep them looking their best, and enjoy the process of creating something beautiful with nature's own decorations. The best part? You can reuse the vase and materials for years to come, making this a truly sustainable holiday tradition.
Tips & tricks for perfect Christmas tree branch arrangements
Creating a stunning centerpiece with evergreen branches is easier than you think—these simple tricks will help you avoid common pitfalls and create a display that smells as good as it looks.
Branch Selection Secret: Look for branches with a slightly waxy coating on the needles—they'll stay fresher longer. I also check for green tips on the branches, which means they're still alive and will hold up best. Avoid branches with yellow or brown needles, even if they look pretty—they'll dry out within days.
Angle Matters: When trimming your branches at a 45-degree angle in Step 1, make the cut just above a natural leaf node (where tiny buds are visible). This helps the branch absorb water more efficiently and prevents it from sealing off too quickly. I like to use sharp pruning shears for clean cuts, but kitchen scissors work in a pinch—just be sure to sterilize them first with rubbing alcohol.
Hidden Hydration Hack: For vases with narrow necks, create a DIY hydration sleeve by rolling plastic wrap around a wire or skewer, then inserting it into the vase. Fill this sleeve with water before adding your branches. This clever trick lets you use decorative vases that wouldn't normally work while keeping your branches hydrated for the full 2-3 weeks mentioned in Step 2.
Needle Density Tip: In Step 3, aim for a 70-30 rule when arranging: 70% of your branches should have dense needles at the base, tapering to 30% with lighter, airier sections toward the top. This creates that magical "tree" silhouette while keeping the arrangement from looking too heavy. Think of it like building a pyramid—start wide at the bottom and let it naturally narrow as you move upward.
Pro Tips for Christmas Tree Branches In Vase
- Creating a stunning centerpiece with evergreen branches is easier than you think—these simple tricks will help you av...
- Branch Selection Secret: Look for branches with a slightly waxy coating on the needles—they'll stay fresher longer. I...
- Angle Matters: When trimming your branches at a 45-degree angle in Step 1, make the cut just above a natural leaf nod...
Frequently asked questions
Got questions about creating a stunning Christmas tree branches in vase centerpiece? We’ve got answers! Here are some of the most common queries to help you craft the perfect rustic holiday display.
How do I keep the branches fresh in a vase?
Trim the ends of the branches at an angle (about 1 inch) before placing them in a vase with clean water. Change the water every 2–3 days and add a drop of bleach or floral preservative to prevent bacteria. Keep them away from direct sunlight and heat sources to extend their freshness for up to 2 weeks.
Can I use branches from any tree, or are there specific types?
While evergreen branches (like pine, spruce, or fir) are ideal for their durability and scent, you can also use deciduous branches (such as birch, willow, or oak) for a lighter, more natural look. Avoid branches with sap or excessive needles, as they may stain or dry out faster.
When is the best time to harvest tree branches for this project?
The best time to prune is late fall or early winter, just before the holiday season. Choose branches that are still slightly green but not overly fresh—this ensures they hold up well in a vase. Avoid branches that are brittle or already shedding heavily.
What’s the best vase shape or material for this arrangement?
Low, wide vases (like ceramic, glass, or even repurposed tin cans) work best for stability and a rustic look. For a modern twist, try a slender glass vase, while a wooden bucket or mason jar adds cozy charm. Just ensure the vase is deep enough to hold water securely.
How do I fix wilted or droopy branches in my vase?
If your branches start to droop, trim the ends again and refresh the water. Add a splash of floral preservative or a pinch of sugar to revive them. If the issue persists, check for hidden pests or mold—discard the branches and start fresh with new cuts.
Can I add other elements, like berries or lights, to the arrangement?
For extra holiday flair, tuck in pinecones, cranberries, or eucalyptus sprigs. For a magical touch, drape fairy lights around the vase (ensure they’re not submerged in water). Just avoid heavy ornaments that could weigh down the branches.
Wrapping up and next steps
Transforming your Christmas tree branches into a stunning vase centerpiece is a simple yet magical way to extend the holiday spirit long after the season ends!
With just a few evergreen clippings and a little creativity, you’ve crafted a rustic, fragrant centerpiece that brings warmth and charm to any space. Now’s your chance to experiment further: try mixing textures with pinecones or berries, or even repurpose the branches into wreaths or garlands for extra holiday flair. Your green thumb (and holiday spirit) just got a festive upgrade! 🎄✨