
Pruning
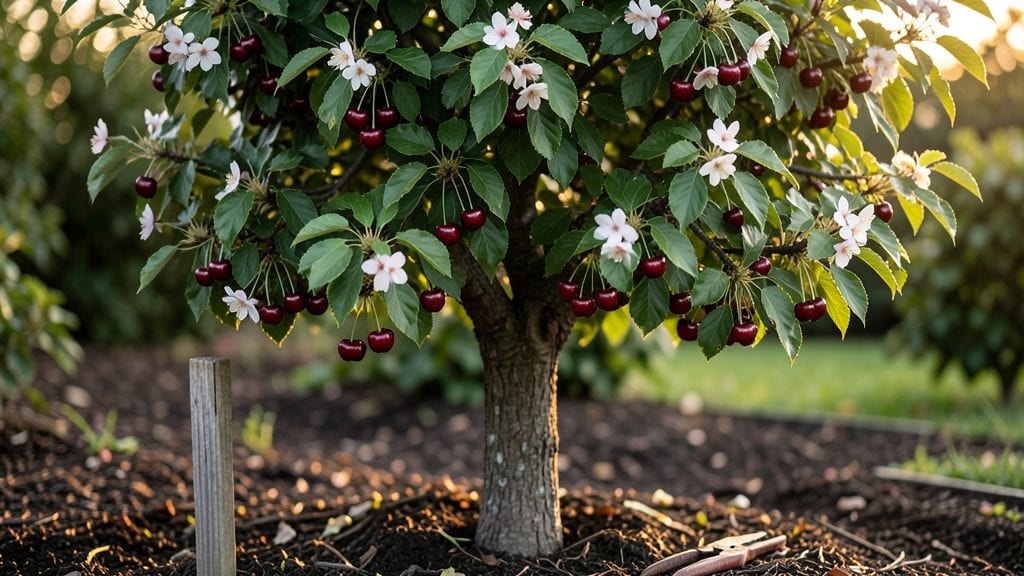
A full grown cherry tree in your Pacific Northwest yard isn’t just a tree—it’s a statement piece that transforms your outdoor space into a lush, seasonal masterpiece. 🌿 I’ve learned the hard way that proper placement and pruning can turn a wild, sprawling mess into a structured focal point that frames your garden year-round.
The key lies in understanding how light, space, and timing work together to keep your tree healthy and stunning.
Start by giving your cherry tree 15-20 feet of clearance from structures and other plants—these trees don’t like to be crowded. In the PNW’s mild, wet climate, prune in late winter (before buds swell) to shape it for spring blooms, then do light maintenance in summer to encourage air flow.
Pair it with shade-tolerant perennials like ferns or hostas at its base, and you’ll create a layered, textured look that feels intentional, not accidental.
What you’ll end up with is a tree that’s productive, picturesque, and problem-free. The blossoms in spring, summer shade, and fall color make it the centerpiece of your outdoor living space.
With the right pruning rhythm and companion plants, your cherry tree won’t just survive—it’ll thrive as the heart of your garden design.
This approach works for both sweet and tart varieties, whether you’re working with a young transplant or an established tree. The secret is consistency—small adjustments now mean fewer headaches later. Let’s get your tree looking like the showstopper it deserves to be.
📚 In This Guide
- What you need
- Instructions
- Tips and common mistakes
- Wrapping up and next steps
What you need
- ● Pruning saw: A sharp bypass pruning saw (18–24" blade) for larger branches (2"+ diameter). Pro tip: 💡 Test the saw’s sharpness first—dull blades crush wood, stressing the tree!
- ● Loppers: Bypass loppers (20–24" handles) for medium branches (¾"–2"). Opt for ratcheting loppers for extra leverage.
- ● Hand pruners: Bypass pruners (6–8" blades) for small branches/twigs (Pro tip: 🌡️ Sterilize blades with rubbing alcohol to prevent disease spread!
- ● Pole saw/pruner: Extendable (10–16 ft) for high branches—essential for safety!
- ● Gloves: Heavy-duty gardening gloves (nitrile-coated) to protect hands from thorns and splinters.
- ● Safety gear: Safety glasses
- ● Ear protection (if using a chainsaw)
- ● Non-slip boots
- ● Chainsaw: For very thick branches (3"+), use a sharp, clean chainsaw with a low-kickback bar.
- ● Tree wound dressing: Controversial but useful for large cuts—pruning sealant or beeswax to reduce sap loss.
- ● Ladder: Sturdy, extendable ladder (20–24 ft) with stabilizers for high branches.
- ● Disposable bags: Heavy-duty contractor bags (30–50 gallon) for debris cleanup.
- ● First-aid kit: Bandages, antiseptic wipes, and tweezers for minor injuries.
- ● Weather check: Prune on a dry, calm day (avoid wind/rain). Ideal temps: 40–75°F.
- ● Safety briefing: Clear a 20-foot radius around the tree of people, pets, and flammable materials.
- ● Tree health assessment: Inspect for diseases (e.g., bacterial canker) or pests before pruning.
- ● Local regulations: Check if your area requires a permit for large branch removal (common for branches >6" diameter).
Instructions for year-round pruning of a mature cherry tree
Here’s how I maintain my Pacific Northwest cherry tree through all four seasons—keeping it healthy, productive, and resistant to disease.
⏰ Step 1: Late Winter Dormant Pruning (January-February)
When the tree is fully dormant but before buds swell, grab your pruning saw and loppers and remove dead, diseased, or crossing branches first. These are easy to spot—they’re brown, brittle, or growing inward. Cut just outside the branch collar (the swollen area where the branch meets the trunk) to prevent wounds that invite infection.
Next, thin the canopy by removing up to 25% of the smallest branches from the interior. This improves airflow and sunlight penetration, which is critical in our damp climate. Look for branches that rub against each other or grow straight up—they’ll compete for resources and create weak points. Make clean cuts at a 45-degree angle just above an outward-facing bud.
☀️ Step 2: Light Summer Pruning (June-July)
After the tree finishes flowering but before new growth hardens, do a light maintenance prune. Focus on suckers (shoots growing from the base or roots) and water sprouts (fast-growing vertical shoots). These drain energy from fruit production. Use hand pruners for small branches and loppers for anything thicker than your wrist.
Remove any branches that are dying back (often from silver leaf fungus, common here). Sterilize your tools with 70% isopropyl alcohol between cuts to prevent spreading pathogens. You’ll know you’ve done enough when the tree’s structure looks open and airy—no dense clusters of branches blocking light from reaching the center.
✂️ Step 3: Post-Harvest Cleanup (August-September)
Once you’ve picked the last cherries, inspect the tree for damaged or diseased fruit-bearing branches. These are prime spots for fungal infections like brown rot. Prune them out immediately, then sanitize your tools again. Cut back any branches that produced poor-quality fruit—this encourages stronger growth next season.
Thin out excessive leaf clusters if needed, but avoid heavy pruning now. The tree is directing energy into storing nutrients for winter. Instead, focus on removing dead leaves and raking up fallen fruit to reduce pests and diseases over winter. This is also the time to reseal any pruning cuts with pruning sealant if they’re larger than ½ inch in diameter—though many experts debate this, I’ve found it helps in our wet climate.
🌱 Step 4: Early Spring Growth Adjustments (March-April)
As new growth appears, do a final light prune to shape the tree and remove any frost-damaged tips. This is also when you’d correct any overly aggressive growth from last season’s pruning. Use hand pruners for precision cuts, and avoid removing more than 10% of the canopy—cherry trees are sensitive to heavy late pruning.
Pay special attention to scaffold branches (the main structural limbs). If any are rubbing or growing at sharp angles, prune one to encourage the other to strengthen. You’ll see the tree’s buds swelling—this is your cue to finish up. After pruning, water deeply to help the tree recover, especially if we’ve had a dry winter.
Tips & tricks for perfect year-round cherry tree pruning
Here's what I've learned after years of pruning my Pacific Northwest cherry tree—these tricks will help you avoid common mistakes and keep your tree thriving.
Timing is Everything: In Step 1, when pruning during late winter dormancy, check for bud swelling first. If you see buds starting to plump up, you've waited too long—this is the tree's signal it's waking up. The goal is to prune just before growth begins, typically in January-February. I always do this on a dry, calm day to minimize stress on the tree and reduce disease spread from wet conditions.
Tool Sanitation Matters: The instructions emphasize sterilizing tools between cuts, especially in Step 2 when dealing with potential fungal infections. I take this a step further by using a dedicated bottle of 70% isopropyl alcohol for each pruning session. For extra protection, I also wipe down tools with a cloth soaked in a 10% bleach solution (1 part bleach to 9 parts water) between trees if I'm working on multiple trees in my yard. This prevents cross-contamination of diseases like silver leaf fungus.
Branch Angle Technique: When making cuts in Step 1 or Step 4, pay attention to the branch angle. For branches growing at a 45-degree angle or less, make your cut just outside the branch collar. For steeper angles, cut back to the parent branch to prevent tear-out. I've found that using a sharp pruning saw makes these clean cuts easier—dull tools crush the wood, creating larger wounds that heal more slowly.
Seasonal Pruning Strategy: The key to year-round success is understanding each season's role. In summer (Step 2), focus on removing only what's necessary—don't over-prune. In winter (Step 1), you can be more aggressive with structural pruning. I've created a simple seasonal checklist: Winter (structure), Summer (maintenance), Fall (cleanup), Spring (fine-tuning). This approach prevents over-stressing the tree during critical growth periods.
Pro Tips for Full Grown Cherry Tree
- Here's what I've learned after years of pruning my Pacific Northwest cherry tree—these tricks will help you avoid common mistakes and keep your tree thriving.
- Timing is Everything: In Step 1, when pruning during late winter dormancy, check for bud swelling first.
- Tool Sanitation Matters: The instructions emphasize sterilizing tools between cuts, especially in Step 2 when dealing with potential fungal infections.
Frequently asked questions
Got questions about caring for your full-grown cherry tree in the Pacific Northwest? You’re not alone! Here are answers to the most common queries—from pruning timing to troubleshooting—so you can keep your tree thriving year-round.
When is the best time to prune a full-grown cherry tree?
For sweet cherries, prune in late winter or early spring (February–March) before buds swell but before leaves emerge. Sour cherries (like Montmorency) can handle pruning in dormant season (November–February). Avoid heavy pruning in fall—it invites disease and pest issues. Pro tip: Lightly shape trees in summer after harvest to improve airflow!
Why is my cherry tree’s fruit dropping early?
Early fruit drop is often due to over-thinning, stress (drought, poor soil), or pests/disease. Check for:
- Birds/squirrels: Use netting if wildlife is raiding fruit.
- Brown rot fungus: Remove infected fruit immediately and apply fungicide.
- Nutrient deficiency: Test soil and amend with compost or a balanced fertilizer (10-10-10).
If the issue persists, prune to reduce canopy density and improve sunlight exposure.
How do I protect my cherry tree from Pacific Northwest rain?
The PNW’s wet climate can foster fungal diseases like leaf spot or canker. Mitigate risks by:
- Pruning for air circulation (avoid overcrowding branches).
- Applying copper fungicide in spring/fall as a preventative.
- Planting in well-draining soil (cherries hate soggy roots!).
- Mulching 3–4 inches deep (keep mulch away from the trunk).
Pro tip: Choose resistant varieties like ‘Stella’ or ‘Rainier’ for wetter climates!
How long does it take for a cherry tree to bear fruit after planting?
Patience is key! Most sweet cherries take 5–7 years to bear fruit, while sour cherries may fruit in 3–5 years. Factors like:
- Tree age at planting (bought as a sapling vs. mature tree).
- Climate suitability (PNW’s cool summers are ideal!).
- Proper pruning and care (healthy trees fruit faster!).
Cross-pollination is critical—plant two compatible varieties (e.g., ‘Bing’ + ‘Stella’) for sweet cherries.
Can I prune a cherry tree too much?
Yes! Over-pruning stresses trees, reduces fruit production, and invites disease. Follow the “rule of thumb”: Never remove more than 25% of the canopy in one season. For mature trees, aim for 10–15% annual pruning to maintain shape and health. Focus on:
- Dead/diseased wood.
- Water sprouts (vertical shoots).
- Crossing branches.
Pro tip: Use sharp, clean tools and prune at a 45° angle just outside the branch collar!
Wrapping up and next steps
Growing and maintaining a full grown cherry tree in the Pacific Northwest is a rewarding journey that brings beauty, fruit, and fresh air to your space! 🌿 With the right pruning techniques—timing, tools, and seasonal care—you’ll ensure your tree thrives year-round.
Remember, consistency is key, so stay patient and observe your tree’s unique needs.
Now that you’re armed with knowledge, it’s time to roll up your sleeves and get pruning! Start with a fresh assessment of your tree, then tackle those branches with confidence. Happy gardening—and may your cherry harvest be plentiful! 🍒✨