
Trees
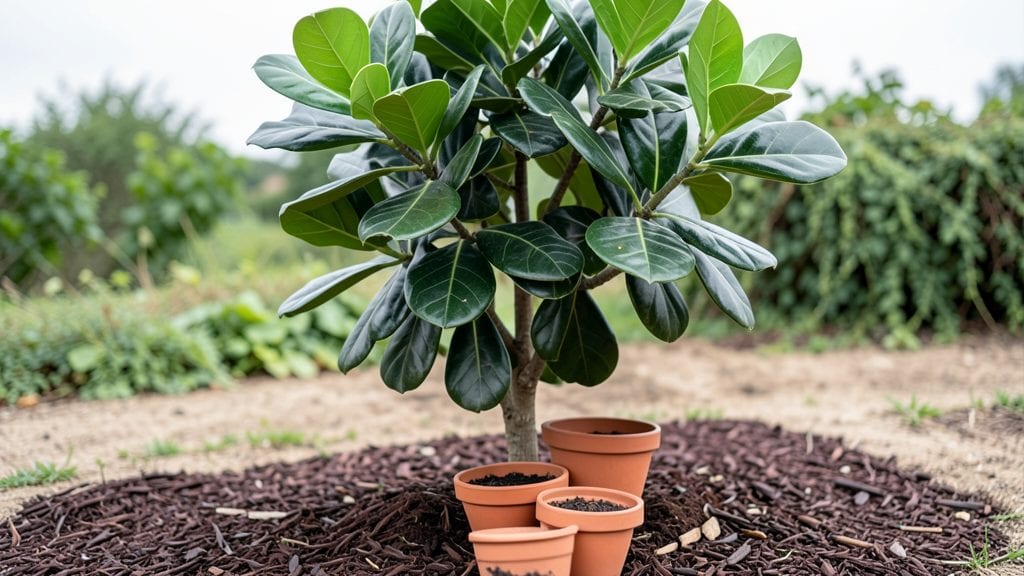
Flower pots around trees transform bare trunks into stunning vertical gardens that add color and texture all year. 🌿 I used to dread the stark winter look of my oak tree—until I wrapped it in pots of evergreen ferns and winter jasmine.
The effect is like framing a masterpiece with living art.
The key is choosing plants that match your tree's light conditions and your climate. For shade lovers, try hostas or impatiens; for sunny spots, petunias or geraniums thrive. Drought-resistant succulents work well if your area gets dry spells. Just keep pots 12–18 inches from the trunk to avoid root competition.
You'll create a layered look that softens the tree's silhouette while adding seasonal interest. Mulch at the base ties everything together, and string lights tucked among the pots glow beautifully at dusk. The best part? You can swap out plants each season without digging.
This technique works for any mature tree—front yard, backyard, or even urban patios. Start small with 3–5 pots, then expand as you see what combinations you love. The privacy boost from dense foliage is a bonus that keeps neighbors' eyes on your garden, not your fence line.
📚 In This Guide
- What you need
- Instructions
- Tips and common mistakes
- Wrapping up and next steps
What you need
- ● Flower pots: 4–6 medium-sized pots (12–18 inches in diameter) per tree, depending on desired coverage. Opt for weather-resistant materials like ceramic, terracotta, or fiberglass.
- ● Potting soil: 5–10 gallons of high-quality, well-draining soil (mix in perlite or sand for extra aeration).
- ● Privacy plants: Evergreens (e.g., Dwarf Alberta Spruce, Boxwood) for year-round coverage.
- ● Flowering shrubs (e.g., Hydrangeas, Camellias) for seasonal color.
- ● Vines (e.g., Clematis, Ivy) for vertical growth (if using trellis-style pots).
- ● Tree-friendly mulch: 2–3 bags of shredded bark or pine straw to protect tree roots.
- ● Basic tools: Garden trowel or spade
- ● Measuring tape (to ensure pots are spaced 12–24 inches from the tree trunk)
- ● Pruning shears (for trimming plants post-planting)
- ● Self-watering pots: Reduce maintenance for drought-prone areas.
- ● Slow-release fertilizer: Boosts plant growth without frequent feeding.
- ● Decorative accents: Solar-powered lights, pebbles, or mosaic tiles for a polished look.
- ● Root barrier fabric: Protects tree roots if planting near sidewalks or driveways.
Step-by-Step guide to creating a year-round privacy screen with flower pots around trees
Here's how to transform your yard into a lush, evergreen privacy barrier that thrives in every season.
🌱 Step 1: Choose the Right Tree and Pot Combinations
Start by selecting trees that complement your climate and space. Evergreens like boxwoods or arborvitae provide year-round coverage, while deciduous trees like dogwoods add seasonal interest. I like to pair evergreens with flowering shrubs in pots—think azaleas or camellias for spring blooms alongside holly for winter structure.
For four trees, you'll need about 8-12 large pots (18-24 inches in diameter) to create a cohesive screen. Place pots in a staggered pattern around each tree, alternating heights for visual interest. The key is to leave 12-18 inches of space between pots and the tree trunk to prevent root competition and allow for easy maintenance.
🪴 Step 2: Prepare Pots and Soil for Optimal Growth
Use pots with drainage holes and saucers to prevent waterlogging, which can suffocate roots. I recommend terracotta or fiberglass pots—they breathe better than plastic and won’t crack in freezing temps. Fill each pot with a mix of 60% high-quality potting soil, 30% perlite or orchid bark, and 10% compost for drainage and nutrients.
For evergreens, add a slow-release fertilizer at planting time to support their dense foliage. For flowering shrubs, mix in a handful of bone meal to encourage blooms. Water the soil mix thoroughly before planting to settle it and remove air pockets. You’ll know it’s ready when water drains evenly from the bottom without pooling.
☀️ Step 3: Plant and Arrange for Maximum Privacy Impact
Start by planting the tallest shrubs in the back row, closest to the tree trunks, and work your way forward with medium and shorter varieties. For example, place a 3-foot-tall boxwood behind a 2-foot azalea to create depth. Space plants 18-24 inches apart in pots to allow for growth without overcrowding.
Arrange pots in a slightly curved line around each tree to soften the edges and create a natural, flowing look. Step back every few feet to check your progress—you want the pots to frame the tree while filling gaps in its canopy. If a spot looks bare, add a trailing plant like sweet potato vine in a hanging pot to cascade down and fill space.
💧 Step 4: Water and Mulch for Season-Long Success
Water deeply right after planting to help roots establish, then water whenever the top 1-2 inches of soil feel dry. Evergreens like boxwoods prefer slightly drier soil, while flowering shrubs such as hydrangeas need consistent moisture. I use a soaker hose to water at the base of each pot, avoiding the foliage to prevent fungal diseases.
Apply a 2-inch layer of mulch around the base of each plant, keeping it 3 inches away from the trunk to prevent rot. Use shredded bark or pine needles—they retain moisture and regulate soil temperature. Replenish mulch every 3-4 months or as it breaks down, especially in hot summers when evaporation speeds up.
✂️ Step 5: Prune and Maintain for Long-Term Privacy
Prune flowering shrubs right after they bloom to encourage new growth and more flowers next season. For evergreens, shape them lightly in early spring to maintain their dense form. I use clean, sharp pruners and always cut just above a leaf bud to promote healthy regrowth. Remove any dead or diseased branches immediately to keep plants vigorous.
Fertilize in early spring and again in mid-summer with a balanced, slow-release fertilizer. For flowering shrubs, switch to a bloom-boosting formula in late winter to jumpstart spring blooms. Watch for pests like spider mites or aphids—spray plants with a strong stream of water to dislodge them, or use neem oil for stubborn infestations. With consistent care, your pot-and-tree combo will create a thriving, year-round privacy screen.
Tips & tricks for perfect year-round privacy screens
Creating a stunning privacy screen takes planning—here are my go-to tricks to ensure your pots and trees thrive together.
Plant Selection Strategy: In Step 1, when choosing trees, consider the mature height of both your trees and potted plants. I always pair a 6-foot arborvitae with 3-foot pots of camellias—this creates a layered look that fills gaps perfectly. For deciduous trees like dogwoods, add evergreen pots (like juniper) to maintain winter coverage. The key is to visualize how each plant will fill space as it grows, not just at planting time.
Soil Mix Hack: For Step 2, when mixing your soil, I add a handful of worm castings to the compost portion—it gives plants a nutrient boost right away. Also, if you're using heavy clay soil, increase the perlite to 40% for better drainage. This prevents root rot, especially important for evergreens that prefer well-drained conditions.
Arrangement Pro Tip: In Step 3, when arranging pots, I recommend using a garden hose to create a gentle curve around each tree. This visual guide helps you space pots evenly while maintaining that natural, flowing look. For extra impact, place taller pots slightly behind shorter ones to create depth—think of it like painting with foliage!
Maintenance Schedule: For Step 5, I set reminders for my pruning and fertilizing schedule: early spring for shaping evergreens, right after flowering for shrubs, and mid-summer for that second fertilizer boost. This consistent care keeps everything looking lush without overwhelming you. A quick weekly check for pests (especially spider mites on the undersides of leaves) prevents small issues from becoming big problems.
Pro Tips for Flower Pots Around Trees
- Creating a stunning privacy screen takes planning—here are my go-to tricks to ensure your pots and trees thrive together.
- Plant Selection Strategy: In Step 1, when choosing trees, consider the mature height of both your trees and potted plants.
- Soil Mix Hack: For Step 2, when mixing your soil, I add a handful of worm castings to the compost portion—it gives plants a nutrient boost right away.
Frequently asked questions
Got questions about using flower pots around trees for privacy and beauty? You’re not alone!
Here are some common concerns—and straightforward answers—to help you create a stunning, low-maintenance garden oasis.
What’s the best time of year to plant flower pots around trees?
The ideal time is early spring or fall when temperatures are mild. This gives roots time to establish before extreme heat or cold. Avoid planting in summer—pots can dry out quickly, stressing your plants. If you must plant in winter, choose cold-hardy varieties like heuchera or boxwood.
How often should I water flower pots around trees?
Watering depends on your climate, but aim for 1–2 times per week during dry spells. Pots dry out faster than ground soil, so check moisture with your finger—if the top inch feels dry, it’s time to water. Mulch (2–3 inches) helps retain moisture and reduces weeds. Drip irrigation systems are a game-changer for consistency!
Will flower pots hurt the tree’s roots?
Not if you place them correctly! Keep pots at least 12–18 inches away from the tree trunk to avoid root competition. Use well-draining soil and avoid compacting it near the tree’s base. If roots start circling the pot area, gently loosen them with a fork—this encourages outward growth.
Can I use any type of plant in flower pots around trees?
Choose shade-tolerant, low-maintenance plants like ferns, hostas, or ornamental grasses for understory pots. For full-sun spots, opt for succulents, impatiens, or petunias. Avoid invasive species (e.g., mint or English ivy) that could spread aggressively. Pro tip: Mix heights and textures for a lush, layered look!
How do I refresh or replace pots without damaging the tree?
Start by watering the area 24 hours before to loosen the soil. Gently lift pots (or use a flat shovel) and replant with fresh soil and mulch. If roots are tangled, trim excess growth with sterilized shears. For a quick refresh, swap out spent plants for seasonal blooms—just ensure new pots have drainage holes!
Are flower pots around trees prone to pests or diseases?
Yes, but prevention is easy! Inspect plants regularly for aphids, spider mites, or fungal spots. Use neem oil or insecticidal soap for pests, and ensure pots have good airflow to prevent mold. Elevate pots slightly (with bricks or pot feet) to improve drainage and deter slugs.
Still stumped? Drop your question in the comments—we’re happy to help you grow a thriving, tree-friendly pot display!
Wrapping up and next steps
Transforming your outdoor space with flower pots around trees is a creative and rewarding way to boost privacy, beauty, and curb appeal—all while keeping nature thriving year-round! 🌿 Whether you’re a seasoned gardener or a beginner, the key is to start small, choose the right plants, and let your green vision grow naturally.
Now that you’re armed with tips and answers, it’s time to roll up your sleeves and bring your dream garden to life!
Next step: Pick a sunny spot, grab your supplies, and plant your first pot today—your future shaded retreat awaits! 🌱