Pruning
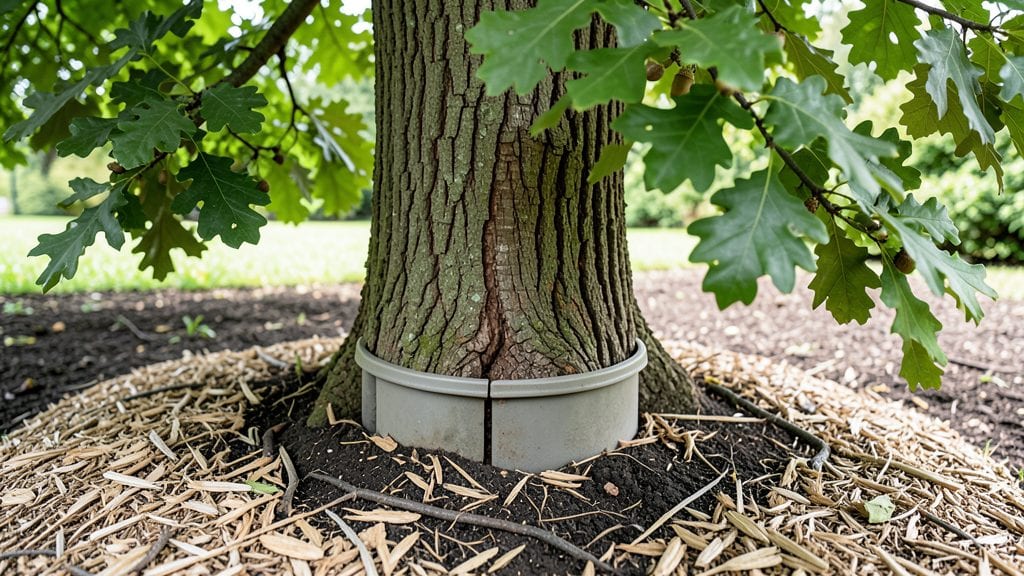
Protecting tree trunks from frost cracks isn’t just about looks—it’s about saving your oak or maple from becoming firewood after one brutal winter. 🌳 The good news? A simple wrap can save your trees from this silent killer.
Most people grab whatever’s handy—plastic sheeting, burlap, even old blankets—but not all materials work the same. You need something breathable yet sturdy, like tree-specific wraps or even undyed burlap, to shield bark without trapping moisture.
The key is timing: wrap trunks in late fall, before temperatures dip below freezing, and remove it in early spring once the threat passes.
What you’ll end up with is a trunk protected from frost cracks, sunscald, and even hungry critters like rabbits. The right wrap also keeps bark from peeling or splitting as the tree ages, extending its life by decades.
Plus, it’s a small investment for a big payoff—no more waking up to find your favorite shade tree looking like it’s been hit by lightning.
Works for young saplings and mature giants alike, though you’ll need to adjust the technique based on trunk size and species. Let’s get your trees armored up for winter before it’s too late.
📚 In This Guide
- What you need
- Instructions
- Tips and common mistakes
- Wrapping up and next steps
What you need
- ● Tree Wrap: 1–2 rolls of tree wound dressing (e.g., Tanglefoot Tree Wound Dressing) or tree wrap fabric (e.g., 3–4" wide, breathable burlap or landscape fabric).
- ● For large trunks: plastic tree guard (e.g., 1/4" thick, spiral-wrapped vinyl).
- ● Adhesive: 1 tube of waterproof tree wrap adhesive (e.g., Tanglefoot Tree Wrap Adhesive) or duct tape (for temporary fixes).
- ● Measuring Tape: 1–25 ft. tape measure to determine trunk circumference and wrap length.
- ● Utility Knife or Scissors: For cutting wrap material to size.
- ○ Paintbrush (optional but helpful): For applying adhesive or wound dressing smoothly.
- ● Reflective Tree Guard: For added sun protection (e.g., aluminum foil-wrapped trunk guard).
- ● Tree Spray: Fungicide or sealant (e.g., copper-based spray) to prevent disease.
- ● Staple Gun: For securing fabric wraps (if not using adhesive).
- ● Work Gloves: To protect your hands from rough bark or adhesive.
Instructions for wrapping tree trunks to prevent frost cracks
Here’s how to shield your trees from winter damage using simple, effective methods.
🪴 Step 1: Choose the Right Wrapping Material
Pick a breathable, flexible material like tree wrap or burlap—never plastic wrap or thick cardboard. I like tree wrap because it stretches easily and protects for years. Measure the trunk’s circumference and cut a strip 12-18 inches wide and 2-3 times the trunk’s height. This ensures full coverage without restricting growth.
If you’re using burlap, soak it in water first to prevent it from wicking moisture away from the trunk. Avoid synthetic fabrics; they trap heat and encourage rot or insect infestations. The key is breathability—your tree needs to "breathe" even in winter.
✂️ Step 2: Clean and Prepare the Trunk
Start by removing any loose bark, moss, or debris from the trunk using a soft brush or cloth. This prevents pests from hiding under the wrap. I also like to apply a thin layer of tree-safe sealant (like latex paint mixed with water) to smooth rough spots—this helps the wrap adhere better and protects against sunscald in spring.
Wait until temperatures drop below 40°F before wrapping. If you do it too early, the tree may still be metabolically active and trap heat, which can cause damage. A quick trick: check the forecast for the next 3-5 days—wrap just before the first hard freeze.
🌿 Step 3: Apply the Wrap Securely
Begin wrapping at the base of the trunk, leaving 2-3 inches of space above the soil to prevent moisture buildup. Overlap each layer by 1-2 inches as you spiral upward, ensuring no gaps. For tree wrap, stretch it snugly but not tightly—you should be able to slide a finger between the wrap and trunk.
Secure the wrap with staples or tape every 12-18 inches, avoiding plastic staples that can cut into the bark. If using burlap, tie it loosely with twine or strips of the same material. The goal is to create a barrier that blocks extreme temperature swings without suffocating the tree.
☀️ Step 4: Monitor and Adjust Through Winter
Check the wrap every 2-3 weeks to ensure it hasn’t loosened or torn. If snow or ice accumulates, gently brush it off to prevent added weight from pulling the wrap away. In late winter, as temperatures rise above 50°F, start removing the wrap in stages—leave it on during cold snaps to avoid shocking the tree.
Watch for signs of stress like dark streaks or peeling bark under the wrap. If you see these, remove the wrap immediately and inspect the trunk. The wrap should protect, not harm—if it’s causing issues, it’s time to adjust or replace it.
⏰ Step 5: Remove Wrap at the Right Time
Remove the wrap gradually in early spring, starting when daytime temperatures consistently stay above 50°F. Begin at the top and work downward, peeling it away slowly to avoid startling the tree. Leave it on during unexpected late frosts—your goal is to shield the trunk until the tree can handle temperature fluctuations on its own.
After removal, inspect the trunk for any damage. If you notice cracks, peeling bark, or sap oozing, the tree may need extra care, like pruning damaged areas or applying a protective sealant. Store the wrap for next winter—properly maintained, it can last 3-5 years before needing replacement.
Tips & tricks for protecting tree trunks from frost cracks
These simple but effective tricks will help you shield your trees like a pro—without any guesswork.
Material Matters: If you're using tree wrap, choose a thin, flexible variety designed for long-term use. Thicker wraps can restrict growth over time, while cheap plastic alternatives trap moisture and promote rot. For burlap, opt for 100% natural fiber—synthetic blends won't breathe properly. I've found that high-quality tree wrap lasts 3-5 years if stored properly between uses.
Timing is Everything: The 40°F threshold in Step 2 is critical—this is when trees start becoming vulnerable to frost cracks. Use a thermometer or check your local weather app for precise timing. I wait until the forecast shows three consecutive nights below 40°F before wrapping. Pro tip: Wrap younger trees first—they're more susceptible to damage.
The Right Tension: When applying the wrap in Step 3, aim for a snug fit that still allows 1/8-inch space between the wrap and trunk. Too tight? It restricts growth. Too loose? It won't protect against temperature swings. Test by sliding your finger between the wrap and trunk—it should move with slight resistance. For extra security on windy days, add a second layer of wrap over the first.
Spring Removal Strategy: Don't rush to remove the wrap in Step 5! I've seen trees shocked by sudden temperature swings when wrap comes off too early. Start removal when daytime temps stay above 50°F for 5 consecutive days, but keep the wrap on for any late frosts. Remove it gradually over 2-3 days, starting from the top—this gives the tree time to adjust without stress.
Pro Tips for Protecting Tree Trunks
- These simple but effective tricks will help you shield your trees like a pro—without any guesswork.
- Material Matters: If you're using tree wrap, choose a thin, flexible variety designed for long-term use.
- Timing is Everything: The 40°F threshold in Step 2 is critical—this is when trees start becoming vulnerable to frost cracks.
Frequently asked questions
Got questions about protecting your tree trunks? You’re not alone! Here are some of the most common concerns—and straightforward answers—to keep your trees healthy and crack-free this winter.
When is the best time to wrap tree trunks for frost protection?
Wrap tree trunks in late fall once temperatures consistently drop below freezing at night (typically after the first hard frost). Remove the wrap in early spring—around March or April—when daytime temperatures rise above freezing to prevent moisture buildup and pests. Pro tip: Use a weather tracker for your zone to time it perfectly!
Can I reuse tree wrap from last year?
Reusing tree wrap is safe if it’s still intact, but check for tears, mold, or excessive dirt. If the material is brittle or smells musty, replace it. Why? Old wraps can harbor pests or trap too much moisture, increasing the risk of rot or disease. Pro tip: Store unused wrap in a dry, ventilated space to extend its life.
What’s the difference between tree wrap and burlap?
Tree wrap (plastic or fabric) is breathable, flexible, and designed to protect against sun scald and frost cracks. Burlap, while natural, can absorb moisture and harbor pests—making it a poor long-term choice. For young or thin-barked trees, tree-specific wrap is the gold standard.
Will wrapping hurt my tree if I leave it on too long?
Leaving wrap on past spring can trap heat and moisture, encouraging fungal growth or bark damage. If you forget, monitor the tree for dark spots, mold, or peeling bark. Remove it as soon as temperatures stabilize above freezing to avoid complications.
Are there natural alternatives to commercial tree wrap?
Yes! For a DIY approach, try:
- Burlap strips (secure loosely with twine)
- Cardboard tubes (cut to size, remove staples)
- Reflective aluminum foil (wrapped snugly, but remove by May)
Wrapping up and next steps
Protecting your tree trunks isn’t just about aesthetics—it’s a proactive investment in their long-term health. By using the right wrapping techniques, you can shield trees from frost cracks, pests, and harsh weather, ensuring they thrive for years to come. 🌳✨
Now that you’re armed with the knowledge, take action! Start by inspecting your trees this fall, gather your supplies, and apply protective wraps before winter hits. Your trees will thank you—and so will your landscape!