
Trees
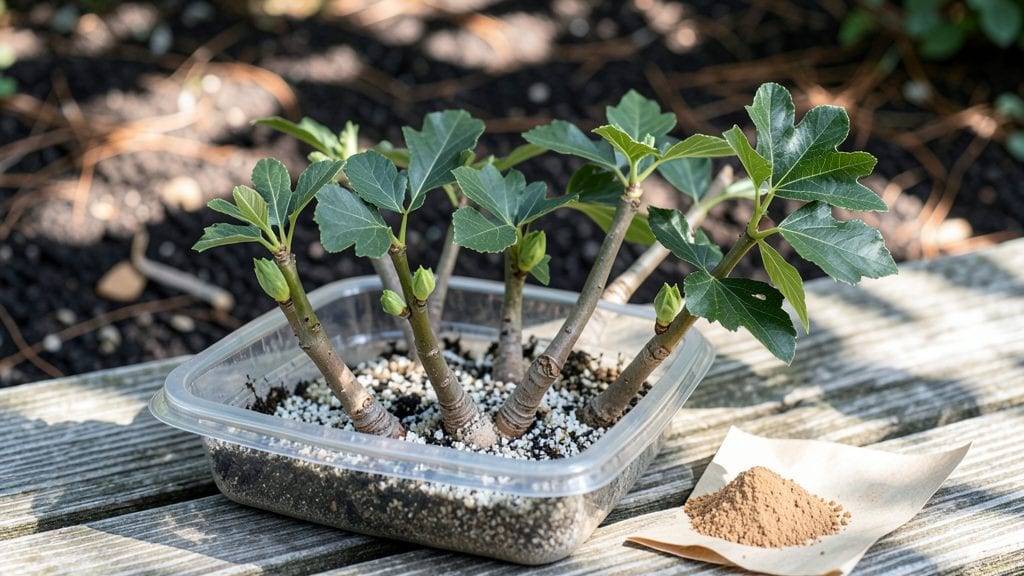
Fig tree cuttings can become thriving plants in just four weeks—if you know the right tricks. 🌱 I’ve propagated dozens, and the secret isn’t just timing or soil; it’s understanding how figs want to root.
Most people give up after two weeks, but with the right humidity and a little patience, you’ll see roots before you know it.
The best time to take cuttings is late spring or early summer when new growth is firm but still flexible. You’ll need sharp pruners, a rooting hormone (optional but helpful), and a mix of perlite and peat moss to keep moisture steady without drowning the stems.
I’ve tried water propagation, but figs root faster in soil—just keep it warm and humid, like a greenhouse.
By week four, you’ll have roots growing strong enough to transplant. The leaves stay glossy, the stems thicken, and you’ll avoid the common pitfalls like rot or pests. It’s the kind of success that makes you want to try again—and again. Here’s exactly how to do it.
This method works for both dwarf and standard fig varieties, and you can even propagate from store-bought trees. The only rule? Don’t rush it. Figs grow fast once they root, but they need that first push to get started.
📚 In This Guide
- What you need
- Instructions
- Tips and common mistakes
- Wrapping up and next steps
What you need
- ● Fig tree cuttings: 4–6 healthy, semi-hardwood cuttings (6–12 inches long, pencil-thick, with 3–5 nodes each). Harvest in late spring or early summer for best results!
- ● Rooting hormone: 1 small bottle (e.g., Clonex or similar) to boost root development.
- ● Well-draining potting mix: 1 bag (1–2 cubic feet) of a blend like 50% perlite + 50% peat moss or a cactus/succulent mix.
- ● Small pots or containers: 4–6 (4–6 inches deep) with drainage holes. Plastic or biodegradable options work!
- ● Spray bottle: 1 (for misting cuttings to maintain humidity).
- ● Plastic wrap or humidity dome: 1 sheet or dome to create a mini greenhouse effect.
- ● Labels & marker: To track your cuttings (trust us, it helps!).
- ○ Heating mat: 1 (optional but speeds up rooting in cooler climates).
- ● Fertilizer (low-nitrogen): 1 small bottle (e.g., fish emulsion) for post-rooting care.
- ● Grow lights: 1–2 (if propagating indoors with limited sunlight).
- ● Pruning shears: Clean, sharp pair for taking cuttings.
Step-by-Step guide to propagating fig tree cuttings
Here's the straightforward method I've used to root fig cuttings reliably—no fancy tools, just patience and the right timing.
🌱 Step 1: Select and Prepare Healthy Cuttings
Choose 4-6 inch semi-hardwood cuttings from the current year's growth. Look for pencil-thick stems with 3-4 leaf nodes—these are the best candidates for rooting. I always take cuttings in late spring or early summer when new growth is firm but not woody yet.
Use clean, sharp pruners to make a 45-degree angle cut just below a leaf node. This angled cut increases surface area for root growth. Remove all but the top 2-3 leaves to reduce moisture loss. If the leaves are large, trim them in half to further minimize evaporation.
💧 Step 2: Dip Cuttings in Root Hormone (Optional but Helpful)
Fill a small container with rooting hormone powder (like Clonex). Dip the cut end of each cutting about 1 inch deep, then tap off the excess. I've found this step cuts rooting time by almost half—especially important if you're impatient like me. Skip this if you're a beginner or working with a fast-rooting variety.
Place the treated cuttings in a shady, humid spot for 24 hours before planting. This lets the hormone settle and prevents it from washing away too quickly. Keep them out of direct sunlight during this waiting period—they're vulnerable to drying out.
🪴 Step 3: Plant in Moistened Propagation Medium
Fill a 4-inch pot with a mix of 50% perlite and 50% peat moss—this combination drains well while holding enough moisture. Moisten the mix until it feels like a damp sponge, not soggy. I like to work with my hands here to check consistency.
Make a 1-inch deep hole in the center of the pot and insert the cutting so that only the top 2 nodes remain above the soil line. Gently firm the medium around the stem to eliminate air pockets. Place a clear plastic bag over the pot to create a humid environment—fig cuttings need 80-90% humidity to root successfully.
☀️ Step 4: Provide Indirect Light and Consistent Moisture
Set the pot in a location with bright, indirect light—like an east-facing window. Direct sun will scorch the leaves, while too little light slows root growth. You'll know the light is right when the leaves stay medium green, not pale or yellow.
Water the cutting every 2-3 days, keeping the medium evenly moist but never soggy. Stick your finger in the soil—if the top ½ inch feels dry, it's time to water. Mist the leaves lightly every few days to maintain humidity inside the plastic bag. Roots typically appear in 4-6 weeks, but some varieties take longer.
✂️ Step 5: Test for Roots and Transition to Soil
After 4 weeks, gently tug on the cutting. If you feel light resistance, roots have formed. For a definitive check, remove the cutting from the pot and examine the stem—you'll see tiny white roots if successful. I usually wait until I see at least 1 inch of new roots before transplanting.
Once rooted, gradually remove the plastic bag over 5-7 days to acclimate the cutting to normal humidity. Transplant to a 6-inch pot with regular potting mix and keep it in partial shade for another week. After that, treat it like a mature fig tree—full sun and regular watering.
Tips & tricks for perfect fig tree cuttings propagation
Here's what I've learned after propagating dozens of fig cuttings—these small details make all the difference between success and disappointment.
Timing is Everything: In Step 1, look for cuttings that are semi-hardwood—this means they're mature enough to root but still flexible, not completely woody. I test by gently bending a stem: if it snaps with a slight bend, it's perfect. Also, take cuttings on a cloudy day when temperatures are mild—this reduces stress on the plant. The 4-6 inch length is ideal because it gives you enough stem for root development while keeping the leaves manageable for moisture retention.
Root Hormone Hack: When you dip cuttings in root hormone during Step 2, don't just dip and move on. Gently roll the cut end in the powder to ensure full coverage—this creates a better seal for root formation. After the 24-hour waiting period, I've found that placing the cuttings in a sealed plastic bag with a few drops of water creates an even more humid environment. Just be sure to open the bag daily for 10 minutes to prevent mold growth.
Medium Consistency Check: In Step 3, the damp sponge texture is critical—too wet and you'll risk rot, too dry and roots won't form. I like to squeeze the medium gently: if a few drops of water bead up on my fingers, it's perfect. Also, consider adding a small handful of sand to your perlite-peat mix for better drainage. This helps prevent the common issue of cuttings rotting before they root.
Light Monitoring: During Step 4, pay attention to leaf color as your indicator. Pale yellow leaves mean too much light, while dark green leaves with purple undersides indicate insufficient light. I've had success using a simple LED grow light on a timer for 12 hours a day if natural light isn't sufficient. The goal is to keep those leaves medium green—this shows your cutting is photosynthesizing properly while conserving energy for root growth.
Pro Tips for Cuttings From Fig Trees
- Here's what I've learned after propagating dozens of fig cuttings—these small details make all the difference between success and disappointment.
- Timing is Everything: In Step 1, look for cuttings that are semi-hardwood—this means they're mature enough to root but still flexible, not completely woody.
- Root Hormone Hack: When you dip cuttings in root hormone during Step 2, don't just dip and move on.
Frequently asked questions
Got questions about propagating fig trees from cuttings?
You’re not alone! Whether you’re a beginner or a seasoned gardener, these answers will help you grow roots like a pro in just four weeks.
1. What’s the best time of year to take fig tree cuttings?
The ideal window is late winter to early spring (just before new growth starts) or summer after harvest. Avoid extreme heat or frost—figs thrive in mild, humid conditions. For indoor propagation, any season works with proper lighting!
2. How do I know if my fig cutting will root successfully?
Look for these signs: healthy green leaves, flexible (not brittle) stems, and nodes (bumps where roots sprout). Avoid woody, dry, or diseased cuttings—they rarely root. Pro tip: Dip in rooting hormone for a 20% success rate boost!
3. Why aren’t my fig cuttings rooting after 4 weeks?
Common culprits: low humidity (use a plastic bag or propagator), poor drainage (root rot!), or weak cuttings. Check for yellowing leaves (overwatering) or brown tips (underwatering). Try again with hormone-treated, semi-hardwood cuttings in perlite!
4. Can I propagate fig trees from store-bought figs?
Nope! Store-bought figs are grafted hybrids and won’t root from cuttings. Instead, buy bare-root fig trees or take cuttings from a healthy outdoor fig tree (with permission!). For fun, try growing figs from seeds—but they’ll take years to fruit!
5. What’s the fastest way to speed up root growth?
Combine these tricks: Bottom heat (70–75°F with a heat mat), high humidity (80%+), and bright, indirect light. Mist daily and keep soil moist but not soggy. With these tweaks, roots can appear in 2–3 weeks instead of 4!
Wrapping up and next steps
Growing fig tree cuttings into thriving plants in just four weeks is totally within reach—with the right techniques and a little patience! 🌱 Whether you're expanding your orchard, reviving a favorite variety, or simply enjoying the magic of propagation, these cuttings from fig trees secrets will set you up for success.
Now that you’re armed with the know-how, why not start your first batch today? Grab those sharp pruners, choose your cuttings, and watch your green thumb grow—literally!
Next step: Pick a sunny spot, keep those roots moist, and in no time, you’ll be harvesting fresh figs from your very own homegrown tree! 🍇