Trees
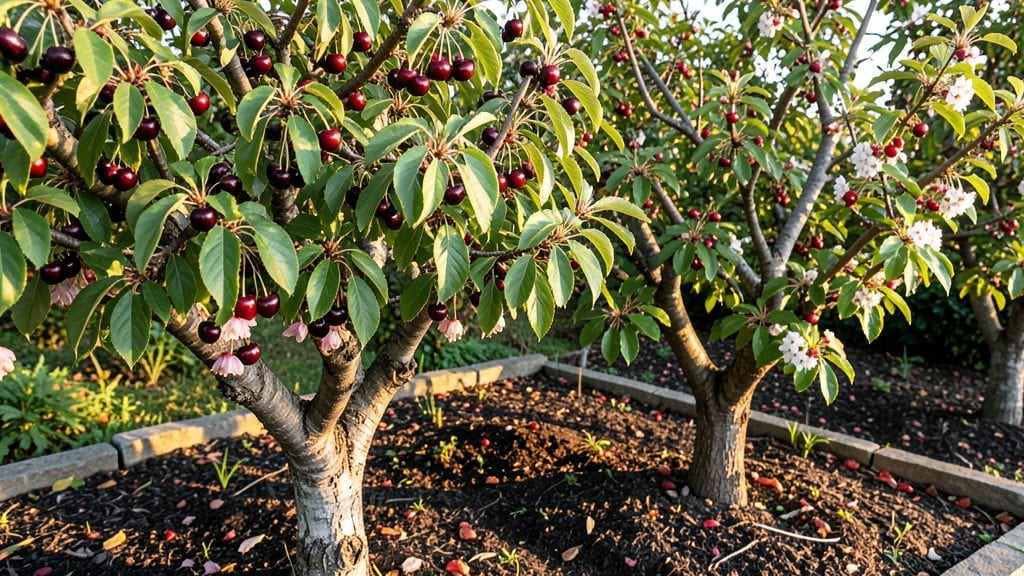
Growing cherry fruit trees in the Pacific Northwest means year-round beauty and sweet rewards—cherry trees thrive here with their stunning spring blossoms, summer shade, and fall fruit. 🌸 I’ve watched my own trees go from bare branches to heavy with fruit in just a few seasons, and the key is choosing the right variety for your climate and space.
The best PNW cherries need 600-1,000 chilling hours (cold winter nights) and well-drained soil rich in organic matter. Sweet cherries like ‘Stella’ or ‘Lapins’ are perfect for home gardens, while sour cherries like ‘Montmorency’ are tougher and great for pies.
Dwarf varieties fit small yards, while standard trees need more room but produce bigger harvests.
Once planted, cherries reward patience with vibrant blooms in spring and juicy fruit by summer. Prune in late winter to shape the tree and remove dead wood, and thin fruit in early summer to prevent overcrowding.
With the right care, you’ll enjoy fresh cherries for decades—and maybe even share them with neighbors.
Whether you’re a first-time grower or expanding your orchard, these hardy varieties make it easier than ever. The PNW’s cool, wet climate actually works in your favor—just avoid soggy soil and watch for common pests like aphids or cherry fruit flies. Let’s get those trees growing!
📚 In This Guide
- What you need
- Instructions
- Tips and common mistakes
- Wrapping up and next steps
What you need
- ● Cherry Tree Varieties (Pacific Northwest Hardy): 2–5 bare-root or container-grown trees (e.g., Stella®, Lapins®, or Montmorency for sweet or tart cherries).
- ● Ensure self-pollinating varieties or plant at least two compatible types for cross-pollination.
- ● Planting Site: Full sun location (6+ hours of sunlight daily).
- ● Well-draining soil (amend with compost if needed).
- ● Space: 20–25 feet between trees (or 15 feet for dwarf varieties).
- ● Soil Amendments: 5–10 lbs of 5-10-10 fertilizer (balanced NPK ratio).
- ● 2–3 inches of organic mulch (wood chips or straw).
- ● Tools: Shovel or spade (for digging).
- ● Pruning shears (sterilized).
- ● Garden hose or watering can.
- ● Measuring tape (for spacing).
- ● Tree Supports: Stakes or cages for young trees (prevents wind damage).
- ● Drip Irrigation: Automated system for consistent moisture (especially in dry summers).
- ● Bird Netting: Protects ripe cherries from hungry birds and wildlife.
- ● Soil pH Test Kit: Ensures soil pH is between 6.0–6.5 (ideal for cherries).
- ● Fungicide: Copper-based spray for disease prevention (e.g., brown rot).
Step-by-Step guide to planting cherry trees in the Pacific Northwest
Here's how to establish your cherry trees for years of vibrant blooms and delicious fruit.
🌱 Step 1: Choose the Right Variety for Your Climate
The Pacific Northwest's cool, wet winters and mild summers favor sweet cherries like 'Stella' or 'Lapins' over tart varieties. These types handle our region's USDA zones 6-8 beautifully and produce fruit that thrives in our maritime climate. I always check with local nurseries—they often carry region-specific rootstocks that handle our heavy soils better.
Look for trees labeled self-fertile if you only want one tree, or pair a sweet cherry with a pollinator like 'Empress' for better fruit set. Dwarf varieties like 'Compact Stella' work well in smaller yards, while standard trees need 20-30 feet of space for their mature spread. The key is matching the tree's needs to your site's microclimate.
🪴 Step 2: Prepare the Planting Site
Cherry trees need full sun (at least 6-8 hours daily) and well-draining soil. In our region, that means avoiding low spots where water pools. I test soil drainage by digging a 12-inch deep hole—if water stands after 24 hours, amend with 2-3 inches of compost mixed into the native soil.
For heavy clay soils common here, I add 1 part sand to 3 parts native soil when backfilling. The planting hole should be twice as wide as the root ball but only as deep—burying too deep suffocates roots. Loosen the root ball's edges if it's tightly bound, then water thoroughly before planting to settle the soil.
⏰ Step 3: Plant at the Right Time and Depth
Fall planting (October-November) gives roots time to establish before winter, while spring planting (March-April) avoids frost heave. I plant mine in early October when soil is still warm but before hard frosts. Position the tree so the graft union (visible bump near the base) sits 2-3 inches above soil level—this prevents rot in wet winters.
Backfill with native soil mixed with compost, tamping gently to remove air pockets. Water deeply to settle everything, then create a 4-inch high berm around the base to direct water away from the trunk. Mulch with 3-4 inches of wood chips, keeping it 6 inches away from the trunk to prevent moisture buildup.
☀️ Step 4: Water and Fertilize for First-Year Growth
Newly planted cherry trees need deep watering once a week during the first growing season, more in summer droughts. I check soil moisture by sticking my finger 4 inches deep—if it's dry, water slowly until it seeps into the root zone. Overhead watering can spread fungal diseases, so I use a soaker hose at the drip line.
Wait until spring of the second year to fertilize—too much nitrogen now encourages leafy growth at the expense of root development. Then apply 10-10-10 fertilizer at half the recommended rate, spreading it 6 inches from the trunk and watering it in. Pacific Northwest soils often need micronutrients, so I add a balanced organic fertilizer like fish emulsion annually.
✂️ Step 5: Prune for Structure and Disease Prevention
Prune young cherry trees in late winter (February-March) before buds swell, removing dead, crossing, or inward-growing branches. I make cuts just outside the branch collar to promote healing. Our region's high humidity makes cherry trees prone to silver leaf disease, so I sterilize pruners with rubbing alcohol between cuts.
Open the center of the tree to improve airflow and sunlight penetration. Aim for a vase-shaped structure with a strong central leader. In subsequent years, prune in late winter to remove suckers (shoots from the base) and water sprouts (fast-growing vertical shoots). Thin out 10-20% of the canopy annually to maintain health and fruit production.
Tips & tricks for perfect cherry tree planting in the Pacific Northwest
Planting cherry trees in our region's unique climate requires some special considerations—here's what I've learned from years of growing these beautiful fruit trees.
Variety Selection: When choosing between 'Stella' or 'Lapins' in Step 1, consider your specific needs. 'Stella' produces fruit that's slightly larger, while 'Lapins' is more cold-hardy and disease-resistant—both excellent choices for our climate. For urban gardens, dwarf varieties like 'Compact Stella' are perfect since they mature at half the size of standard trees while still producing abundant fruit. Remember, the 20-30 feet spacing mentioned for standard trees applies to mature size, so plan accordingly.
Soil Testing Tip: Before amending your soil in Step 2, conduct a simple drainage test by digging that 12-inch deep hole and filling it with water. If it drains completely within 24 hours, you're good to go. If not, consider adding more sand or creating raised beds. Our region's heavy clay soils often need this extra attention—don't skip this step! The 2-3 inches of compost recommendation is perfect for improving both drainage and nutrient content simultaneously.
Planting Depth: The 2-3 inches above soil level for the graft union in Step 3 is absolutely critical. This positioning prevents winter rot from our wet winters while allowing the tree to develop strong roots. I've seen many gardeners bury the graft union too deep, which can lead to poor fruit quality or even tree death. After planting, create that 4-inch berm to direct water away from the trunk—this simple technique prevents root rot and keeps your tree healthy.
Watering Wisdom: In Step 4, when checking soil moisture 4 inches deep, remember that our Pacific Northwest summers can bring unexpected droughts. During these periods, increase watering to twice weekly until the tree establishes strong roots. The soaker hose recommendation is perfect for delivering water directly to the root zone without wetting the foliage, which helps prevent fungal diseases that thrive in our humid climate.
Pro Tips for Cherry Fruit Trees
- Planting cherry trees in our region's unique climate requires some special considerations—here's what I've learned from years of growing these beautiful fruit trees.
- Variety Selection: When choosing between 'Stella' or 'Lapins' in Step 1, consider your specific needs.
- Soil Testing Tip: Before amending your soil in Step 2, conduct a simple drainage test by digging that 12-inch deep hole and filling it with water.
Frequently asked questions
Got questions about growing cherry fruit trees in the Pacific Northwest? You’re not alone! Here are some of the most common queries—plus straightforward answers to help you thrive.
How cold-hardy are Pacific Northwest cherry trees?
Most Prunus avium (sweet cherries) and Prunus cerasus (sour cherries) thrive in USDA Zones 5-8. Look for varieties like Stella® (sweet) or Montmorency (sour), which handle frost and wet winters well. Tip: Mulch heavily in winter to protect roots!
When should I plant cherry trees in the PNW?
Fall (October–November) is ideal—soil temps cool, and trees establish roots before winter. Spring (March–April) works too, but avoid extreme heat. Pro tip: Bare-root saplings plant best in dormancy (late fall/winter).
Do cherry trees need cross-pollination?
Yes! Most varieties need a second tree (same species, blooming at the same time) for fruit set. Sweet cherries often require a pollinator like Lapins or Sweetheart. Sour cherries (e.g., Montmorency) are often self-fertile but yield better with a partner.
What pests should I watch for in PNW cherry trees?
Common culprits include cherry fruit flies, aphids, and borers. Preventative tip: Use horticultural oil in early spring to smother overwintering pests. Birds love cherries too—netting helps!
Can I grow cherry trees in containers?
Dwarf varieties (like Stella® or Black Tartarian) work in large pots (15+ gallons), but they’re short-lived. Ensure well-draining soil and full sun. Warning: Container trees need annual root pruning and winter protection.
How long until my cherry tree bears fruit?
Patience pays off! Dwarf trees may fruit in 2–3 years, while standard trees take 4–7 years. Pro tip: Thin young fruit to encourage larger, higher-quality cherries later.
Wrapping up and next steps
Growing cherry fruit trees in the Pacific Northwest isn’t just about harvesting sweet fruit—it’s about embracing year-round beauty, resilience, and a touch of rustic charm. From the Stella® Cherry to the stunning Weeping Cherry for ornamental appeal, these trees bring color, flavor, and joy to your landscape.
Whether you’re a seasoned gardener or just starting out, the right variety can transform your yard into a vibrant, low-maintenance haven.
Ready to take the next step? Start small—pick a variety that suits your space and climate, gather your tools, and plant with confidence! Soon, you’ll be savoring homegrown cherries and admiring their blossoms for seasons to come. Your orchard awaits! 🌸🍒