Blooming
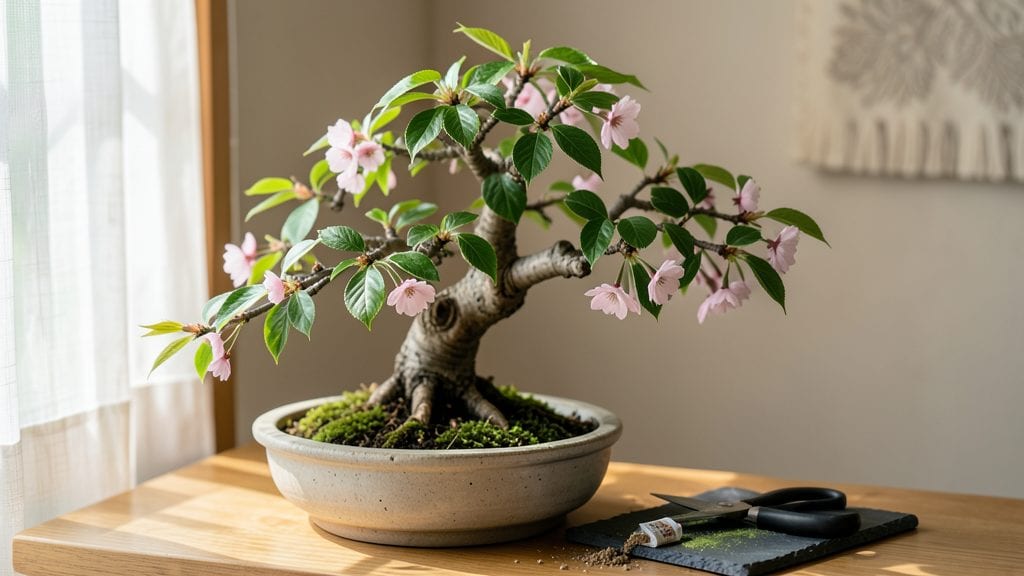
A cherry blossom bonsai tree brings delicate pink clouds to your windowsill. ✨ I still remember the first time I saw one—its tiny petals unfolding like a secret spring garden. The key to growing this miniature masterpiece lies in patience and precision, not expensive tools or rare soil.
You’ll need a dwarfing rootstock species like Prunus serrulata 'Kanzan' or Prunus x yedoensis, a well-draining soil mix of akadama, pumice, and organic matter, and basic bonsai tools like wire, scissors, and a root rake.
Even beginners can shape these trees with careful pruning and wiring—just avoid overwatering, which causes root rot.
By summer, you’ll watch clusters of blossoms form on carefully trained branches, their scent filling your space like a fleeting spring breeze. The artistry comes alive when you refine the shape each season, creating a living sculpture that blooms year after year.
This bonsai thrives in bright indirect light and cooler temperatures, making it perfect for apartments or sunrooms. With proper care, it can live for decades, becoming a cherished heirloom that tells a story of quiet dedication.
📚 In This Guide
- What you need
- Instructions
- Tips and common mistakes
- Wrapping up and next steps
What you need
- ● Cherry Blossom Bonsai Tree: A young, healthy Prunus serrulata or Prunus × yedoensis bonsai (3-5 years old, 6-12 inches tall). Look for one with a well-shaped trunk and branches.
- ● Bonsai Pot: A shallow, well-draining pot (5-8 inches in diameter) with drainage holes. Ceramic or clay pots work best.
- ● Bonsai Soil: A mix of 70% akadama, 20% pumice, and 10% lava rock for optimal drainage and aeration.
- ● Pruning Tools: Concave bonsai shears (for branch pruning)
- ● Sharp bonsai scissors (for fine trimming)
- ● Root hook (for root pruning and shaping)
- ● Wire (Bonsai Wire): Aluminum or copper wire (1-3mm gauge) for shaping branches.
- ● Fertilizer: A balanced bonsai fertilizer (e.g., 10-10-10 or a slow-release organic option) or a liquid bloom booster during flowering season.
- ● Spray Bottle: For misting leaves (especially in dry climates).
- ● Humidity Tray: A pebble tray with water to increase humidity around your bonsai.
- ● Bonsai Stakes: For supporting weak branches during growth.
- ● pH Test Kit: To monitor soil acidity (ideal range: 5.5-6.5).
- ● Grafting Tools: If you plan to propagate your own cherry blossom bonsai from cuttings.
- ● Patience: Bonsai trees thrive with slow, consistent care—especially cherry blossoms, which can take years to flower.
- ● Light Knowledge: Familiarize yourself with bonsai basics (pruning, wiring, repotting) or watch beginner tutorials.
- ● Space: A sunny spot (at least 4-6 hours of direct sunlight daily) and a cool, draft-free environment during winter.
Step-by-step instructions for cultivating a cherry blossom bonsai tree
Creating your own cherry blossom bonsai is simpler than you think—just follow these precise steps.
🌱 Step 1: Select and Prepare Your Tree and Pot
Start with a young Prunus serrulata (cherry blossom) tree, ideally 3-5 years old and 12-18 inches tall. Choose a shallow bonsai pot with drainage holes—6-8 inches wide—to restrict root growth and encourage trunk thickening. I use unglazed ceramic because it breathes and helps regulate soil moisture.
Fill the pot with a well-draining bonsai mix (typically 50% akadama, 30% pumice, 20% organic matter). Moisten the mix until it holds together when squeezed but doesn’t clump. Tap the pot gently to settle the soil without compacting it—this prevents air pockets that could suffocate roots.
🪴 Step 2: Plant and Style the Roots
Remove the tree from its nursery pot and loosen the root ball with your fingers, spreading roots gently outward. This encourages branching and prevents root-bound stress. Place the tree in the pot so the soil line sits about 1 inch below the rim—this leaves room for future trunk thickening.
Use wire or chopsticks to guide roots into a shallow, spreading pattern. Avoid deep planting—cherry blossom bonsai thrive when roots stay near the surface. Add soil gradually, tamping lightly to eliminate air gaps. Water thoroughly until it drains freely from the bottom.
☀️ Step 3: Position for Light and Prune Strategically
Place your bonsai in bright, indirect light—east or west-facing windows are ideal. Direct morning sun is fine, but afternoon sun can scorch delicate leaves. If indoors, supplement with a grow light (12-14 hours daily) positioned 6-12 inches away to mimic natural light cycles.
After flowering, prune back one-third of new growth to maintain shape. Use concave cuts just above a leaf node to encourage branching. Remove spent blossoms by pinching them off at the base—this redirects energy into next year’s buds. Watch for bud swell in early spring—this is your cue to adjust light exposure.
💧 Step 4: Water and Fertilize for Optimal Growth
Water when the top inch of soil feels dry—stick your finger in to check. Cherry blossom bonsai hate soggy roots, so always water until it drains from the bottom. In summer, you may need daily watering; in winter, reduce to every 3-5 days. Mist leaves occasionally to boost humidity, especially indoors.
Fertilize monthly during spring and summer with a balanced liquid fertilizer (10-10-10 or similar). Reduce to every 6-8 weeks in fall and stop in winter to let the tree rest. I use a seaweed-based fertilizer in early spring to kickstart blooming—it’s gentler on roots and packed with micronutrients.
✂️ Step 5: Refine and Maintain Through Seasons
In early spring, prune branches to encourage dense foliage and open the canopy for airflow. Use bonsai wire to shape branches—wrap it around limbs at a 45-degree angle and bend gradually. Remove wire after 3-4 months to avoid scarring.
During dormancy (late fall to winter), reduce watering and store outdoors in a sheltered, frost-free spot if temperatures drop below 20°F. Prune dead or crossing branches in late winter to prepare for new growth. Watch for bud break in late winter—this signals it’s time to resume regular care.
Tips & tricks for perfect cherry blossom bonsai cultivation
Here's what nobody tells you about keeping your cherry blossom bonsai thriving—these little details make all the difference between a struggling plant and a showstopper.
Soil Mix Matters: The 50-30-20 akadama-pumice-organic mix isn't just arbitrary—it's designed to mimic the tree's natural rocky mountain habitat. If you can't find akadama, substitute with 50% coarse sand and 30% perlite, but expect slightly faster drying. I've found that adding a handful of orchid bark to the organic portion improves aeration without compromising moisture retention.
Light Positioning: That 12-14 hours of daily light isn't just about duration—it's about quality. East-facing windows provide perfect morning sun without afternoon intensity, but if you're using grow lights, position them 6-12 inches away and angle them at 45 degrees to mimic natural light patterns. I've seen trees burn when lights are too close or positioned directly overhead.
Pruning Precision: When you're pruning back one-third of new growth, focus on the outermost leaves first—this opens up the canopy for better airflow and light penetration. For concave cuts, use sharp bonsai shears and cut just above a leaf node at a 45-degree angle. I learned this the hard way after creating ugly stubs that took months to heal.
Winter Survival: The 20°F threshold isn't just about avoiding frost—it's about preventing cold shock. If your winters dip below this, move your bonsai to a garage or unheated porch where temperatures stay above freezing. I've had trees survive 15°F briefly, but they showed stress for months afterward. A simple breathable frost cloth wrapped around the pot adds an extra layer of protection.
Pro Tips for Cherry Blossom Bonsai Tree
- Here's what nobody tells you about keeping your cherry blossom bonsai thriving—these little details make all the difference between a struggling plant and a showstopper.
- Soil Mix Matters: The 50-30-20 akadama-pumice-organic mix isn't just arbitrary—it's designed to mimic the tree's natural rocky mountain habitat.
- Light Positioning: That 12-14 hours of daily light isn't just about duration—it's about quality.
Frequently asked questions
Got questions about nurturing your own cherry blossom bonsai tree? You’re not alone! Here are some of the most common inquiries—plus straightforward answers to help you grow with confidence.
How often should I prune my cherry blossom bonsai?
Prune your bonsai after blooming (late spring) to shape the tree and encourage new growth. Light trimming of leaves and branches can happen year-round, but avoid heavy pruning during winter. For flowering branches, leave at least 3-5 buds to ensure future blooms!
When will my cherry blossom bonsai first bloom?
Patience is key! Most bonsai trees take 3-5 years to bloom, depending on age, care, and variety. Some dwarf cultivars may flower sooner. Ensure your tree gets full sun (6+ hours daily) and proper winter chilling (below 40°F) to trigger blossoms.
Can I grow a cherry blossom bonsai indoors?
While possible, indoor growth is tricky. Cherry blossoms need cold winters (dormancy) and bright light—a sunny windowsill or grow light helps, but outdoor placement (even in pots) during cooler months is ideal. If indoors, mimic seasons with temperature drops and reduced watering.
Why are my cherry blossom leaves turning yellow?
Yellow leaves often signal overwatering, nutrient deficiency, or pests. Check soil moisture (top inch should dry between waterings) and inspect for aphids or spider mites. Feed with a balanced bonsai fertilizer (diluted) every 4-6 weeks in spring/summer. Adjust care based on the season!
What’s the best soil mix for a cherry blossom bonsai?
Use a well-draining mix like 50% akadama, 30% pumice, and 20% organic matter (e.g., compost or peat). Avoid heavy garden soil—it retains too much moisture. Repot every 2-3 years in early spring to refresh roots and prevent root rot.
How do I protect my bonsai from winter damage?
Hardy varieties (like Prunus serrulata) tolerate light frost, but extreme cold (<20°F) may need protection. Wrap the pot in burlap or use a frost cloth. Avoid watering before freezing temps. Move potted trees to a sheltered spot (e.g., garage) if your climate drops below 15°F.
Wrapping up and next steps
Cultivating a cherry blossom bonsai tree is more than just gardening—it’s a journey into patience, creativity, and the joy of bringing nature’s beauty indoors. Whether you’re a beginner or a seasoned hobbyist, this delicate art lets you embrace spring’s magic year-round, one tiny petal at a time. 🌸
Now that you’re armed with the how-tos and FAQs, why not take the next step? Start with a cutting or a young sapling, and let your bonsai story unfold.
Every prune, wire, and watering session brings you closer to your own miniature masterpiece—so roll up your sleeves and watch your vision bloom! ✨