
Pruning
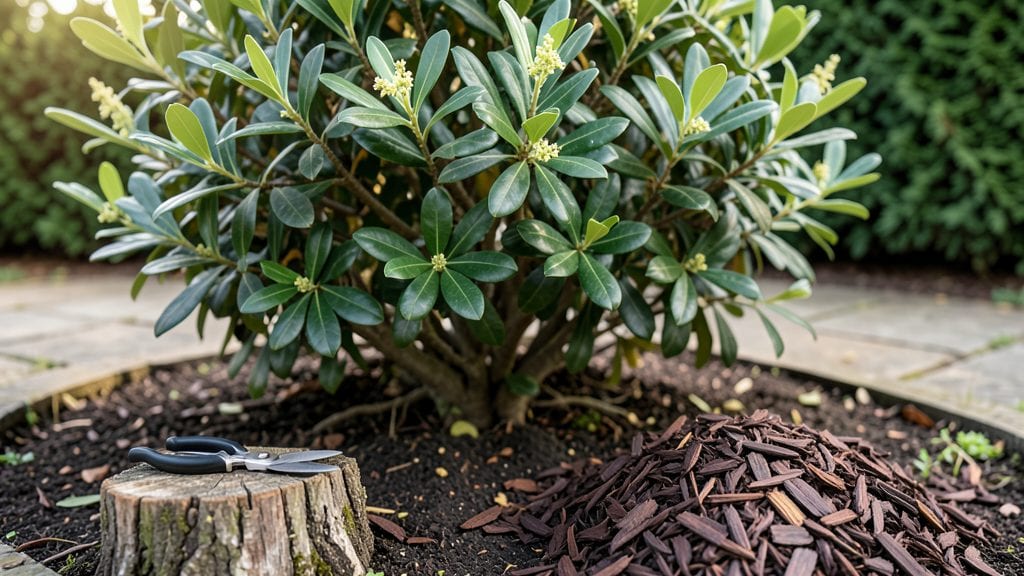
Bay tree maintenance starts with understanding that strategic pruning cuts keep your plant lush and productive for years. 🌿 I’ve learned the hard way that skipping pruning leads to leggy, sparse growth—no matter how much you water.
The key is timing: prune right after harvest in late spring or early summer when new growth signals the tree’s energy. A healthy bay tree thrives with well-draining soil, bright indirect light, and moderate watering—never soggy roots.
Overwatering is the #1 killer, so let the top inch of soil dry out between waterings. Mulch helps retain moisture while keeping roots cool, especially in hot climates where bay trees love to grow. With proper care, your tree will reward you with fragrant, glossy leaves and even edible berries.
The pruning itself is simple: trim back overgrown branches to encourage bushier growth, and always cut just above a leaf node. This keeps the tree compact and full of life. Seasonal adjustments matter—reduce watering in winter, increase humidity in dry climates, and watch for pests like spider mites.
A little prevention goes a long way in keeping your bay tree thriving all year. Let’s get started!
📚 In This Guide
- What you need
- Instructions
- Tips and common mistakes
- Wrapping up and next steps
What you need
- ● Pruning shears: Sharp, bypass pruners (4–6 inches) for clean cuts on small branches.
- ● Loppers: Heavy-duty loppers (8–12 inches) for thicker branches (½–1 inch in diameter).
- ● Hand saw: A pruning saw with a curved blade for stubborn, woody growth.
- ● Gloves: Sturdy, gardening gloves (leather or nitrile-coated) to protect hands from thorns and sap.
- ● Disinfectant: 70% rubbing alcohol or hydrogen peroxide (3%) to sterilize tools between cuts.
- ● Rake or leaf blower: For clearing fallen leaves/debris after pruning.
- ● Hose with nozzle: For rinsing off sap or dust after trimming.
- ● Tree ties or twine: To support young or newly pruned branches.
- ● Fertilizer: Balanced, slow-release fertilizer (10-10-10 or organic options like compost) post-pruning.
- ● Mulch: Organic mulch (wood chips, straw) to retain moisture and suppress weeds.
- ● Plant food spray: Seaweed-based or fish emulsion for a nutrient boost during growing seasons.
How to maintain a healthy bay tree through all seasons
Here's the straightforward approach I've used for years to keep bay trees lush and productive.
✂️ Step 1: Prune for Shape and Airflow in Late Winter
Wait until late February or early March when the tree is still dormant but just before new growth begins. Grab your pruning shears and remove any dead, crossing, or crowded branches first—these compete for energy and invite pests. I always start at the bottom and work upward, cutting just above a leaf node where new growth can emerge.
Shape the tree by trimming back any branches that grow inward or rub against each other. Aim for an open center that lets sunlight and air circulate freely. You'll know you're doing it right when you can see light reaching all the way to the trunk. Never remove more than one-third of the tree's foliage in a single pruning session—this stresses the plant.
☀️ Step 2: Monitor Light Exposure and Adjust as Needed
Bay trees thrive in full sun to partial shade, but their needs change with seasons. If you notice new growth stretching toward the light or leaves turning pale, move the tree closer to a south-facing window or supplement with a grow light for 6-8 hours daily. I position my grow light 12-18 inches away and raise it as the tree grows.
Watch for brown leaf edges—this signals too much direct sun, especially in hot summer months. In these cases, shift the tree to a spot with morning sun and afternoon shade. The goal is consistent, indirect light that keeps leaves vibrant without scorching.
💧 Step 3: Water Deeply and Adjust for Seasonal Needs
Bay trees prefer their soil to dry out slightly between waterings, but they can't handle soggy roots. Stick your finger 1-2 inches into the soil—if it feels dry, water thoroughly until it drains from the bottom. In spring and summer, you'll likely water every 7-10 days, but reduce this to every 2-3 weeks in fall and winter when growth slows.
I always water at the base rather than overhead to prevent fungal diseases. If you see yellowing leaves, it's usually a sign of overwatering. Let the soil dry out completely for a week before watering again. In winter, you might not need to water at all if your home stays consistently warm.
🌿 Step 4: Fertilize Lightly in Spring and Summer
Feed your bay tree with a balanced, water-soluble fertilizer diluted to half strength in early spring when new growth appears. I use a 10-10-10 formula and apply it every 4-6 weeks through the growing season. Over-fertilizing leads to salt buildup, which burns roots—always flush the soil with water after fertilizing.
Stop fertilizing in late summer to encourage the tree to prepare for dormancy. You'll know it's working when you see healthy, dark green leaves and steady new growth. If leaves turn yellow with brown tips, flush the soil with water immediately to remove excess salts.
⏰ Step 5: Prepare for Winter Dormancy by October
By October, reduce watering and stop fertilizing entirely. Move the tree to a cooler spot (around 50-60°F) if possible, but avoid drafts. Prune any weak or damaged growth before winter sets in—this helps the tree conserve energy. I also check for pests like spider mites or scale insects and treat them with neem oil if needed.
Bay trees are evergreens, so they won't lose all their leaves, but you might see some browning. This is normal—just trim away the dead foliage in early spring. Keep the soil slightly moist but not soggy through winter, and you'll see fresh growth return by late winter.
Tips & tricks for perfect bay tree maintenance
Here's what nobody tells you about keeping your bay tree thriving all year round.
Pruning Precision: In Step 1, when you're pruning, look for those small buds at the base of branches—these are your leaf nodes. Cutting just above them ensures new growth emerges in the right place. I always make my cuts at a slight angle to prevent water from pooling and rotting the wound. And here's the thing: if you're unsure about a cut, wait until you see fresh growth in spring before deciding whether to prune further.
Lighting Strategy: For that crucial 6-8 hours of grow light in Step 2, position the light so it covers the entire canopy—not just the top. Bay trees grow upward, so rotate the pot every few days to ensure even light exposure. I've seen leaves turn pale on one side while the other stays dark green—this is your tree begging for better light distribution!
Watering Wisdom: That 1-2 inch soil check in Step 3 is your best friend. If you're unsure whether to water, stick your finger in deeper—bay trees can handle slightly drier soil than many houseplants. Pro tip: use room-temperature water, as cold water can shock the roots. And if you notice yellowing leaves, don't panic—it's often overwatering, not underwatering.
Fertilizer Timing: When you're fertilizing every 4-6 weeks in Step 4, make sure to mix that diluted fertilizer with water first before pouring it on the soil. I've ruined a few bay trees by pouring undiluted fertilizer directly on the roots—always dilute first! Also, if you see those brown tips, flush the soil immediately with plain water to wash out the salt buildup.
Pro Tips for Bay Tree Maintenance
- Here's what nobody tells you about keeping your bay tree thriving all year round.
- Pruning Precision: In Step 1, when you're pruning, look for those small buds at the base of branches—these are your leaf nodes.
- Lighting Strategy: For that crucial 6-8 hours of grow light in Step 2, position the light so it covers the entire canopy—not just the top.
Frequently asked questions
about bay tree maintenance can help you keep your plant thriving year-round! Here are some common queries with straightforward answers to guide you.When is the best time to prune a bay tree?
The ideal time to prune your bay tree is late winter or early spring, just before new growth begins. This encourages healthy foliage and prevents overcrowding. Avoid heavy pruning in fall, as it can stress the tree before dormancy.
How much should I trim my bay tree back?
Remove no more than 20-30% of the foliage in a single pruning session to avoid shocking the tree. Focus on dead, yellowing, or crossing branches first. For shaping, trim just above a leaf node (bud) to promote new growth.
Why are my bay tree leaves turning yellow?
Yellow leaves often signal overwatering, underwatering, or nutrient deficiencies. Check soil moisture—bay trees prefer well-draining soil and moderate watering. Yellowing on older leaves may indicate natural aging, while new leaves suggest iron or nitrogen deficiency.
Can I grow a bay tree indoors year-round?
Yes! Bay trees thrive indoors with bright, indirect light (south or west-facing windows). Keep humidity moderate and avoid drafts. In winter, reduce watering slightly since growth slows. If leaves drop, it may need more light or less water.
What’s a good alternative if my bay tree keeps dying?
If bay trees struggle in your climate, try lavender, rosemary, or olive trees—they’re also drought-tolerant and aromatic. For a similar look, Loropetalum or Japanese holly are hardy evergreen options that require less fuss.
Wrapping up and next steps
Keeping your bay tree thriving year-round is all about consistent care and strategic pruning—whether you’re shaping its lush branches or encouraging new growth. With the right tools, timing, and techniques, you’ll enjoy a healthy, aromatic tree that’s the star of your garden or kitchen. 🌿
Ready to take the next step? Schedule a quick check-in with your bay tree—trim those overgrown stems, reward it with fresh soil, and watch it flourish! For extra inspiration, bookmark our pruning guide and revisit it as the seasons change.