
Pruning
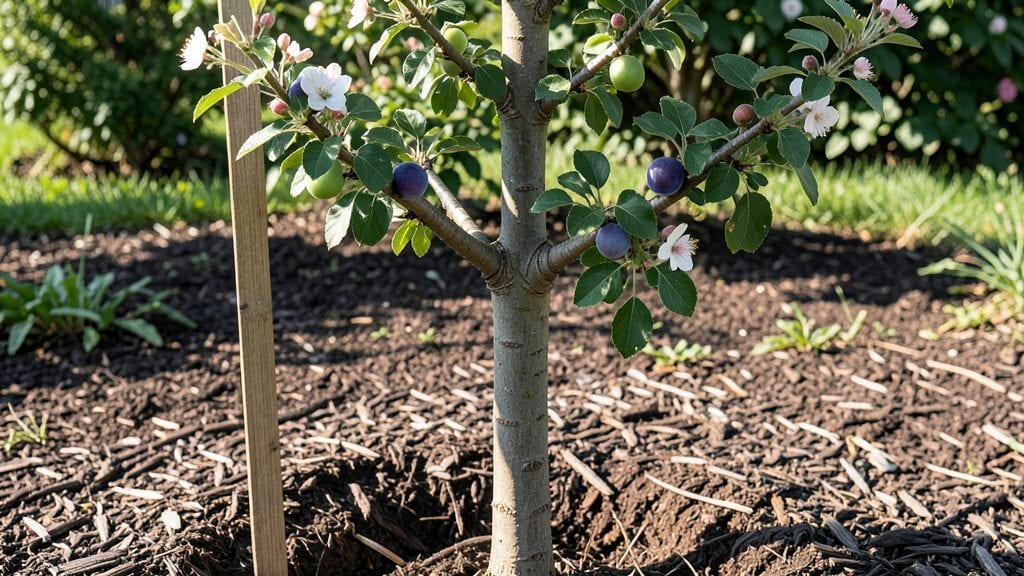
A 4-in-1 plum tree packs four different plum varieties onto a single trunk, saving space while delivering a year-round harvest of sweet, tart, and versatile fruit. 🌱 The magic happens through careful grafting—each branch produces a distinct variety, so you get early, mid, and late-season plums from one compact tree.
My first attempt nearly failed when I ignored the rootstock requirements, but once I got it right, I never looked back at buying store-bought plums again.
The secret to success starts with the right soil: well-draining, slightly acidic mix enriched with compost. Water deeply once a week during dry spells, but avoid soggy roots—plum trees hate wet feet.
Pruning in late winter shapes the tree while encouraging strong graft unions, and thinning fruit in summer prevents overburdened branches. This isn’t just a tree; it’s a high-yielding, space-saving fruit factory that outperforms standard plum trees.
By year three, you’ll harvest pounds of fruit from just a few square feet, with varieties ripening in succession for fresh eating, jams, or drying. The tree stays manageable at 8–10 feet tall, making it perfect for small yards or urban gardens.
Just watch for borers and aphids—organic sprays and neem oil keep pests at bay without harming the fruit.
Works in zones 5–9 with proper winter protection, and the same principles apply to other grafted fruit trees like apples or peaches. Ready to turn your backyard into a plum powerhouse? Let’s get growing.
📚 In This Guide
- What you need
- Instructions
- Tips and common mistakes
- Wrapping up and next steps
What you need
- ● Pruning shears: Sharp, bypass-style shears (e.g., Felco #2 or equivalent) – 2 pairs (one for clean cuts, one as backup).
- ● Loppers: 8–10-inch loppers for thicker branches (e.g., Corona or Fiskars).
- ● Pruning saw: Curved-tooth saw for stubborn branches (e.g., Felco or Bahco).
- ● Gloves: Heavy-duty, cut-resistant gloves (e.g., Mechanix Wear or similar).
- ● Disinfectant: 70% isopropyl alcohol or 10% bleach solution (1 part bleach to 9 parts water) for sterilizing tools.
- ● Sealing wax: Pruning sealant (e.g., Tree Seal or Tanglefoot) to protect cuts.
- ● Tarp or drop cloth: 4x6 ft to collect debris.
- ● Garden twine or ties: For supporting branches if needed.
- ● Weather check: Prune on a dry, cloudy day (avoid frost or extreme heat).
- ○ Safety gear: Optional sunglasses and long sleeves for sun/prickly branch protection.
- ○ Tree diagram: Print or sketch a simple branch map to track cuts (optional but helpful!).
- ● Fertilizer: Balanced 10-10-10 or organic compost (apply post-pruning for recovery).
- ● Mulch: 2–3 inches of organic mulch (e.g., wood chips) to retain moisture.
How to plant and maintain a 4-In-1 plum tree
This space-saving marvel packs four plum varieties into one tree—here’s how to get the most from it.
🌱 Step 1: Choose the Right Location for Year-Round Success
Pick a spot with full sun exposure (6-8 hours daily) and well-draining soil. Plums thrive in areas with 60-80°F daytime temperatures and cooler nights, so avoid low spots where cold air pools. Dig a hole twice as wide as the root ball but only as deep—planting too deep suffocates the graft union where the four varieties meet.
Test your soil’s drainage by digging a 12-inch hole and filling it with water. If it doesn’t drain within 2 hours, amend with 2-3 inches of compost mixed into the bottom 6 inches of the hole. The 4-in-1 graft union is sensitive to waterlogging, so prioritize drainage over everything else.
🪴 Step 2: Plant the Tree at the Correct Depth and Stake for Stability
Remove the tree from its container and loosen any circling roots with your fingers—plums hate root-bound stress. Place it in the hole so the graft union sits 2-3 inches above soil level. This ensures proper airflow and prevents rot. Backfill with native soil, tamping gently every 2 inches to eliminate air pockets.
Install a 5-foot stake> at a 45-degree angle, 3-4 inches from the trunk. Tie the tree loosely to the stake with a soft fabric strip (never wire—it cuts into bark as the tree grows). Water deeply until the soil is moist 12 inches down. You’ll know it’s right when water pools at the surface for 10-15 minutes before draining.
☀️ Step 3: Prune for Structure and Airflow in Early Spring
Wait until late winter or early spring (before buds swell) to prune. Remove any dead, crossing, or inward-growing branches first—these compete for sunlight and invite disease. Cut back to the nearest outward-facing bud using clean, sharp pruners. The goal is an open center that lets light reach all four varieties.
Shape the tree into a modified central leader form: keep one strong vertical branch as the main trunk and train 3-4 scaffold branches to grow outward at 45-degree angles. Thin out any suckers (shoots growing below the graft union)—these drain energy from your fruit-bearing varieties. After pruning, apply a copper fungicide spray to protect fresh cuts.
💧 Step 4: Water Deeply and Mulch to Retain Moisture
Water deeply once a week during the first growing season, aiming for 1-1.5 gallons per inch of trunk diameter. Plums have shallow roots, so let the top 6 inches of soil dry between waterings—this prevents root rot while encouraging deep root growth. Use a soaker hose or drip irrigation to keep foliage dry, which reduces fungal diseases like brown rot.
Spread 3 inches of organic mulch (wood chips or straw) around the base, keeping it 6 inches away from the trunk. Mulch conserves moisture, regulates soil temperature, and suppresses weeds. Refresh the mulch annually in early spring, but never let it pile against the trunk—this traps moisture and invites rot.
✂️ Step 5: Harvest and Prune Seasonally for Continued Productivity
Plums ripen at different times—watch for color changes and slight softness when gently squeezed. Harvest each variety separately: early varieties in late spring, mid-season in early summer, and late varieties in mid-summer. Cut fruit stems with pruners to avoid damaging branches. Store unripe plums at 35-40°F to ripen slowly over 2-3 weeks.
After harvest, prune again in late fall to remove dead wood and shape the tree. Thin out any overly dense branches to improve airflow—this prevents fungal issues that can ruin next year’s crop. Fertilize lightly in early spring with a balanced 10-10-10 formula, but avoid heavy feeding, which encourages leafy growth over fruit production.
Tips & tricks for perfect 4-In-1 plum tree maintenance
These simple strategies will help you maximize your compact plum tree's potential and troubleshoot common growing challenges.
Location Matters: When testing drainage in Step 1, look for water to disappear within 2 hours—this is critical for the graft union's health. If your yard has heavy clay soil, consider planting on a slight mound to improve drainage naturally. I've seen graft unions fail when planted too deep or in waterlogged soil, so take this step seriously.
Pruning Precision: In Step 3, when shaping your tree, focus on creating an open center that lets sunlight reach all four varieties. I like to make my first cuts just outside the branch collar (the swollen area where the branch meets the trunk) to prevent damage. This technique promotes faster healing and better fruit production. Remember, you're not just pruning branches—you're sculpting a tree that will produce four different plum varieties!
Watering Wisdom: The once-a-week deep watering in Step 4 works best with a soaker hose placed near the drip line (the edge of the tree's canopy). This encourages roots to grow outward rather than staying shallow. I've found that watering in the early morning gives the tree time to absorb moisture before evening heat evaporates it. The 10-15 minutes of surface pooling you should see after watering is your confirmation that moisture reached deep enough.
Seasonal Care: Don't forget the late fall pruning in Step 5—this is when you remove any dead wood that might harbor fungal spores over winter. I always sterilize my pruners with rubbing alcohol between cuts to prevent spreading disease. Also, the 35-40°F storage temperature for ripening plums works perfectly in most home refrigerators, but if you have an unheated garage, a root cellar would be ideal for larger harvests.
Pro Tips for 4 In 1 Plum Tree
- These simple strategies will help you maximize your compact plum tree's potential and troubleshoot common growing challenges.
- Location Matters: When testing drainage in Step 1, look for water to disappear within 2 hours—this is critical for the graft union's health.
- Pruning Precision: In Step 3, when shaping your tree, focus on creating an open center that lets sunlight reach all four varieties.
Frequently asked questions
Got questions about maximizing your 4-in-1 plum tree’s potential?
Here are the most common ones—plus expert tips to keep your compact orchard thriving year-round.
What exactly is a 4-in-1 plum tree, and how does it work?
A 4-in-1 plum tree is a single tree grafted with four different plum varieties (e.g., early, mid-season, late, and a dwarf rootstock). Each variety produces fruit at different times, giving you a continuous harvest from spring to fall. The dwarf rootstock keeps the tree compact (ideal for small spaces!), while the grafts ensure diversity in flavor, size, and ripening schedules.
How long does it take for a 4-in-1 plum tree to bear fruit?
Patience is key! Most 4-in-1 plum trees start producing fruit in 2–3 years after planting, though some varieties may take up to 4 years. Early-season grafts (like Stanley or Methley) often fruit first, while late varieties (like Cacaksota) may lag slightly. Prune lightly in the first year to encourage strong root and scaffold growth.
Do I need to prune a 4-in-1 plum tree differently than a regular plum tree?
Yes! Since it’s a grafted tree, focus on three key areas:
- Graft union care: Never prune below the graft (usually a swollen bump near the base). This ensures all four varieties stay healthy.
- Balanced growth: Thin out crowded branches to improve airflow, especially after harvest. Aim for an open-center shape to avoid disease.
- Variety-specific pruning: Some grafts (like late plums) may need lighter cuts to delay dormancy.
Use sharp, sterile shears and prune in late winter (before buds swell) for best results.
Can I grow a 4-in-1 plum tree in containers, or does it need to be planted in the ground?
A 4-in-1 plum tree thrives in large containers (15+ gallons) with well-draining soil. Just ensure:
- A sunny spot (6+ hours of light daily).
- Regular watering (containers dry out faster!).
- Winter protection (move pots to a sheltered area or wrap the base in bubble wrap if temps drop below 10°F).
Container-grown trees may fruit slightly later but are perfect for patios, balconies, or urban gardens!
What are the most common pests/diseases for 4-in-1 plum trees, and how do I prevent them?
Watch for:
- Plum curculio: Tiny beetles that pock fruit. Solution: Use row covers during blooming season or apply neem oil as a preventative spray.
- Silver leaf disease: Fungal infection causing silvery leaves. Solution: Prune infected branches immediately and avoid overhead watering.
- Aphids: Sap-sucking pests. Solution: Blast off with water or introduce ladybugs (natural predators).
Pro tip: Plant garlic or chives nearby—they repel pests naturally! Also, sterilize pruning tools with rubbing alcohol to prevent spreading disease.
Can I replace one of the grafted varieties if it’s not producing well?
Unfortunately, no. Once grafted, the varieties are permanent. However, you can:
- Prune back underperforming grafts to redirect energy to healthier branches.
- Choose a reliable nursery when buying to minimize poor-performing grafts.
- Consider pollination helpers—if one variety is weak, plant a compatible companion tree nearby to boost cross-pollination.
If all else fails, propagate a new 4-in-1 tree with better-performing varieties!
Wrapping up and next steps
Growing a 4-in-1 plum tree is your ticket to year-round fruit bounty in minimal space—whether you’re a seasoned gardener or just starting out! 🌱 With the right pruning techniques, you’ll enjoy four distinct harvests from a single compact tree, maximizing both flavor and efficiency.
The key is patience, consistency, and a little creativity with training.
Ready to transform your garden? Start by observing your tree’s growth this season, then refine your pruning strategy next year. Share your progress with fellow gardeners—you might inspire someone else to try this space-saving marvel! 🌟