
Pruning
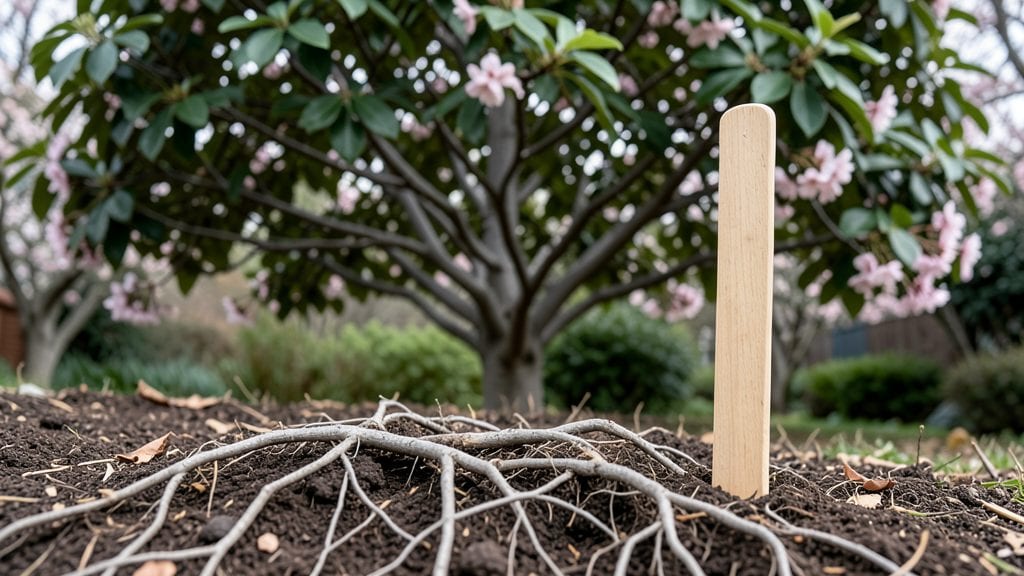
Yoshino cherry tree roots spread wider than most gardeners realize—often 15 to 20 feet beyond the canopy. I learned this the hard way when my first Yoshino’s delicate blooms struggled after a neighbor’s foundation cracked from competing roots. The secret isn’t just pruning the branches; it’s managing what’s hidden underground.
These trees thrive when planted in well-draining soil with a slightly acidic pH (6.0-6.5)—but their roots need room to breathe. Mulching with 3-4 inches of organic matter keeps them cool while preventing suffocation.
The real game-changer? Pruning roots during transplanting with a clean, sharp spade to avoid damaging the cambium layer.
When done right, you’ll see stronger stems and longer bloom seasons—my tree now bursts with pink flowers for two full weeks every spring. The key is timing: prune roots in late winter or early spring before new growth starts, and avoid heavy root work after summer heat sets in.
For urban gardens or small yards, consider container planting—Yoshinos adapt surprisingly well when given at least a 20-gallon pot and regular root checks. Just watch for root-bound signs like yellowing leaves or stunted growth, and repot every 3-5 years to keep them happy.
📚 In This Guide
- What you need
- Instructions
- Tips and common mistakes
- Wrapping up and next steps
What you need
- ● Pruning shears: Bypass pruners (sharp, clean, and sterilized with rubbing alcohol to prevent disease). Specs: 6-8" blades, ergonomic grip.
- ● Loppers: For thicker roots (1-2" diameter). Specs: 18-24" long, bypass or anvil type (avoid anvil for delicate cuts).
- ● Root saw: Heavy-duty saw with fine teeth (10-14 TPI) for stubborn roots. Specs: 12-16" blade, sturdy handle.
- ● Gloves: Heavy-duty, cut-resistant gloves (e.g., Mechanix or similar) to protect hands from thorns and sharp tools.
- ● Disinfectant: 10% bleach solution (1 part bleach to 9 parts water) or hydrogen peroxide (3%) to sterilize tools between cuts.
- ○ Pruning sealant: Tree wound pruning paste (e.g., Tanglefoot Tree Wound Pruning Sealant) to coat large cuts (optional but recommended for >1" diameter roots).
- ● Measuring tape: 25-foot tape measure for assessing root spread and spacing.
- ● Shovel or root pruning knife: For careful excavation if inspecting roots. Specs: Flat-blade spade (12-14") or a d-handle root knife.
- ● Watering can or hose: With a gentle spray nozzle for post-pruning hydration.
- ● Mulch: Organic mulch (e.g., shredded bark or wood chips) to replenish after pruning. Specs: 2-3" layer, kept 6" away from the trunk.
- ● Root stimulator: Mycorrhizal fungi powder (e.g., Great White) to boost root health post-pruning.
- ● Plant tags or markers: To label pruned areas if working with multiple trees.
- ● Knee pads: For comfort during extended root work.
- ● Safety glasses: To protect eyes from debris (especially when using a root saw).
- ● Camera or sketchpad: To document root structure before/after pruning.
- ● ✅ Best timing: Prune roots in late fall to early winter (dormant season) or early spring (before buds swell). Avoid pruning during extreme heat or cold.
- ● ✅ Tree health check: Ensure your Yoshino cherry is healthy (no signs of disease like canker or fungal spots) before pruning roots.
- ● ✅ Weather prep: Choose a cloudy day or prune in the early morning to reduce stress on the tree.
- ● ✅ Local regulations: Check if your area requires permits for large-scale root pruning (especially near sidewalks or utilities).
Instructions for pruning Yoshino cherry tree roots
Here’s how to encourage a vibrant, long-lived Yoshino cherry tree by managing its roots—without the guesswork.
Assess Root Health and Growth Patterns
Start by examining the root zone carefully. Healthy Yoshino cherry roots should appear white or light tan, with fine, fibrous extensions radiating outward. Look for signs of stress: dark, mushy roots signal rot, while thick, woody roots indicate overcrowding. I like to work in early spring, just as new shoots emerge but before heavy blooming begins.
Use a small trowel to gently loosen the top 6 inches of soil around the tree’s dripline (the edge of its canopy). Avoid disturbing roots deeper than 12 inches—Yoshino cherries have shallow, sensitive root systems. If you see girdling roots (roots circling the trunk), mark them with flags for removal later—they’ll strangle the tree over time.
Prune Aggressive or Damaging Roots
Remove any roots that are growing directly into the trunk or forming tight loops. These are the most dangerous because they restrict water and nutrient flow. Cut them at their base with sharp, sterilized pruning shears, making clean cuts at a 45-degree angle. This prevents splintering and encourages faster healing.
For overly dense root clusters near the surface, thin them out by removing one-third of the thickest roots in the affected area. Focus on roots that are ½ inch or larger in diameter—these are the ones competing for resources. After pruning, water the tree deeply to help it recover and reduce shock.
Encourage Deep Root Development
To promote stronger, deeper roots, create small trenches around the tree’s perimeter, about 12 inches deep and 6 inches wide. This mimics natural soil disturbance and encourages roots to grow downward. Fill the trenches with a mix of organic compost and native soil, then water thoroughly to settle the material.
Mulch the area with 2-3 inches of wood chips, keeping it 6 inches away from the trunk to prevent rot. This mulch layer retains moisture while allowing air to reach the roots. Avoid piling mulch against the trunk—this creates a moist environment that attracts pests and disease.
Monitor and Maintain Root Health
After pruning, check the tree’s root zone every 4-6 weeks during the growing season. Healthy roots should show new growth within 6-8 weeks, with fresh white or light tan fibers appearing. If you notice yellowing leaves or stunted growth, it may signal over-pruning or root damage.
To prevent future issues, avoid compacting soil around the base—walking or driving near the tree compresses roots and restricts growth. Instead, use stepping stones or a board to move around the yard. Water deeply once a week during dry spells, ensuring the soil stays moist but not soggy.
Tips & tricks for pruning Yoshino cherry tree roots
Pruning Yoshino cherry tree roots might seem daunting, but these targeted tips will help you avoid common mistakes and ensure your tree thrives for decades. The key lies in understanding the tree's delicate root system and working with—not against—its natural growth patterns.
Timing is Everything: Early spring is the ideal window for root pruning because the tree is just waking up from dormancy but hasn't yet directed all its energy into blooming. I've found that working right after the first flush of new leaves appear—when the tree has enough energy to recover quickly—makes all the difference. This timing aligns perfectly with the natural growth cycle of Yoshino cherries, giving them the best chance to bounce back from any root disturbance.
Precision Over Aggression: When thinning dense root clusters in Step 2, focus on removing only one-third of the thickest roots—never more. I learned this the hard way after over-pruning a neighbor's tree and watching it struggle for two full growing seasons. Remember, these roots are the tree's lifeline. A good rule of thumb is to leave at least 50% of the original root mass intact, especially for mature trees. The goal is to improve circulation, not to weaken the tree.
Soil Composition Matters: The mix of organic compost and native soil in your trenches should be about 50-50 by volume. I've had success using well-aged compost (at least 6 months old) to avoid introducing weeds or pathogens. For the native soil component, take it from the area immediately surrounding the tree's dripline—this ensures the microbial balance matches what the tree is already accustomed to. This careful layering creates an ideal environment for new root development.
Visual Cues for Healthy Roots: After pruning, healthy new roots should appear as fine, white or light tan fibers within 6-8 weeks. If you're unsure whether you've pruned correctly, look for these visual cues: roots should be flexible (not brittle) and should snap rather than tear when gently bent. Dark, rubbery roots indicate stress or disease, while thick, woody roots suggest overcrowding that needs addressing. Pay special attention to the root tips—they should be actively growing outward, not inward toward the trunk.
Pro Tips for Yoshino Cherry Tree Roots
- Pruning Yoshino cherry tree roots might seem daunting, but these targeted tips will help you avoid common mistakes and ensure your tree thrives for decades.
- Timing is Everything: Early spring is the ideal window for root pruning because the tree is just waking up from dormancy but hasn't yet directed all its energy into blooming.
- Precision Over Aggression: When thinning dense root clusters in Step 2, focus on removing only one-third of the thickest roots—never more.
Frequently asked questions
Got questions about Yoshino cherry tree roots and how to keep them thriving? Here are some common concerns—and expert answers to help you prune like a pro!
How deep do Yoshino cherry tree roots grow?
Yoshino cherry tree roots typically spread wider than they grow deep—about 18–24 inches deep but extending 2–3 times the tree’s canopy width horizontally. Avoid compacting soil or digging near the trunk, as roots are sensitive to disturbance. For pruning, focus on above-ground care to support root health!
When is the best time to prune Yoshino cherry tree roots?
Prune above-ground branches in late winter or early spring (before buds swell) to avoid stressing the tree. However, roots themselves aren’t pruned—instead, improve soil aeration by mulching (2–4 inches of organic matter) and avoiding heavy foot traffic near the base. Root damage can stunt blooms!
What if my Yoshino cherry tree has exposed or gnarled roots?
Exposed roots signal poor soil conditions or over-pruning. Don’t cut roots—instead:
- Add 2–3 inches of mulch (wood chips or compost) to protect roots.
- Water deeply 1–2 times/week during dry spells.
- Test soil pH (ideal: 6.0–7.0) and amend if needed.
Can I transplant a Yoshino cherry tree with its roots intact?
Transplanting is risky due to delicate roots, but possible for young trees (3–5 years old). Timing is critical:
- Do it in late fall or early spring (dormant season).
- Dig a wide hole (2x the root ball) and amend soil with compost.
- Water daily for 2 weeks post-transplant.
Are there alternatives to pruning for stronger root growth?
Yes! Skip pruning roots entirely and try these root-friendly strategies:
- Mulch properly: Use organic mulch (avoid plastic) to retain moisture and encourage shallow root spread.
- Aerate compacted soil: Use a garden fork to loosen soil 6–12 inches deep in early spring.
- Fertilize lightly: Apply balanced fertilizer (10-10-10) in early spring to support root vitality.
Wrapping up and next steps
Mastering the art of pruning Yoshino cherry tree roots is your key to vibrant blooms and lasting health! 🌸 By understanding root structure, timing, and techniques, you can foster a thriving tree that dazzles for years.
Start small—even a single session makes a difference—and watch your cherry tree flourish with confidence.
Next step: Grab your tools, mark your calendar for early spring, and give those roots the care they deserve. Your future pink paradise awaits! 🌱