Pruning
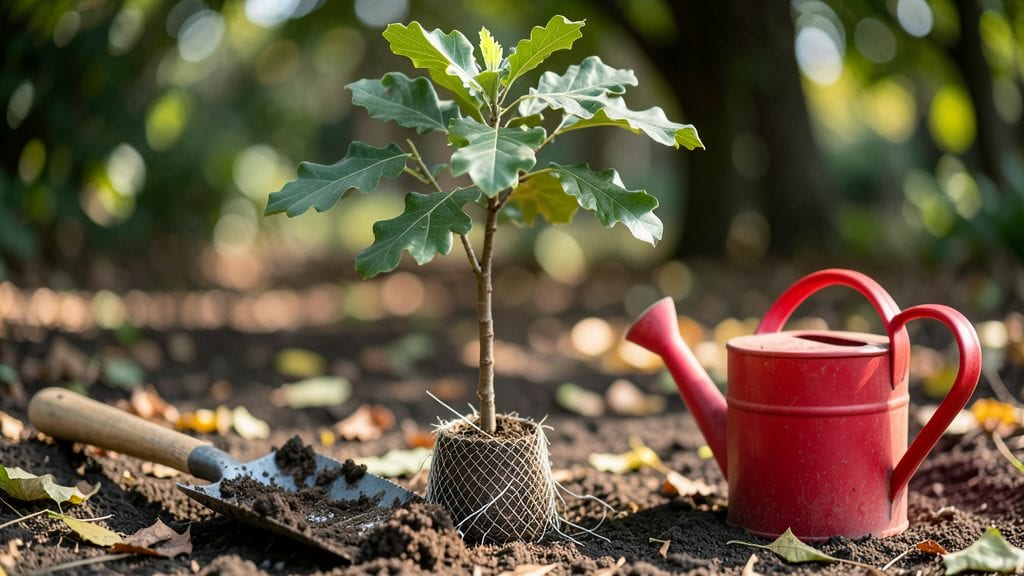
The tree planting process starts with a hole twice as wide as the root ball—this simple detail makes all the difference between a struggling sapling and a thriving shade tree for decades.
I learned this the hard way when my first oak barely took root because the hole was too tight. The right soil prep, careful root handling, and proper watering create a foundation that supports growth for generations.
You’ll need basic tools: a shovel, wheelbarrow, and hose, plus a sturdy stake if planting near wind. For heavy clay soil, mix in compost or sand to improve drainage. Deciduous trees like maples handle moisture better than drought-tolerant oaks, so adjust watering based on your tree’s needs.
The key is patience—roots need time to establish, and rushing backfilling can suffocate them.
After planting, you’ll watch for new leaves within weeks, a sign the roots are settling in. Mulch helps retain moisture while keeping weeds away, and regular watering (especially in the first year) prevents transplant shock.
Even a small tree planted correctly now will outperform one rushed into the ground. Let’s get those roots growing strong.
This method works for everything from fruit trees to shade giants, though conifers need slightly different soil prep. Avoid common mistakes like planting too deep or ignoring root flare—both can kill a tree before it starts.
With these steps, your new tree will thrive for decades, not just survive the first season.
📚 In This Guide
- What you need
- Instructions
- Tips and common mistakes
- Wrapping up and next steps
What you need
- ● Tree: A healthy sapling or young tree (check root ball size—typically 6–12 inches in diameter for small trees).
- ● Shovel or Digger: A round-point shovel (18–24 inches wide) for digging holes efficiently.
- ● Gloves: Sturdy work gloves to protect your hands from dirt and sharp roots.
- ● Water: At least 5–10 gallons (or a hose with a gentle spray nozzle) for immediate post-planting watering.
- ● Mulch: Organic mulch (wood chips, straw, or pine needles), 2–4 inches deep, to retain moisture and suppress weeds.
- ● Stakes & Ties (if needed): 2–4 wooden or metal stakes (6–8 feet tall).
- ● Soft tree ties or strips of fabric/nylon stockings to secure the tree without damaging the trunk.
- ○ Soil Amendment (optional but helpful): A small bag of native soil or compost to improve drainage if your soil is heavy clay or sandy.
- ● Tree Planting Spade: A specialized tool for planting balled-and-burlapped trees (saves time and effort!).
- ● Post-Hole Digger: For rocky or compacted soil where a shovel struggles.
- ● Soil pH Test Kit: To check if your soil needs adjustments (e.g., lime for acidic soil).
- ● Tree Guard or Protective Collar: A plastic or metal guard to shield the trunk from lawnmowers or pests.
- ● Drip Irrigation System: For long-term watering, especially in dry climates.
- ● Pruning Shears: To trim any damaged roots or branches before planting.
Step-by-Step guide for planting trees that thrive for decades
Here's how I plant trees that grow strong, deep roots and stay healthy for generations.
Choose the Right Tree and Planting Site
First, select a tree suited to your climate and soil type. Mature tree size determines spacing—plant at least 20 feet from structures and 30 feet from other large trees. Dig a hole twice as wide as the root ball but no deeper, since roots naturally spread horizontally. I always check for underground utilities before digging, and I avoid planting near sidewalks or driveways where roots could cause damage.
Look for a location with at least 6 hours of sunlight daily, unless you're planting a shade-tolerant species. Test your soil's drainage by digging a 12-inch deep test hole and filling it with water—if it drains within 2 hours, your soil is suitable. Poor drainage is the #1 reason young trees fail, so if your soil stays soggy, amend it with 2-3 inches of compost mixed into the bottom of the hole.
Prepare the Root Ball and Planting Hole
Remove the tree from its container or burlap wrap, gently loosening any circling roots with your fingers. If the roots are tightly bound, score the root ball with a knife to encourage outward growth. Place the tree in the hole so the top of the root ball sits 1-2 inches above ground level—this prevents soil from settling and suffocating the trunk.
Backfill the hole with the native soil you removed, tamping lightly every 6 inches to eliminate air pockets. Don't compact the soil aggressively—you want roots to spread easily. I always add a 5-gallon bucket of mulch around the base (but not touching the trunk) to retain moisture and regulate soil temperature. Water the area thoroughly until it's saturated 12 inches deep.
Stake and Water for Initial Establishment
Only stake the tree if it's taller than 6 feet or in a windy location. Use two stakes positioned diagonally, tied loosely with soft fabric to allow trunk movement. Tight ties strangle young trees as they grow. Water deeply twice weekly for the first month, then taper to once weekly once leaves appear. You'll know it's enough when water drains 6 inches deep—stick your finger in the soil to check.
Real talk: The first year is critical. I water my newly planted trees every 5-7 days during dry spells, aiming for 10-15 gallons per watering. Avoid overhead sprinklers—they waste water and spread disease. Instead, use a soaker hose or water slowly at the base until runoff appears, then stop. This encourages deep root growth instead of shallow, weak roots.
Mulch and Protect for Long-Term Health
Spread 3-4 inches of organic mulch (like wood chips or shredded bark) in a 3-foot diameter circle around the base. Keep mulch 6 inches away from the trunk to prevent rot. Replenish mulch annually to maintain depth—this insulates roots from temperature swings and retains moisture. I also wrap the trunk with tree guard (a plastic spiral) for the first year to protect against rodents and lawnmower damage.
Monitor the tree weekly for signs of stress: wilting leaves, yellowing foliage, or cracked soil at the base. These are early warnings to adjust watering. In the first year, avoid fertilizing—new roots need time to establish before competing with nutrients. Instead, focus on consistent watering and pruning only dead or crossing branches with sterilized pruners.
Tips & tricks for perfect tree planting
Planting a tree that thrives for decades requires attention to details most people overlook. Here's what I've learned from years of trial and error to give your tree the best possible start.
Site Selection is Everything: In Step 1, when choosing your location, pay special attention to the 6 hours of sunlight requirement. Morning sun is ideal—it dries dew quickly and reduces fungal diseases. I always check the site at different times of day to confirm light exposure. Also, avoid planting near large shrubs or other trees that could compete for water and nutrients during the critical first year. The 20-foot spacing from structures isn't just about aesthetics—it prevents root damage that can weaken your tree for decades.
Root Ball Preparation Matters: During Step 2, when loosening circling roots, be gentle but thorough. I use my fingers to carefully separate roots rather than cutting them, which can damage the tree. For container-grown trees, soak the root ball in water for 10-15 minutes before planting to rehydrate roots that may have dried out. The 1-2 inches above ground level positioning is crucial—this prevents soil settling from burying the trunk, which can cause rot over time. I always double-check this with a level to ensure the tree stands straight.
Watering Wisdom: The watering instructions in Step 3 are non-negotiable, but here's the secret: deep watering is more important than frequency. Instead of light sprinkles, water until you see runoff at the 6 inches deep mark. I use a trowel to check moisture—if it's dry at that depth, water again. For the first year, I set up a simple drip irrigation system on a timer to ensure consistent moisture, especially during dry spells. This creates strong taproots that anchor your tree for life.
Mulching Magic: When applying the 3-4 inches of organic mulch in Step 4, think of it as insulation for your tree's roots. I use wood chips because they break down slowly, adding nutrients over time. The key is maintaining that 6-inch gap from the trunk—piling mulch against the bark creates a moist environment that invites pests and disease. Also, refresh the mulch annually to maintain that protective layer, especially in hot summers when roots need protection from temperature extremes.
Pro Tips for Tree Planting Process
- Planting a tree that thrives for decades requires attention to details most people overlook.
- Site Selection is Everything: In Step 1, when choosing your location, pay special attention to the 6 hours of sunlight requirement.
- Root Ball Preparation Matters: During Step 2, when loosening circling roots, be gentle but thorough.
Frequently asked questions
Got questions about planting trees? You’re not alone! Here are some of the most common concerns—and clear answers—to help you get started with confidence.
When is the best time to plant a tree?
The ideal window is late fall to early spring (dormant season), when soil is moist but not frozen. Avoid extreme heat or drought—young roots need time to establish without stress. Pro tip: If planting in summer, water deeply 2-3 times per week!
How deep should I plant the tree?
The root flare (where roots meet the trunk) should sit slightly above ground level. Dig a hole twice as wide as the root ball but no deeper—this prevents waterlogging. Fill gaps with native soil, not amended mixes, to avoid shocking roots.
How often should I water a newly planted tree?
Water immediately after planting, then every 2–3 days for the first 2 weeks (10–15 gallons per inch of trunk diameter). After that, taper to once a week unless it’s dry. Watch for: Wilting leaves or dry soil 2–3 inches down.
Can I plant a tree in a small yard or urban area?
Choose dwarf or columnar varieties (e.g., Japanese maple, columnar apple) and plant near sidewalks/fences with root barriers if needed. Always check local codes—some cities require permits for large species near structures.
What if my tree’s leaves turn brown or wilt after planting?
Common causes: Overwatering, root damage, or transplant shock. Check soil moisture (stick your finger in—it should feel damp but not soggy). If roots were circling, gently tease them apart. Mulch 2–4 inches deep to retain moisture and reduce stress.
Should I fertilize right after planting?
Not usually! New trees rely on stored energy in roots. Wait 6–12 months unless soil tests show deficiencies. Then, use a slow-release, balanced fertilizer (10-10-10) in early spring. Warning: Over-fertilizing burns roots.
Wrapping up and next steps
Planting a tree is more than just digging a hole—it’s an investment in the future, whether for your garden, community, or the planet. 🌱 By following the right tree planting process, from selecting the perfect spot to nurturing young roots, you’re setting the stage for decades of beauty, shade, and even cleaner air.
The key? Patience, preparation, and a little love.
Ready to take the next step? Pick a tree that suits your climate and space, gather your tools, and start planting today. Your future self—and the trees—will thank you! 🌳✨