Planting
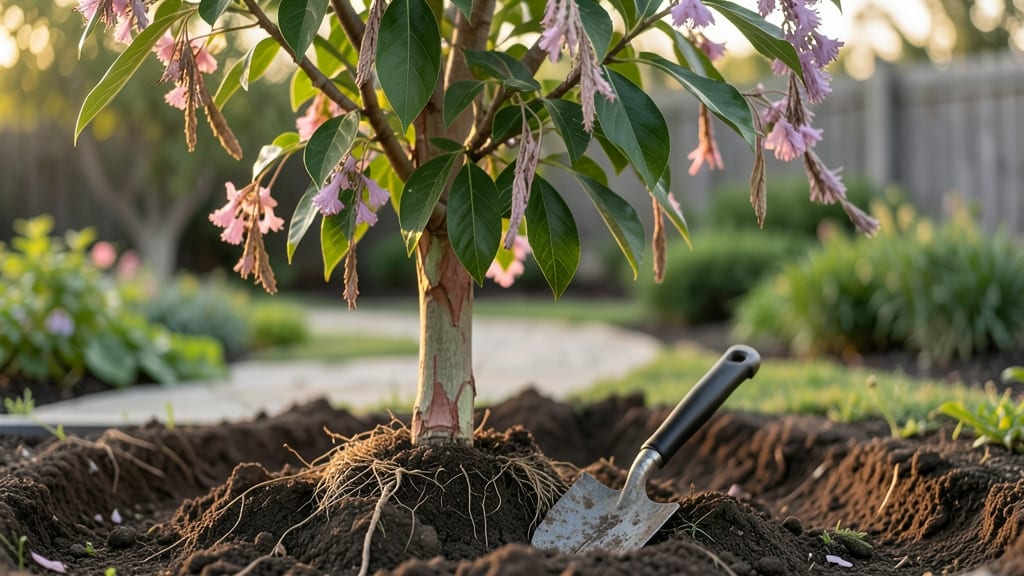
Transplanting crepe myrtle trees successfully hinges on timing and technique—relocating them during dormancy minimizes stress and maximizes their odds of thriving. I’ve transplanted three of these stunners myself, and the ones moved in late fall now burst with blooms every summer without a single leaf lost to transplant shock.
The secret starts with preparing the new spot like a five-star hotel for roots: loosen the soil 12-18 inches deep, mix in compost, and water it thoroughly a week ahead.
Meanwhile, prune the roots of your crepe myrtle just before digging—this isn’t brutal trimming, just snipping any circling roots with clean shears to encourage outward growth. A 4-foot tree might need 2-3 hours of careful work, but the payoff is worth it.
After you’ve lifted the root ball and settled it into its new home, backfill with that prepped soil and water deeply—not a quick splash, but a slow soak that penetrates 6-8 inches.
The first few weeks are critical: keep the soil moist but never soggy, and avoid fertilizing until new growth appears in spring. You’ll know it’s working when fresh green shoots push through by May.
This method works for trees of any size, from young saplings to mature specimens—just scale the prep work accordingly. The key is patience: a well-transplanted crepe myrtle will reward you with vibrant blooms the following season, proving the move was worth every careful step.
📚 In This Guide
- What you need
- Instructions
- Tips and common mistakes
- Wrapping up and next steps
What you need
- ● Shovel or spade – A sharp-edged, heavy-duty shovel (18–24 inches wide) for digging the root ball and planting hole.
- ● Pruning shears or loppers – Bypass-style shears (for clean cuts) to trim damaged roots or branches.
- ● Garden hose or watering can – For deep watering before and after transplanting (aim for 1–2 gallons per hour).
- ● Burlap or landscape fabric – 100% biodegradable (2–3 feet wide) to wrap the root ball for easier handling.
- ● Garden twine or rope – To secure the burlap around the root ball.
- ● Mulch (pine bark, wood chips, or compost) – 2–3 inches deep (avoid fresh mulch touching the trunk).
- ● Garden fork or tiller – To loosen compacted soil in the new planting area.
- ○ Staking materials (optional but helpful) – 2–3 stakes (2–3 feet tall) + soft tree ties if the tree is tall or top-heavy.
- ● Root stimulator or mycorrhizal fungi – To boost root growth (follow package instructions).
- ● Soil amendment (peat moss, compost, or sand) – If your native soil is clay-heavy or sandy.
- ● Wheelbarrow or dolly – For easier transport of large root balls.
- ● Gloves (heavy-duty) – To protect hands from thorns or rough bark.
- ● Plant food (balanced fertilizer, 10-10-10) – Apply 4–6 weeks after transplanting to encourage recovery.
Step-by-Step instructions for transplanting crepe myrtle trees
Crepe myrtles thrive with the right transplanting technique—here's how to move them without shock.
Choose the Right Time and Prepare the New Location
Transplant crepe myrtles during their dormant season—either late fall (after leaf drop) or early spring (before bud break). Avoid summer heat or winter frost, as both stress the tree. Select a site with full sun exposure (at least 6 hours daily) and well-draining soil, as crepe myrtles hate soggy roots.
Test the soil pH—crepe myrtles prefer slightly acidic to neutral (6.0-7.0). If your soil is heavy clay, amend it with 2-3 inches of compost mixed into the top 12 inches of soil. This improves drainage and provides nutrients for recovery. Mark the new planting spot with stakes to visualize the tree’s final position.
Dig the Transplant Hole and Prune the Tree
Dig the new hole twice as wide as the root ball but no deeper. The top of the root ball should sit 1-2 inches above ground level—burying it too deep suffocates the tree. Loosen the soil at the bottom of the hole with a shovel to encourage root spread. Avoid disturbing the surrounding soil unless it’s compacted.
Prune the tree before transplanting to reduce stress. Cut back one-third of the branches, focusing on crossing or weak limbs. Remove any dead or diseased wood. This redirects energy toward root establishment rather than foliage growth. Water the tree deeply 2-3 days before moving to hydrate the roots for the shock of relocation.
Carefully Remove the Tree and Transport It
Dig around the root ball in a wide, shallow trench to avoid severing roots. Use a shovel to lift the tree gently, keeping as much soil attached as possible. If the root ball is too large to move, consider sectioning it (though this risks damage). Wrap the root ball in burlap or a tarp to protect it during transport, securing it with twine.
Keep the tree upright and shaded during transport. Avoid bending branches or letting the root ball dry out. If moving a distance, use a wheelbarrow or truck bed to prevent jostling. Once at the new site, place the tree in the hole and backfill with the native soil you removed—no amendments—to prevent nutrient imbalance. Tamp the soil lightly to remove air pockets.
Water and Mulch for Recovery
Water the tree deeply immediately after planting, soaking the root ball until water drains from the bottom of the hole. Apply 1-2 inches of mulch (wood chips or pine straw) around the base, keeping it 6 inches away from the trunk to prevent rot. Mulch retains moisture and regulates soil temperature, critical for root growth.
Water twice weekly for the first month, then taper to once weekly once new growth appears. Avoid overhead watering—direct the hose at the base to encourage deep root development. Monitor the tree for wilting or yellowing leaves, signs of transplant shock. If leaves drop entirely, don’t panic—this is normal as the tree adjusts, but ensure the soil stays consistently moist.
Support and Monitor Growth
Stake the tree only if necessary—crepe myrtles have strong root systems and rarely need support. If staking, use two stakes placed diagonally and tie the trunk loosely with soft fabric strips to avoid girdling. Remove stakes after 6-12 months to prevent dependency. Fertilize lightly in late spring with a balanced, slow-release fertilizer (10-10-10) to encourage blooming.
Watch for new shoots in 4-6 weeks—this signals successful root establishment. If the tree struggles, prune back any dead branches and avoid heavy pruning for at least a year. Crepe myrtles reward patience; with proper care, they’ll rebound with vibrant blooms the following season. Avoid moving again for at least 2 years to let the roots fully stabilize.
Tips & tricks for transplanting crepe myrtle trees
Moving crepe myrtles successfully comes down to timing, technique, and patience—here's how to avoid common pitfalls and ensure your tree thrives in its new home.
Timing is Everything: While late fall or early spring are ideal, I've found that transplanting on a cool, overcast day (not just any day in the dormant season) reduces stress significantly. The lack of direct sunlight prevents rapid moisture loss through the leaves, giving roots more time to establish before active growth resumes. If you must transplant in summer, do it at dusk or dawn when temperatures are mildest.
The Root Ball Rescue: When digging around the root ball in Step 3, work slowly to avoid tearing roots—think of it like unwrapping a delicate gift. If you encounter stubborn roots, use a sharp spade to sever them cleanly rather than pulling. For large trees where sectioning is necessary, make vertical cuts rather than horizontal ones to minimize damage. The goal is to preserve as much of the root system as possible, even if it means taking extra time during removal.
Soil Science Matters: The instructions mention testing soil pH, but I can't stress enough how critical this is. If your soil tests outside the 6.0-7.0 range, adjust it gradually—don't shock the tree with sudden pH changes. For acidic soil, add elemental sulfur; for alkaline soil, use aluminum sulfate. And remember: the 2-3 inches of compost in the top 12 inches of soil isn't just about nutrients—it's about creating that perfect loose, well-draining environment crepe myrtles crave.
Post-Transplant Care Secret: That first deep watering after planting is crucial, but what happens next is where most people fail. After the initial soaking, water again in 3-4 days—this maintains consistent moisture without waterlogging. The key is to keep the root ball evenly moist (not soggy) during the critical first 4-6 weeks while roots establish. I've seen trees struggle when people either overwater (causing rot) or underwater (leading to desiccation).
Pro Tips for Transplanting Crepe Myrtle Trees
- Moving crepe myrtles successfully comes down to timing, technique, and patience—here's how to avoid common pitfalls a...
- Timing is Everything: While late fall or early spring are ideal, I've found that transplanting on a cool, overcast da...
- The Root Ball Rescue: When digging around the root ball in Step 3, work slowly to avoid tearing roots—think of it lik...
Frequently asked questions
Got questions about transplanting crepe myrtles?
You’re not alone! Here are answers to the most common concerns—so you can move your trees with confidence and keep those stunning blooms thriving.
When is the best time to transplant crepe myrtle trees?
The ideal window is late fall to early spring (before buds swell or after leaves drop). Avoid extreme heat or frost—crepe myrtles stress easily. Pro tip: If transplanting in summer, do it on a cloudy day and keep the root ball moist for 2–3 weeks post-move.
How do I prepare my crepe myrtle for transplanting to minimize shock?
Start by watering deeply 2–3 days before moving to hydrate roots. Prune 1/3 of the foliage to reduce stress, and dig a hole twice as wide as the root ball. Key trick: Use a burlap wrap or tarp to protect roots if moving long distances.
Can I transplant a crepe myrtle in full sun? What if my new spot has partial shade?
Crepe myrtles love full sun (6+ hours/day) but tolerate partial shade—just expect fewer blooms. If moving to shade, gradually acclimate the tree over 2 weeks by shielding it from direct sun. Watch for: Yellowing leaves (too much shade) or leaf scorch (too much sun post-transplant).
What should I do if my crepe myrtle’s leaves turn yellow or wilt after transplanting?
Yellow leaves often signal root stress or overwatering. Check soil moisture—it should be damp but not soggy. If wilting, trim wilted branches and mulch heavily (3–4 inches) to retain moisture. Boost recovery: Fertilize lightly with balanced 10-10-10 after 4–6 weeks.
Are there alternatives to digging up the entire root ball when transplanting?
Yes! For smaller trees (under 6 ft), try the “bare-root” method—dig a trench, slide the root ball out, and replant. For larger trees, use a transplanting spade to cut roots in a wedge shape (reduces trauma). Bonus: Apply mycorrhizal fungi to the roots before replanting for faster establishment.
Wrapping up and next steps
Transplanting your crepe myrtle trees doesn’t have to be a stressful task—with the right timing, tools, and care, you can give them a fresh start for vibrant blooms and healthy growth.
Remember to choose the ideal season, prepare the new site thoroughly, and handle the roots with gentleness to minimize shock. 🌿
Now that you’re equipped with the know-how, roll up your sleeves and get ready to give your crepe myrtles the new home they deserve! Start by marking your calendar for the best transplanting window, then gather your supplies and begin the process.
Your future garden will thank you for the effort!