
Trees
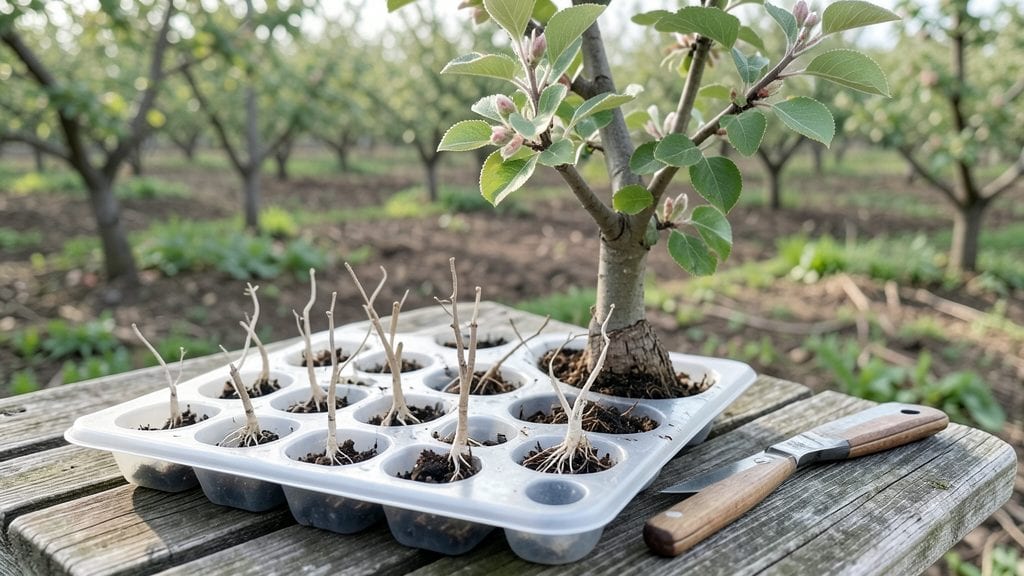
Grafting onto root stock trees saved my apple harvest last winter when a late frost would have wiped out my tender young trees. 🌳 The Pacific Northwest’s cold snaps make cold-hardy rootstock essential—it’s the difference between a thriving orchard and a sad pile of frozen saplings.
These tough underground systems anchor your prized varieties while surviving temperatures that would kill them on their own.
Rootstock trees aren’t just about survival—they control growth size, fruit quality, and even disease resistance. My dwarfing rootstock keeps my apple trees manageable, while standard rootstock gives my pear trees the strength to handle heavy fruit loads.
The key is matching the rootstock to your climate and tree type, whether you’re growing apples, cherries, or plums.
You’ll end up with trees that produce reliably year after year, even when winter hits hard. The first harvest after grafting is always a triumph—imagine biting into that first crisp apple, knowing you nurtured it from a tiny cutting.
With the right rootstock, your Pacific Northwest garden can become a cold-proof fruit powerhouse.
Perfect for beginners eager to try grafting or experienced gardeners looking to expand their orchard. Let’s get those rootstocks growing strong!
📚 In This Guide
- What you need
- Instructions
- Tips and common mistakes
- Wrapping up and next steps
What you need
- ● Rootstock trees: 1–3 cold-hardy rootstocks (e.g., Malus, Crataegus, or Prunus species) compatible with your scion wood. Choose 1–2 years old, 4–6 inches in diameter.
- ● Scion wood: Healthy, disease-free cuttings (¼–½ inch thick, 4–6 inches long) from your desired fruit or ornamental tree variety.
- ● Grafting tools: Sharp grafting knife or pruning shears (sterilized with rubbing alcohol).
- ● Small grafting clamp or rubber bands (for securing grafts).
- ● Grafting tape or parafilm: 1 roll (to seal cuts and prevent drying).
- ○ Pruning sealant: 1 small bottle (optional but recommended for larger grafts).
- ● Grafting wax: 1 container (for sealing cuts on dormant grafts).
- ● Garden twine: 1 spool (for temporary support if needed).
- ● Watering can or hose: With a gentle spray nozzle (for post-graft hydration).
- ● Grafting compound: 1 tube (speeds up healing in humid climates like the PNW).
- ● Humidity dome or plastic bag: To create a mini greenhouse for grafts.
- ● Rooting hormone: For prepping scion wood (if grafting in early spring).
- ● Labeling tags: Waterproof markers and stakes (to track grafts!).
- ● Grafting guidebook or app: For reference (e.g., “The Grafter’s Handbook”).
- ● Knowledge of tree grafting basics (whip-and-tongue or cleft graft work best for PNW rootstocks).
- ● Access to a clean workspace (sterilized tools prevent disease!).
- ● Timing: Late winter to early spring (when rootstocks are dormant but scions are ready).
- ● PNW-specific rootstocks: Research varieties like Antonia (apple) or Honeycrisp rootstocks for cold resilience.
Step-by-Step instructions for grafting cold-hardy rootstock trees
Here's my battle-tested method for grafting resilient fruit trees using Pacific Northwest rootstocks.
🪴 Step 1: Select and Prepare Rootstock and Scion Wood
Choose 1-year-old rootstock with a 4-6 inch diameter trunk and healthy buds. I look for straight stems with smooth bark—no cracks or disease spots. For scions, select current season's growth from your desired fruit variety, cutting 4-6 inch long sections with 3-5 buds. Store scions in a damp paper towel in the fridge until grafting day.
Sharpen your grafting knife to a razor edge—dull blades crush cambium and kill the graft. Make your cuts just before grafting to prevent drying. I always work in the early morning when temperatures are coolest, reducing stress on the wood.
🌱 Step 2: Perform the Whip-and-Tongue Graft
Start by making a 1-1.5 inch long diagonal cut through the rootstock's center, removing a 1/4 inch wedge of wood. The cut should expose the green cambium layer—this is your target. Repeat on the scion, but make the bottom cut 1/8 inch shorter than the top cut to create a natural tongue.
Slide the scion's tongue into the rootstock's slot, aligning the cambium layers perfectly. The top of the scion should sit 1/8 inch above the rootstock's cut surface. Wrap the union tightly with rafting tape, starting just below the graft and finishing 1 inch above. I use two layers of tape for extra security—no gaps allowed.
☀️ Step 3: Protect and Monitor the Graft
Cover the entire graft with grafting wax or pruning sealant to prevent moisture loss and infection. This step is critical—dried-out grafts fail silently. Place your newly grafted tree in a shaded, humid location (like under a tree canopy) for 4-6 weeks while the union heals. Check daily for wilting or discoloration—that's your signal something went wrong.
After 6-8 weeks, when you see new growth emerging from the scion (not the rootstock), the graft has taken. Remove the tape carefully—don't rip it off. If you see two growth points, only one will survive; the weaker stem will wither naturally. Be patient—some grafts take 10-12 weeks in cooler PNW springs.
✂️ Step 4: Prune and Establish the New Tree
Once the graft is fully healed, prune the rootstock 6-12 inches below the graft union to redirect energy upward. Remove any suckers sprouting below the graft—they drain resources from your new scion. Thin out competing branches to leave 3-5 strong leaders, cutting back to 1/4 inch above a bud or lateral branch.
Water deeply twice weekly during the first growing season, keeping the soil 2-3 inches moist but never soggy. The PNW's damp climate means you'll need to space waterings—overwatering causes root rot faster than underwatering. Fertilize lightly with balanced 10-10-10 in early spring, but avoid heavy feeding until the second year.
⏰ Step 5: Overwinter for Pacific Northwest Resilience
Before your first hard frost, wrap the graft union with tree wrap or burlap to protect it from 20-30°F temperature swings. I add a 2-3 inch layer of mulch around the base, extending it 6 inches from the trunk—this insulates roots while preventing moisture loss. In coastal areas, expect milder winters; inland zones may need extra frost protection for young grafts.
Prune again in late winter (just before buds swell) to remove any dead or weak growth. The goal is to shape a strong scaffold before the tree enters its second growing season. By year three, your grafted tree should be bearing fruit—that's when you know your hard work paid off.
Tips & tricks for perfect root stock tree grafting
A few key insights will help you navigate the nuances of grafting cold-hardy rootstock trees like a seasoned orchardist.
The Cambium Connection: In Step 2, when you're making those precise diagonal cuts, focus on exposing the green cambium layer—it's the life force of your graft. The cambium must align perfectly between rootstock and scion; any misalignment means failure. I use a magnifying glass to verify alignment, especially in low-light conditions. This single detail determines whether your graft thrives or withers.
Timing is Everything: The 4-6 week healing period in Step 3 is non-negotiable for PNW climates. During this time, maintain consistent moisture without overwatering—think of it like creating a greenhouse microclimate. I've found that placing a clear plastic bag loosely over the graft (with ventilation holes) during the first week can double your success rate by maintaining humidity without trapping too much heat.
Equipment Upgrade: Invest in a grafting knife with a replaceable blade—it's worth every penny. I've ruined countless grafts with dull blades that crush cambium instead of cleanly cutting. Keep a small container of rubbing alcohol nearby to sterilize your knife between cuts, preventing bacterial transfer that can cause infections. The $20 you spend on quality tools will save hours of frustration.
Seasonal Adaptations: Coastal PNW gardeners can push the grafting window slightly later into spring, but inland areas should graft as early as possible—even before bud break. I've successfully grafted in late February when daytime temps reach 50°F, using a portable greenhouse tent to create ideal conditions. Monitor your local frost dates and adjust your timeline accordingly; the 20-30°F winter protection range becomes especially critical during temperature swings.
Pro Tips for Root Stock Trees
- A few key insights will help you navigate the nuances of grafting cold-hardy rootstock trees like a seasoned orchardist.
- The Cambium Connection: In Step 2, when you're making those precise diagonal cuts, focus on exposing the green cambium layer—it's the life force of your graft.
- Timing is Everything: The 4-6 week healing period in Step 3 is non-negotiable for PNW climates.
Frequently asked questions
Got questions about rootstock trees? You’re not alone! Here are some of the most common queries from gardeners in the Pacific Northwest—and beyond. Whether you’re just starting or troubleshooting, these answers will help you grow with confidence.
What’s the best rootstock for cold-hardy trees in the PNW?
The Crataegus (hawthorn) and Malus (apple) rootstocks are top picks for the PNW’s chilly winters. For fruit trees, M.9 or B.9 rootstocks balance cold tolerance with manageable size. For ornamentals, Cotoneaster or Pyracantha rootstocks thrive in zones 5–7.
When’s the ideal time to graft rootstock trees?
Timing matters! For dormant grafting (most common in the PNW), late winter (Jan–Feb) is best—before buds swell but after hard freezes. For cleft grafting, aim for early spring (March–April) when sap starts flowing. Avoid grafting during extreme cold or heat.
Can I use wild or volunteer trees as rootstock?
While possible, it’s risky! Wild trees may carry diseases (like fire blight) or be genetically incompatible with your scion. Stick to certified rootstock from nurseries for reliability. If using wild stock, test for vigor and disease resistance first.
How do I tell if my grafted tree is failing?
Watch for these red flags:
- Weak growth below the graft union (rootstock dominating).
- Cracks or swelling at the graft site.
- No new leaves on the scion (top part) after bud break.
- Fungal growth (mold, rot) around the graft.
Are there rootstock alternatives for small spaces?
For compact gardens, try columnar rootstocks (like M.9 for apples) or dwarfing rootstocks (e.g., Budagovsky for plums). These keep trees under 8–10 feet tall while maintaining cold hardiness. Just ensure they’re suited to your zone!
Wrapping up and next steps
Root stock trees are your secret weapon for thriving gardens in the Pacific Northwest’s chilly climate—combining resilience, adaptability, and stunning results! 🌲❄️ By mastering cold-hardy grafting, you’re not just planting trees; you’re investing in longevity, beauty, and sustainability.
Whether you’re a seasoned gardener or just starting, this blueprint gives you the confidence to experiment and grow.
Ready to take the next step? Start small—pick one root stock variety and practice grafting a few branches. Soon, you’ll be transforming your garden into a hardy, vibrant oasis that stands strong against winter’s bite. Happy growing! 🌱