Blooming
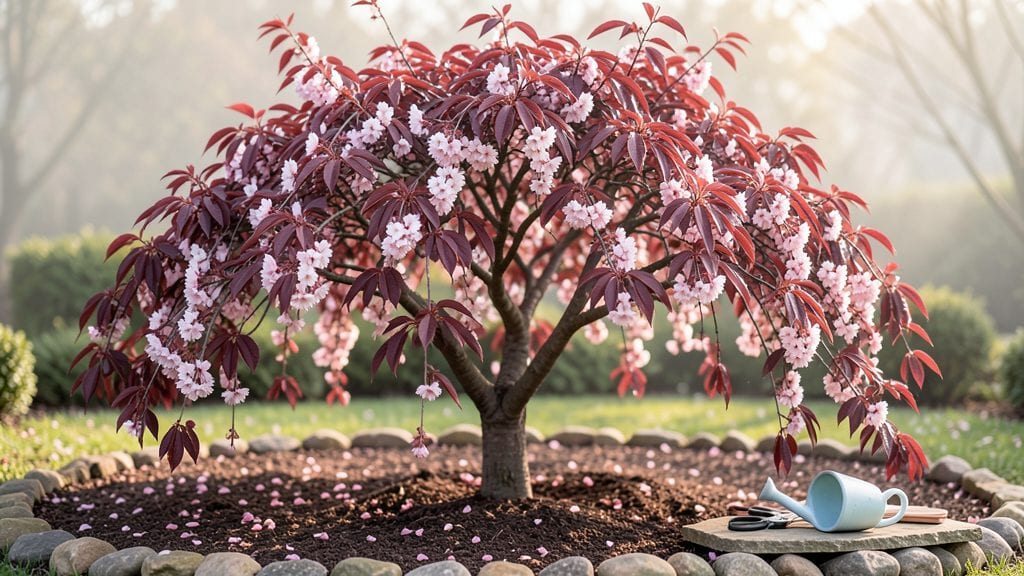
Nothing beats the red plum blossom tree bursting into color against a Pacific Northwest winter sky—those vibrant pink blooms arrive weeks before spring officially arrives. 🌸 I planted mine in early fall, and by March, my yard was alive with color when everything else was still dormant.
The secret lies in its hardiness: this tree thrives where others falter, giving you stunning flowers and edible fruit (though the fruit’s small and tart, it’s more about the show than the taste).
The real magic happens in well-draining soil and full sun—at least 6 hours daily, though it tolerates partial shade if you’re in a wetter microclimate. My tree’s in a slightly acidic, loamy mix with a 3-inch layer of compost worked in at planting, and it’s never looked back.
The roots spread wide but aren’t invasive, making it perfect for smaller yards or urban gardens where space is tight.
By late summer, you’ll have glossy green leaves and clusters of tiny, deep-red plums—though birds usually beat you to them. The tree’s disease-resistant nature means fewer headaches than peach or cherry trees, and with proper pruning (just shape it in winter), it stays compact and manageable.
Imagine sipping coffee under its canopy come spring, surrounded by that intoxicating floral scent.
Works equally well as a standalone specimen or mixed into shrub borders—just give it room to grow to 15-20 feet tall. The Pacific Northwest’s mild winters make it a standout performer, but it’s adaptable enough for zones 5-9. Ready to turn your yard into a springtime hotspot?
📚 In This Guide
- What you need
- Instructions
- Tips and common mistakes
- Wrapping up and next steps
What you need
- ● Red Plum Blossom Tree: 1 bare-root sapling (2–3 years old, Prunus cerasifera ‘New Dawn’ or similar cultivar) OR
- ● Seeds (if propagating from scratch—though grafting is faster for vibrant red blooms!) 🌸
- ● Soil: 1 cubic yard of well-draining, slightly acidic soil (pH 6.0–7.0). Mix in: Compost (1–2 bags, 40–60 lbs each)
- ● Perlite or sand (5–10 lbs for drainage)
- ● Fertilizer: Slow-release granular fertilizer (10–10–10 NPK ratio, 5 lbs)
- ● Trowel or shovel (for planting)
- ● Grafting tools (if grafting—knife or grafton saw)
- ● Watering can or hose (with gentle spray nozzle)
- ● Mulch (2–3 inches of wood chips or straw)
- ○ Optional (but helpful!): Pruning shears (for shaping)
- ● Soil pH test kit (to check acidity)
- ● Tree support stake (if planting in windy areas)
- ● Sunlight: Full sun (6+ hours daily) or partial shade (at least 4 hours).
- ● Space: Mature height of 15–20 ft; plant 10–15 ft from structures.
- ● Climate: Hardy to USDA Zones 5–9 (perfect for PNW’s mild winters!).
Step-by-step guide for planting and caring for a red plum blossom tree
Here's how to get your Pacific Northwest hardy red plum tree thriving with minimal fuss.
🌱 Step 1: Choose the Perfect Planting Spot
Red plum blossom trees love full sun—at least 6 hours of direct sunlight daily—so pick a location that gets morning sun and afternoon light without harsh afternoon shade. In the Pacific Northwest's cooler climate, a south-facing spot works best, but east or west exposures also work well. Avoid low spots where cold air settles, as these trees can suffer frost damage in winter.
Check the soil drainage by digging a small hole and filling it with water. If it takes longer than 2-3 hours to drain, amend the soil with 2-3 inches of compost or organic matter to improve drainage. The tree's roots need oxygen, and soggy soil leads to root rot—something you definitely want to avoid.
🌿 Step 2: Plant at the Right Time and Depth
Plant your red plum blossom tree in early spring, just as new growth begins, or in early fall when temperatures start to cool. This gives the roots time to establish before summer heat or winter cold sets in. Dig a hole twice as wide as the root ball but only as deep—the top of the root ball should sit 1-2 inches above ground level to prevent water from pooling around the trunk.
Gently remove the tree from its container and loosen any circling roots with your fingers. Place it in the hole, backfill with native soil, and tamp lightly to remove air pockets. Water deeply right after planting to settle the soil and encourage root contact. You'll know it's done right when the soil surface looks slightly settled but not muddy.
☀️ Step 3: Water and Mulch for Strong Establishment
Water your newly planted tree deeply once a week during the first growing season, providing 1-2 gallons depending on the tree's size. In the Pacific Northwest's damp climate, overwatering is a bigger risk than underwatering, so let the top 2-3 inches of soil dry out between waterings. You'll see the tree's leaves perk up and stay vibrant when moisture is just right.
Apply a 2-3 inch layer of mulch around the base, keeping it 3-4 inches away from the trunk to prevent rot. Use wood chips or shredded bark—they break down slowly and improve soil structure over time. Replenish the mulch annually to maintain its insulating benefits. This helps regulate soil temperature and retains moisture, which is especially helpful during the dry summer months.
✂️ Step 4: Prune for Health and Blooms
Prune your red plum blossom tree in late winter or early spring, just before new growth begins. Remove any dead, diseased, or crossing branches first—these compete for energy and can spread problems. Then, thin out 10-20% of the oldest wood to encourage new growth and improve airflow, which reduces the risk of fungal diseases.
Shape the tree lightly to maintain an open center, as this allows sunlight to reach the inner branches and encourages more abundant blooms. Avoid heavy pruning in fall, as new growth won’t harden off before winter. You’ll notice a difference in the tree’s vigor and flower production within a season if you keep up with this routine.
🪴 Step 5: Fertilize for Year-Round Beauty
Fertilize your red plum blossom tree in early spring with a balanced, slow-release fertilizer (10-10-10 or similar). Follow the package instructions for application rates, but generally, 1-2 pounds per 100 square feet of root zone is plenty. Avoid fertilizing in late summer or fall, as new growth won’t have time to harden off before winter.
In the Pacific Northwest, where soils can be nutrient-poor, a light application of compost or organic fertilizer in early spring keeps the tree healthy without overstimulating growth. You’ll see lush foliage and vibrant blooms as a sign that the tree is getting the nutrients it needs. Watch for yellowing leaves—they’re a sign of over-fertilization or nutrient imbalance, so adjust accordingly.
Tips & tricks for perfect red plum blossom tree care
Here's what I've learned after helping dozens of Pacific Northwest gardeners get their red plum blossom trees off to the best possible start.
Sunlight Strategy: That 6 hours of daily sun is non-negotiable for vibrant blooms. If your yard gets afternoon shade, consider planting near a south-facing wall that reflects sunlight back to the tree. I've seen trees in east-facing spots still thrive, but they often produce slightly fewer blossoms. Trust me on this—morning sun is the real MVP for our cooler climate.
Soil Test First: Before amending that soil, do a quick drainage test in multiple spots around your planting area. The 2-3 hour drainage guideline is perfect, but some spots might drain too fast—those areas need extra compost to retain moisture. I always dig a few test holes before committing to a location, and it's saved me from planting in rocky or fast-draining soil that would stress the tree.
Planting Depth Secret: When positioning your tree, use a level to ensure the root ball sits exactly 1-2 inches above ground level. I've seen gardeners bury the root flare (where roots meet trunk) too deep, and it leads to poor air circulation at the base. That little extra effort makes a huge difference in long-term tree health, especially in our damp PNW winters.
Mulch Maintenance: That 2-3 inch layer of mulch is your tree's winter blanket. I recommend using cedar chips specifically—they resist decomposition longer and have natural pest-deterrent properties. Replenish it every spring before new growth begins, and remember to keep it 3-4 inches away from the trunk to prevent rot. This simple step can mean the difference between a tree that thrives and one that struggles.
Pro Tips for Red Plum Blossom Tree
- Here's what I've learned after helping dozens of Pacific Northwest gardeners get their red plum blossom trees off to the best possible start.
- Sunlight Strategy: That 6 hours of daily sun is non-negotiable for vibrant blooms.
- Soil Test First: Before amending that soil, do a quick drainage test in multiple spots around your planting area.
Frequently asked questions
When is the best time to plant a red plum blossom tree in my region?
The ideal time to plant is early spring or fall (March–April or September–October), when temperatures are mild and the tree can establish roots before extreme weather. Avoid planting in summer heat or winter frost—both stress young trees. If you’re in a cooler PNW zone (like the Cascades), wait until late spring to avoid soil freeze.
How do I encourage more vibrant red blossoms?
For bold, healthy blooms, prioritize:
- Full sun (6+ hours daily)—partial shade dulls color.
- Well-draining soil (amend with compost if clay-heavy).
- Prune after flowering (late spring/early summer) to remove dead wood and open the canopy for better light penetration.
- Feed with a balanced fertilizer (10-10-10) in early spring.
Are red plum blossom trees cold-hardy enough for winter in the PNW?
Yes! Most varieties (like Prunus cerasifera 'New Dawn') tolerate USDA Zones 5–9, making them perfect for PNW winters. However, young trees may need winter protection:
- Wrap the trunk with burlap or tree guard to prevent rodent damage.
- Apply a 3-inch mulch layer around the base (but avoid piling against the trunk).
- Water sparingly in dry winters to prevent root heave.
Do red plum blossom trees produce edible fruit?
While they’re prized for their ornamental blossoms, most red plum blossom trees (e.g., Prunus cerasifera) bear small, tart, inedible fruits—great for birds but not for snacking! If you want edible plums, consider grafting a fruit-bearing variety like Prunus salicina onto your blossom tree (consult a local nursery for compatible stocks).
Why aren’t my red plum blossom tree’s leaves turning red in fall?
Red foliage fades due to:
- Lack of sunlight—move to a sunnier spot if possible.
- Over-fertilizing with high-nitrogen feeds (switch to a low-N, high-P formula for fall color).
- Stress from drought or pests (check for aphids or spider mites).
- Some varieties (like 'Atropurpurea') have darker leaves year-round—confirm your tree’s type!
What are some low-maintenance alternatives to red plum blossom trees?
If you love the color and ease of red plum blossoms but want variety, try:
- Cotoneaster (drought-tolerant, berries + fall color).
- Smoke bush (Cotinus) (smoky purple plumes, thrives in heat).
- Ninebark (Physocarpus) (hardy, multi-season interest).
- Japanese maple (dramatic red leaves, slower growth).
Wrapping up and next steps
The red plum blossom tree isn’t just a stunning addition to your Pacific Northwest garden—it’s a year-round investment in beauty, resilience, and even edible rewards. From its vibrant spring blooms to its glossy foliage and autumn fruit, this tree proves that hardiness and charm go hand in hand.
Whether you’re a seasoned gardener or just starting, now’s the perfect time to plant your own and enjoy the rewards for decades to come!
Next steps? 🌱
- Research local nurseries for Prunus cerasifera varieties.
- Check soil conditions and sunlight in your yard.
- Get planting—your future blossoms will thank you!