Trees
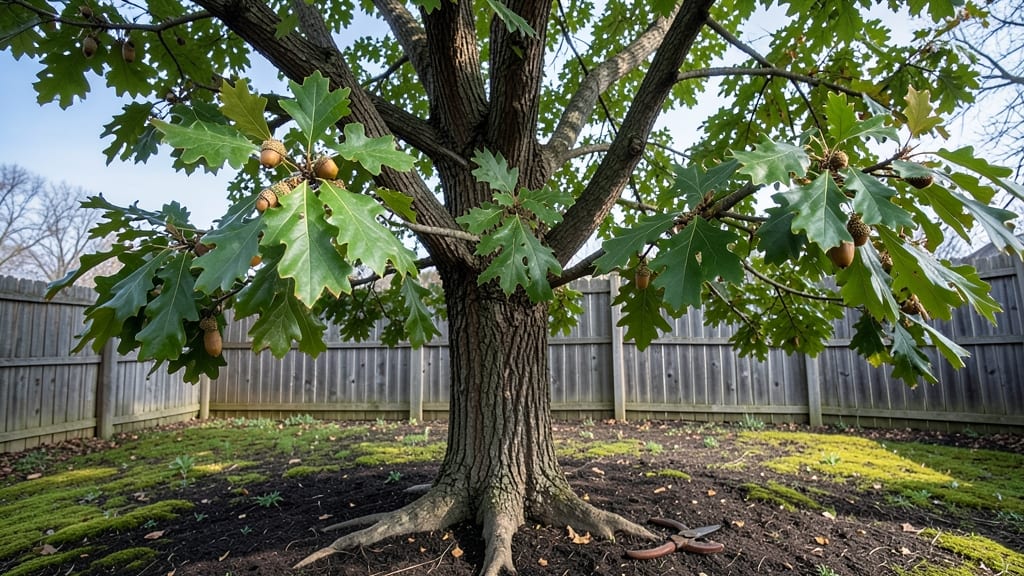
Growing a red oak tree from acorns is one of those rewarding projects that forces you to slow down and appreciate nature's timeline. 🌳 The key starts with finding the right acorns—red oaks have pointed caps and mature in their second fall, so timing matters.
I’ve learned that patience here means waiting for the perfect moment, not rushing the process.
You’ll need just a few supplies: a bucket for collection, a damp paper towel for stratification, and a sunny spot for planting. The real magic happens in the cold stratification step—mimicking winter’s freeze-thaw cycle lets the acorns break dormancy.
Most people skip this, and that’s why their germination rates stay low. With this method, you’ll see sprouts in just a few weeks.
Once planted, your little oak will grow slowly at first—think years, not months—but that’s part of the charm. You’ll watch it develop strong roots, then sturdy leaves, and eventually, if all goes well, those iconic acorns of its own.
The payoff? A tree that could live for centuries, right in your backyard.
Common challenges like squirrels stealing acorns or slow early growth are easy to manage with a little foresight. The secret is consistency: watering deeply once a week, protecting young seedlings, and giving them room to stretch their roots.
Before you know it, you’ll have a thriving oak that attracts wildlife and adds value to your property.
📚 In This Guide
- What you need
- Instructions
- Tips and common mistakes
- Wrapping up and next steps
What you need
- ● Harvesting: Gloves (heavy-duty, to protect from tannins) – 1 pair
- ● Large bucket or mesh bag (for collecting acorns) – 1-2
- ● Pruning shears or a sturdy stick (for reaching high branches) – 1
- ● Ladder or step stool (if trees are tall) – 1
- ● Tarp or large sheet (to lay under trees and minimize mess) – 1
- ● Processing: Water (for leaching tannins) – 5+ gallons
- ● Large bowl or basin (for soaking acorns) – 1
- ● Colander or fine mesh strainer – 1
- ● Paper towels or clean towels (for drying) – 2-3
- ● Food dehydrator or oven (for drying) – 1
- ● Airtight containers (for storage) – 2-3
- ○ Optional (for Wildlife Feeding): Wildlife feeders or platform trays – 1-2
- ● Birdseed or nut mix (to combine with acorns) – 1 bag
- ● Camera or binoculars (for observing wildlife) – 1
- ● Knowledge of red oak tree identification (to avoid toxic white oak acorns!)
- ● Local regulations on harvesting acorns (always check before collecting)
- ● Patience! Processing acorns takes time—plan for 2-3 days of drying
- ○ Optional: A friend to help with heavy lifting (harvesting acorns can be a team effort!)
Step-by-step guide to harvesting and processing red oak acorns for wildlife
Here’s how to gather and prepare these nutritious treats—without wasting a single one.
🌿 Step 1: Identify and Locate Mature Acorns
Red oak acorns are smaller than white oaks, with a rounded cap that doesn’t cover the nut completely. Look for acorns that have fallen naturally in late fall—October through November—when they’re fully mature and ready for harvest. The shells should be hard and the caps should separate easily with a gentle twist.
Check under the tree first, as acorns often roll a short distance. Avoid picking acorns from the tree itself, since immature ones won’t store well. If you’re unsure, tap the shell—a hollow sound means the nut inside is empty, and you can skip it.
🪴 Step 2: Collect and Clean the Acorns
Spread a tarp or large sheet under the tree to gather acorns efficiently. Use a rake to collect them in a single pile, then sort through to remove debris, leaves, and empty shells. Fill a 5-gallon bucket with clean water and add the acorns—good ones will sink, while hollow or insect-damaged ones will float.
Remove any remaining dirt by rubbing the acorns gently with your hands or a soft brush. Let them dry in a sunny, shaded spot for 2-3 days, stirring occasionally. This prevents mold and ensures they’re ready for processing.
💧 Step 3: Leach Tannins for Safe Wildlife Consumption
Red oak acorns are high in tannins, which can be toxic to wildlife if not removed. Fill a large container (like a clean garbage can) with water and add the acorns. Change the water every 6-8 hours for 3-5 days, stirring occasionally. You’ll know the tannins are gone when the water runs clear.
I like to do this outdoors to avoid mess, but if space is tight, a sink with a drain works too. Never rush this step—leaving tannins in can harm animals like squirrels, deer, or birds.
⏰ Step 4: Dry and Store for Long-Term Use
Once the acorns are tannin-free, spread them in a single layer on a baking sheet or wire rack. Place them in a warm, dry spot (like a sunny windowsill) for 3-5 days, flipping them daily. They’re fully dry when the shells feel light and rattle slightly when shaken.
Store the dried acorns in an airtight container (like a glass jar) in a cool, dark place. Label with the date—they’ll keep for up to a year. For wildlife feeders, scatter them in small batches to prevent spoilage and attract animals safely.
🌱 Step 5: Prepare Acorns for Wildlife Feeders
If you’re making feeders, drill small holes in the caps of a few acorns and thread them onto a string or wire. Hang these in trees where wildlife can easily reach them. Alternatively, scatter whole acorns on the ground in shaded areas to encourage natural foraging.
Watch for squirrels, jays, and turkeys—they’ll love the treat! If you notice acorns disappearing overnight, you’ve found a hotspot. Just avoid overfeeding in one area to keep ecosystems balanced.
Tips & tricks for perfect red oak acorn processing
Harvesting and processing acorns takes patience, but these tips will help you avoid common pitfalls and maximize your yield for wildlife.
Timing Secret: In Step 1, focus on acorns that have fallen naturally between October and November—this is when they're fully mature and packed with nutrients. Avoid picking acorns directly from the tree, as they won't have fully developed. I've learned the hard way that immature acorns won't store well and can spoil quickly, so always check for that hollow sound when tapping the shell.
Cleaning Efficiency: For Step 2, use a 5-gallon bucket with clean water to separate good acorns from empty ones. The sinking test works perfectly—just be patient and let them settle completely. After removing debris, I recommend giving the acorns a final rinse with a mesh strainer to remove any remaining dirt before drying. This extra step prevents mold during the drying process.
Tannin Removal: The critical 3-5 day leaching process in Step 3 can't be rushed. I've found that changing water every 6-8 hours is ideal—set a timer to remind yourself! If you're short on time, you can reduce this to every 8 hours, but monitor the water closely. Clear water means tannins are gone, but cloudy water means more time is needed. Never skip this step—tannins can be harmful to wildlife.
Drying Strategy: When drying acorns in Step 4, choose a spot that gets plenty of sunlight but stays cool—like a sunny windowsill or covered porch. Flip them daily to ensure even drying. The acorns are ready when they feel light and rattle slightly. I've had success using a fan on low setting to speed up the process by 1-2 days without over-drying them.
Pro Tips for Red Oak Tree Acorns
- Harvesting and processing acorns takes patience, but these tips will help you avoid common pitfalls and maximize your yield for wildlife.
- Timing Secret: In Step 1, focus on acorns that have fallen naturally between October and November—this is when they're fully mature and packed with nutrients.
- Cleaning Efficiency: For Step 2, use a 5-gallon bucket with clean water to separate good acorns from empty ones.
Frequently asked questions
about red oak tree acorns—here’s what you need to know before diving in!When is the best time to harvest red oak acorns?
Harvest red oak acorns in late fall (October–November) when they’ve fallen naturally but before squirrels or pests get to them. Look for acorns that are firm, plump, and free of cracks or holes. Avoid harvesting if the weather is wet, as moisture can speed up spoilage.
Are red oak acorns safe for wildlife to eat?
Yes! Red oak acorns are a nutritious food source for wildlife like deer, squirrels, and birds—but they must be leached first to remove bitter tannins. Unleached acorns can cause stomach upset. Soak them in water for 24–48 hours, changing the water every 6–8 hours for best results.
Why do some red oak acorns taste bitter?
The bitterness comes from tannins, natural compounds that act as a defense mechanism. While harmless in small amounts, high tannin levels can be toxic to wildlife (and humans) if consumed in large quantities. Leaching removes most tannins—just don’t skip this step when preparing acorns for animals!
Can I plant red oak acorns to grow new trees?
Red oak acorns have a high germination rate if planted correctly. Stratify them by refrigerating in moist sand for 60–90 days, then plant 1 inch deep in well-draining soil. Keep the soil moist, and seedlings should sprout in spring. Patience is key—oaks grow slowly but thrive for centuries!
What’s the difference between red oak and white oak acorns?
Red oak acorns (Quercus rubra) are smaller, oblong, and have a shallow cap, while white oak acorns (Quercus alba) are larger, rounder, and sweeter-tasting with less tannin. Red oaks also have bristle-tipped lobes on their leaves, making ID easier. White oak acorns are safer to eat raw, but red oaks still make great wildlife feed!
Wrapping up and next steps
Harvesting and processing red oak tree acorns is a rewarding way to support local wildlife while connecting with nature.
Whether you’re a seasoned forager or just starting, these nuts offer a fantastic food source for birds, squirrels, and other creatures. Now that you’re equipped with the right knowledge, why not take the next step? 🌿
- Start small: Collect a few acorns from a trusted source and experiment with processing methods.
- Share the bounty: Leave some for wildlife or gift them to fellow nature enthusiasts.
- Expand your skills: Research other edible nuts or seasonal foraging opportunities!
Every acorn you prepare makes a difference—happy foraging! 🐿️🌳