Pruning
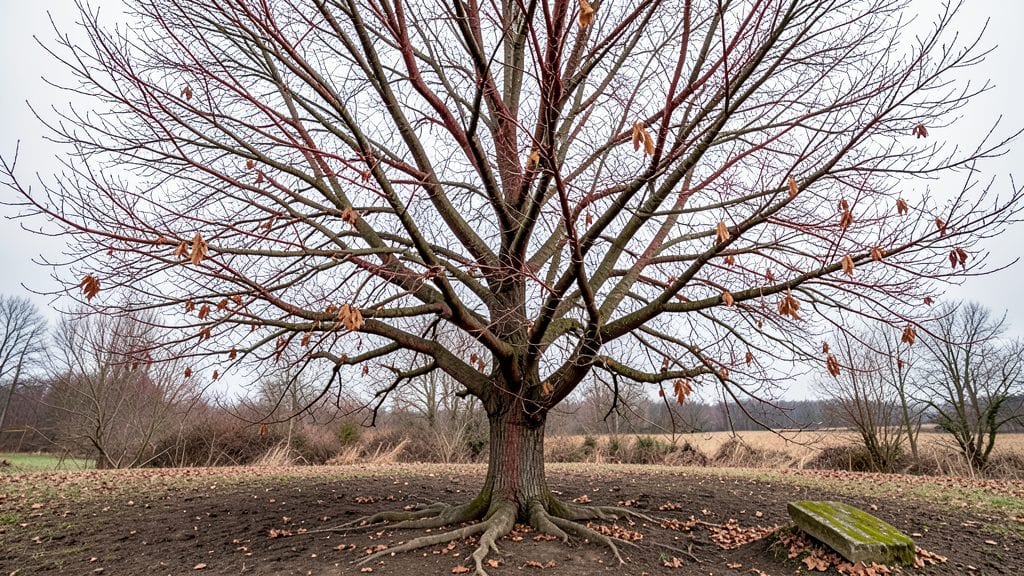
Winter pruning red maple trees reveals their hidden structure—and this is the perfect time to shape them for spring. 🌿 The crisp air makes cuts cleaner, and dormant branches show their true form without summer foliage hiding problems.
I’ve pruned my own red maple in late winter for years, and the results speak for themselves: stronger growth, fewer dead branches, and a canopy that lets sunlight reach the ground below.
The key is timing—wait until the coldest months have passed but before buds swell in early spring. You’ll need sharp pruning shears, a ladder (for taller branches), and a bucket to collect debris.
Red maples bleed sap when cut, but winter pruning minimizes this mess compared to late winter or early spring. Focus on removing dead, diseased, or crossing branches first—they’re easy to spot when the tree is bare.
What you’ll end up with is a tree that wakes up in spring with new vigor. The pruned branches will sprout fresh growth, and the open canopy lets sunlight warm the soil below, encouraging stronger root development.
Plus, you’ll avoid the heartbreak of finding dead branches hidden under summer leaves. This is how you prepare your red maple for its best season yet.
Works just as well for young saplings as mature giants, though scaling up requires patience and a plan. Here’s how to make every cut count—no guesswork, just results. Let’s get started.
📚 In This Guide
- What you need
- Instructions
- Tips and common mistakes
- Wrapping up and next steps
What you need
- ● Pruning shears: Bypass pruners (for cuts up to ½-inch thick) – 1 pair (look for sharp, stainless steel blades).
- ● Loppers: For branches ½- to 2-inches thick – 1 pair (long-handled for reach).
- ● Pruning saw: For thicker branches (2+ inches) – 1 saw (bow saw or pruning saw with a fine-tooth blade).
- ● Ladder: Extendable or sturdy step ladder – 1 (ensure it’s rated for your height needs).
- ● Gloves: Heavy-duty gardening gloves – 1 pair (cut-resistant for safety).
- ● Disinfectant: 70% isopropyl alcohol or bleach solution (1 part bleach to 9 parts water) – small spray bottle (to sterilize tools between cuts).
- ● Heavy-duty trash bags: For debris removal – 2-3 bags (20-gallon size recommended).
- ● Safety gear: Safety glasses – 1 pair (to protect from debris).
- ● Long sleeves/pants – 1 set (weather-appropriate for winter).
- ● Tree wound dressing: (e.g., pruning sealant) – small jar (controversial but useful for large cuts).
- ● Marking twine or flags: For identifying branches to remove – small roll.
- ● Wheelbarrow or tarp: For hauling debris – 1 (saves trips back and forth!).
- ● Sharpener: File or sharpening stone – 1 (to maintain tool sharpness mid-session).
- ● Camera: Smartphone or camera – 1 (document progress before/after!).
Step-by-step guide to pruning red maple trees in winter
Winter’s crisp air is the perfect time to revive your red maple—here’s how to prune for strong spring growth.
✂️ Step 1: Assess the Tree for Winter Damage
Start by examining your red maple for winter damage before making any cuts. Look for dead branches—these will be brittle, lack bark, or snap easily when bent. Also check for storm damage like broken limbs or split trunks, which need immediate removal to prevent further harm. Healthy branches should feel firm and have smooth bark.
I like to do this on a dry, sunny winter day when the tree’s structure is clearly visible. Avoid pruning after heavy frost or snow, as cold temperatures can stress the tree further. If you’re unsure whether a branch is dead, scratch the bark with your fingernail—if it’s green underneath, it’s alive.
✂️ Step 2: Gather Tools and Prepare for Pruning
You’ll need clean, sharp pruning tools—a hand pruner for small branches and a pruning saw for thicker limbs. Sterilize your tools with rubbing alcohol to prevent spreading disease. Red maples are frost-resistant, but open wounds can still invite infections if tools aren’t sanitized.
Wear gloves to protect your hands from thorns and rough bark. A ladder may be necessary for higher branches, but never stand on it if the ground is frozen or icy. I also keep a bucket nearby to collect fallen branches and debris for easy cleanup.
✂️ Step 3: Make Strategic Cuts for Healthy Growth
Begin by removing dead, diseased, or crossing branches first—these compete with healthy growth and can weaken the tree. Cut just outside the branch collar (the swollen area where the branch meets the trunk) at a 45-degree angle to allow water to shed properly. Avoid leaving stubs, as they invite rot.
For larger branches, use the three-cut method: Make the first cut about 12-18 inches from the trunk, then a second cut slightly deeper to create a notch. Finally, make your final cut just outside the collar. This prevents bark from tearing and reduces stress on the tree.
✂️ Step 4: Thin the Canopy for Better Airflow
Thinning the canopy improves light penetration and airflow, which helps prevent fungal diseases. Aim to remove 10-20% of the tree’s foliage by selectively pruning branches that are too dense or growing inward. Focus on the outer third of the tree to maintain its natural shape.
Watch for water sprouts—fast-growing, vertical shoots that drain energy from the tree. These should be pruned back to a lateral branch or the main trunk. A well-thinned red maple will have a balanced, open structure that’s easier to maintain in future seasons.
🌱 Step 5: Clean Up and Protect the Tree
After pruning, remove all debris from the base of the tree to reduce pests and disease. Dispose of diseased branches separately to prevent contamination. If you notice sap bleeding from cuts, it’s normal—red maples often ooze sap in winter, but it won’t harm the tree.
Apply a wound sealant only if the cuts are large (over 4 inches in diameter). For smaller cuts, let the tree seal itself naturally. Water the base lightly if the ground isn’t frozen, but avoid overwatering—red maples are drought-tolerant once established.
Tips & tricks for perfect red maple tree pruning in winter
Winter pruning can make all the difference in your red maple's spring revival—here are the tricks I've learned after years of working with these frost-resistant beauties.
Timing is Everything: The crisp winter days between 20°F and 40°F are ideal for pruning because the tree is dormant but still benefits from the fresh cuts. Avoid pruning during extreme cold snaps or after heavy snowfall, as the tree's natural defenses are weakened. I always check the weather forecast for a dry, sunny day—this gives me the best visibility and working conditions. The tree's natural sap flow is slower in these conditions, which helps prevent excessive bleeding.
Tool Sharpness Matters: Dull tools crush branches instead of making clean cuts, which can damage the tree's vascular system. Before you start, take 5 minutes to sharpen your hand pruner and pruning saw using a file or sharpening stone. I keep a small sharpening kit in my toolbox specifically for this purpose. A sharp cut heals faster and looks cleaner—you'll notice the difference immediately when you make your first cut. Remember, the three-cut method for larger branches works best with sharp tools.
Visual Cues for Healthy Cuts: When making your 45-degree angle cuts just outside the branch collar, look for the natural swelling where the branch meets the trunk. This collar contains healing tissues that help the tree recover. If you're unsure about where to cut, trace the branch's outline with your finger—this helps visualize the clean removal line. The goal is to leave the branch collar intact while removing the entire branch cleanly.
Seasonal Maintenance Strategy: Red maples benefit from light pruning every winter rather than heavy pruning all at once. I recommend removing only 10-20% of the foliage during each winter session, focusing on dead branches, crossing limbs, and water sprouts. This gradual approach prevents stressing the tree and maintains its natural shape. Mark your calendar for winter pruning—consistency is key to long-term tree health.
Pro Tips for Red Maple Tree In Winter
- Winter pruning can make all the difference in your red maple's spring revival—here are the tricks I've learned after years of working with these frost-resistant beauties.
- Timing is Everything: The crisp winter days between 20°F and 40°F are ideal for pruning because the tree is dormant but still benefits from the fresh cuts.
- Tool Sharpness Matters: Dull tools crush branches instead of making clean cuts, which can damage the tree's vascular system.
Frequently asked questions
Got questions about pruning your red maple tree in winter? You’re not alone! Here are some of the most common concerns—plus straightforward answers to keep your tree thriving.
When is the best time to prune a red maple in winter?
The ideal window is late winter (February–March) when the tree is still dormant but before buds swell. Avoid pruning during extreme cold snaps (<10°F) or when sap is flowing heavily (late winter/early spring). Pro tip: Prune on a dry day to minimize disease risk from wet tools or wounds.
Will pruning in winter harm my red maple?
Not if done correctly! Red maples are frost-resistant and heal well in winter, but avoid heavy pruning (removing >25% of branches) unless necessary. Focus on removing dead, diseased, or crossing branches first. Warning: Over-pruning can stress the tree, leading to weak growth or increased pest vulnerability.
How do I know which branches to cut?
Look for:
- Dead/dying branches (no leaves, hollow when tapped, or cracked bark).
- Crossing or rubbing branches (they’ll damage each other over time).
- Water sprouts (fast-growing, vertical shoots—these sap energy).
- Low-hanging branches (if they’re blocking walkways or power lines).
Use the “thinning cut” method for thick branches: Cut back to a lateral branch or bud facing outward.
Can I prune a red maple if it’s already bleeding sap?
Sap bleeding (common in late winter) isn’t ideal for heavy pruning, but you can still address safety hazards (like dead branches). If you must prune, do it early in the day when temperatures are cooler to slow sap flow. Seal larger cuts (>2” diameter) with pruning sealant to reduce sap loss and disease entry.
What if my red maple doesn’t look right after winter pruning?
Don’t panic! It’s normal for trees to look “skeletal” after pruning. Give it 4–6 weeks to show new growth. If branches won’t heal or ooze sap excessively for months, you may have:
- A severe cut too close to the trunk (prune at the branch collar).
- Bacterial infection (black, oozing wounds)—sterilize tools and remove infected tissue.
- Root or trunk damage (check for cracks, fungus, or borer holes).
If unsure, consult a certified arborist—they can assess long-term health.
Wrapping up and next steps
Winter pruning your red maple tree isn’t just about shaping—it’s a rejuvenating ritual that sets the stage for vibrant spring growth. By following these steps, you’re giving your tree the care it needs to thrive, even in the coldest months.
Now that you’re armed with the right tools, techniques, and timing, there’s no better moment to roll up your sleeves and get pruning! 🌳✂️
Ready to take action? Mark your calendar for a crisp winter day, gather your supplies, and give your red maple the fresh start it deserves. Happy pruning—your tree (and future spring blooms!) will thank you!