Pruning
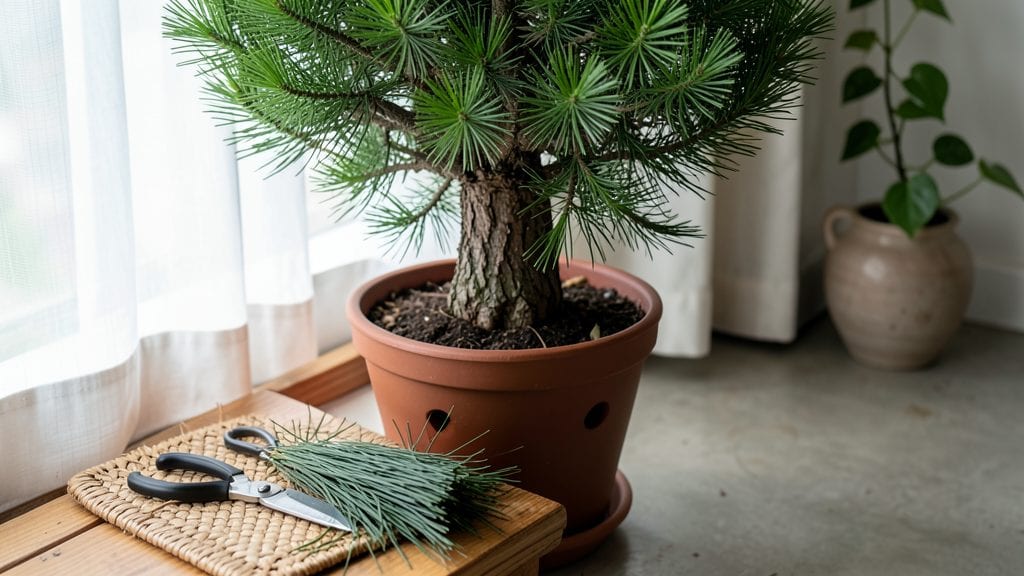
Even with pruning Christmas trees, yours doesn’t have to look perfect—just healthy. Pruning Christmas trees might sound intimidating, but it’s the secret to keeping them lush and full for years.
I’ve pruned Norfolk Island pines and Fraser firs for over a decade, and the difference between a neglected tree and one that thrives is just a few strategic cuts.
The best time to prune is late winter or early spring, before new growth starts. You’ll need sharp pruning shears, rubbing alcohol to sterilize them, and a clean towel to wipe between cuts.
The goal isn’t to shape it like a holiday centerpiece—it’s to encourage bushiness and airflow, which keeps pests and diseases at bay. Even a small trim now means fewer brown spots and more vibrant foliage by next season.
Start by removing any dead or crossing branches first—they’re the easiest to spot and the most important to cut. Then, thin out the interior to let light reach the center, which is where most trees get sparse.
After pruning, give your tree a light drink of water and place it where it gets bright, indirect light. You’ll notice new growth within 4-6 weeks, and the tree will look fuller than ever by holiday time.
This works for all ornamental varieties, from dwarf Alberta spruces to towering Fraser firs. The key is patience—don’t overdo it in one session, and avoid pruning in fall, when the tree is already stressed.
With just a little attention, your Christmas tree will stay vibrant year after year, no matter the season.
📚 In This Guide
- What you need
- Instructions
- Tips and common mistakes
- Wrapping up and next steps
What you need
- ● Sharp pruning shears or loppers – Choose bypass pruners (for clean cuts) or anvil pruners (for thicker branches). Size: 6–8" for small branches, 10–12" for larger limbs.
- ● Hand pruners (for precision) – Ideal for trimming thin, delicate branches (e.g., new growth on living trees). Size: 5–6".
- ● Safety gloves – Cut-resistant gloves (e.g., leather or synthetic) to protect hands from sap and sharp edges.
- ● Ladder or step stool – If pruning a tall tree, use a stable, 3-sided ladder (never a single ladder!). Height: Extend 3 feet above the highest branch you’ll trim.
- ● Disinfectant (70% isopropyl alcohol or bleach solution) – 1 part bleach to 9 parts water to sterilize tools between cuts and prevent disease spread.
- ● Heavy-duty trash bags or bucket – For collecting clippings (aim for 2–3 gallons capacity).
- ○ Tree stand or tarp (optional for cut trees) – Elevates the tree for easier trimming and protects floors from sap.
- ● Pole saw or extension pruners – For high branches without climbing (ideal for living trees).
- ● Rubbing alcohol wipes – Quick cleanup for sticky sap on tools.
- ● Pruning sealant – Not always necessary, but can help large cuts (>½ inch) on living trees heal faster.
- ● Workout gear – Stretching band or light gloves to reduce hand strain during repetitive cuts.
How to prune Christmas trees for stronger, healthier growth
Here’s the straightforward method I’ve used for years to keep Christmas trees lush and thriving.
Choose the Right Time and Tools
The best time to prune is late winter or early spring, just as new growth begins. This timing ensures you’re not removing next year’s buds and gives the tree time to recover before summer heat. I always use sharp, clean pruning shears—dull blades tear stems and invite disease. Disinfect them with rubbing alcohol before and after use to prevent spreading any pathogens.
For larger branches, a pruning saw works better, but most Christmas trees don’t need it unless you’re dealing with deadwood from winter storms. Avoid pruning in fall if you plan to keep the tree indoors—removing too many branches weakens its ability to hold water and stay fresh.
Identify and Remove Dead or Damaged Branches
Start by scanning the tree for dead, broken, or crossing branches. Dead branches are brittle and snap easily when bent; they’ll crumble between your fingers. Crossing branches rub against each other, creating wounds that invite pests and disease. Use your shears to make a clean cut just outside the branch collar—the swollen area where the branch meets the trunk.
Don’t leave stubs; they slow healing and look messy. If a branch is too thick to cut with shears, use the saw and make the cut at a 45-degree angle to shed water away from the wound. Step back after each cut to check the tree’s balance—removing too many branches on one side can make the tree lopsided.
Thin Out the Canopy for Better Airflow
Christmas trees often grow too dense, which traps moisture and encourages fungal growth. Focus on thinning the inner branches—remove about one-third of the smallest, innermost growth to let light and air penetrate. This step is where most people go wrong: they cut too aggressively, leaving bare spots. Instead, work in small sections, removing only 5-10% of the foliage total.
Look for branches that grow inward or downward—they’ll never get enough sunlight to photosynthesize properly. Cut these back to an outward-facing branch or the collar. You’ll see a noticeable difference in the tree’s shape within a season, with fuller growth at the outer edges and fewer bare patches.
Shape the Tree for Balance and Fullness
Now’s the time to refine the tree’s shape, but keep it natural. Avoid drastic cuts—Christmas trees respond best to gradual shaping. Start at the top and work your way down, removing branches that disrupt the tree’s symmetry. If one side looks sparse, trim the opposite side slightly to balance it out.
For a fuller look, focus on the lower third of the tree—this is where most people’s eyes land when admiring it. Prune back any branches that grow straight up; these rarely fill out well. Instead, encourage horizontal growth by cutting just above a bud that faces outward. Water the tree deeply after pruning to help it recover and reduce stress.
Tips & tricks for perfect pruning Christmas trees
Here’s what I’ve learned over years of pruning to keep your Christmas trees thriving—simple tricks that make all the difference.
Timing is Everything: Late winter or early spring is the perfect window because that’s when new growth begins. Pruning at this time ensures you’re not removing next year’s buds, which could weaken the tree. I’ve seen trees recover beautifully when pruned right, but those pruned in fall often struggle—especially if you plan to bring them indoors for the holidays.
Tool Prep Prevents Problems: Always disinfect your pruning shears with rubbing alcohol before and after use. This simple step prevents spreading disease between trees. I learned this the hard way when a tree I’d pruned showed signs of fungal infection—turns out, I’d used the same shears on a diseased branch earlier. For larger branches, a pruning saw creates cleaner cuts, but most Christmas trees won’t need it unless you’re dealing with storm damage.
Cutting Technique Matters: When removing branches, make your cut just outside the branch collar—the swollen area where the branch meets the trunk. This allows the wound to heal properly and prevents unsightly stubs. For thicker branches, a 45-degree angle helps shed water away from the wound, reducing the risk of rot. I always step back after each cut to check the tree’s balance—removing too many branches on one side can make it lopsided.
Thinning for Airflow: Focus on removing about one-third of the smallest, innermost branches to improve airflow and reduce fungal growth. Many people overdo it here, leaving bare spots that look unnatural. Instead, work in small sections, removing only 5-10% of the foliage total. This subtle approach keeps the tree looking full while promoting healthier growth.
Pro Tips for Pruning Christmas Trees
- Here’s what I’ve learned over years of pruning to keep your Christmas trees thriving—simple tricks that make all the difference.
- Timing is Everything: Late winter or early spring is the perfect window because that’s when new growth begins.
- Tool Prep Prevents Problems: Always disinfect your pruning shears with rubbing alcohol before and after use.
Frequently asked questions
Got questions about pruning your Christmas tree? Here are some of the most common ones—and their answers—to help you keep your tree thriving!
When is the best time to prune a Christmas tree?
Prune your Christmas tree in late winter or early spring (before new growth starts). Avoid pruning in fall—this can stress the tree and reduce its ability to withstand winter. If you’re pruning a potted tree for indoor display, do it right after purchase to encourage fuller growth.
How much should I trim off my Christmas tree?
Remove no more than 25% of the tree’s foliage in a single session. Focus on dead, diseased, or overcrowded branches first. For young trees, light pruning (10-15%) is enough. Over-pruning can weaken the tree and reduce its holiday appeal!
Can I prune a Christmas tree that’s already indoors?
Yes, but minimize pruning indoors—it’s better to shape trees outdoors before bringing them inside. If needed, trim only the very tips of branches to refresh the look. Avoid heavy pruning indoors, as it can shorten the tree’s lifespan and increase watering needs.
Why are my tree’s branches turning brown after pruning?
Brown tips after pruning are normal if you cut just above a leaf node (the bump where branches grow). If entire branches turn brown, it may signal drought stress or disease. Ensure the tree gets 1-1.5 inches of water weekly (or more in pots) and avoid over-fertilizing, which can burn roots.
What’s the difference between pruning a real vs. artificial Christmas tree?
Real trees need regular pruning to stay healthy, while artificial trees don’t require pruning at all. For real trees, focus on outdoor maintenance; for artificial ones, just fluff the branches and store them properly. Pro tip: Disinfect pruners between cuts on real trees to prevent spreading disease!
Wrapping up and next steps
Pruning your Christmas tree isn’t just about aesthetics—it’s a simple way to boost health, shape growth, and keep your tree thriving for years to come. 🌲 By following these four easy steps, you’ll ensure a stronger, fuller tree that stays lush and vibrant, whether indoors or out.
Now that you’re armed with the know-how, grab those shears and get pruning! For extra care, consider fertilizing or mulching afterward to give your tree the best start. Happy pruning—your tree will thank you! 🌟