Pruning
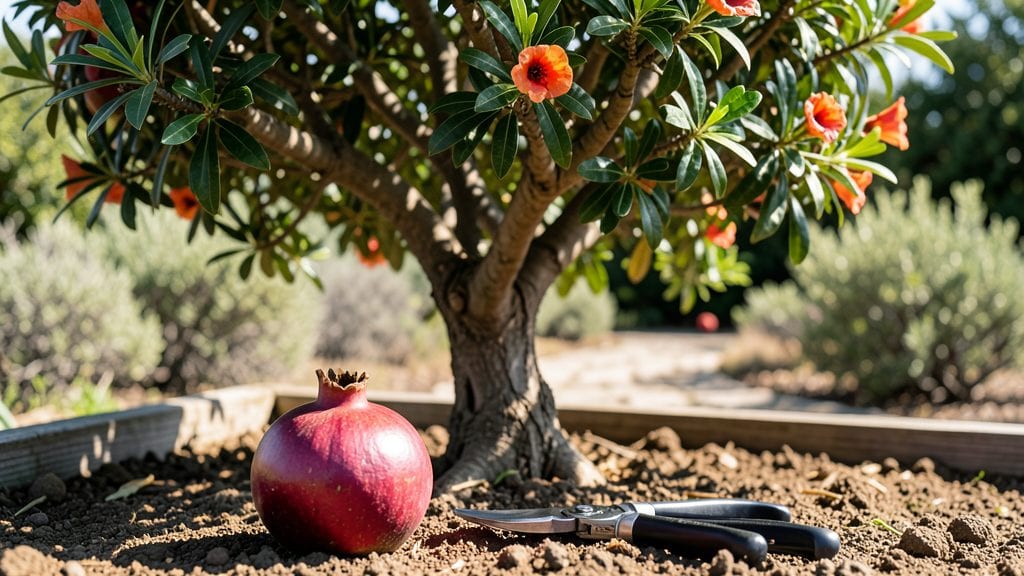
Growing a pomegranate tree from seeds reveals nature’s patience—and your own. ✨ The key to fast sprouting starts with scarifying those hard shells, which I learned the hard way after weeks of waiting for seeds that never broke through.
Most gardeners assume you just plant them and hope, but there’s a science to cracking that dormancy.
The process is simple but requires attention to detail: soak the seeds overnight, then rub them between sandpaper to mimic winter’s frost. Plant them just below the soil surface in a warm, bright spot—think 70-75°F—and keep the soil damp, not soggy.
Within 2-4 weeks, you’ll see those first stubborn little leaves push through, a sign you’ve beaten the odds.
By month three, you’ll have sturdy seedlings ready for transplanting, though they’ll grow slowly at first. Patience pays off when you finally see that first deep green leaf or the telltale red blush of a tiny fruit—proof that your gamble worked.
The real magic happens years later, when your tree bears its first ruby-red jewels.
This method works best in USDA Zones 7-11, but even cooler climates can try it indoors. The trick is consistency: warmth, light, and that perfect balance of moisture. Once you’ve mastered the sprout, the rest is just nurturing a future fruit-bearing giant.
📚 In This Guide
- What you need
- Instructions
- Tips and common mistakes
- Wrapping up and next steps
What you need
- ● Pomegranate seeds: 5–10 fresh, plump seeds (harvested from a ripe, organic pomegranate—avoid store-bought seeds treated with preservatives).
- ● Small pots or seed trays: 3–4 biodegradable pots (3–4 inches deep) or a seed tray with drainage holes (for germinating multiple seeds at once).
- ● Well-draining potting mix: 2–3 cups of a lightweight, seed-starting mix (avoid garden soil—it’s too dense!). Look for labels with "peat-free" or "coco coir" if you prefer eco-friendly options.
- ● Spray bottle: 8–12 oz with a fine mist nozzle (for gentle watering).
- ● Plastic wrap or clear lid: To create a mini greenhouse effect (e.g., a ziplock bag or a humidity dome).
- ● Drainage tray or saucer: To catch excess water and prevent root rot.
- ● Sunny windowsill or grow light: A south-facing window or a 12–16" LED grow light (for 12–14 hours/day once sprouts appear).
- ● Pencil or toothpick: For gently pressing seeds into the soil (no need to bury them deep!).
- ● Heat mat: A seedling heat mat (set to 70–75°F) to speed up germination (especially in cool climates).
- ● Fertilizer: A diluted liquid seaweed fertilizer (1 tsp per gallon of water) to give seedlings a nutrient boost after 4–6 weeks.
- ● Humidity dome with vent: Adjustable vents to control moisture levels as seeds sprout.
- ● Label markers & sticks: To track planting dates and seed varieties (fun for gardeners with multiple projects!).
- ● Transplanting tools: A small trowel or spoon for moving seedlings to larger pots (once they’re 3–4 inches tall).
Step-by-Step instructions for germinating pomegranate tree seeds
Here's how to coax those stubborn pomegranate seeds into sprouting within weeks—not years.
🌱 Step 1: Extract and Prepare the Seeds
Crack open a ripe pomegranate and scoop out the seeds, then rinse them thoroughly under cool water to remove any residual fruit pulp. This prevents mold and speeds up germination. I like to spread them on a paper towel to dry overnight—just enough so they don’t feel slick when you handle them.
Here's the thing—pomegranate seeds have a hard outer shell that slows water absorption. To break it down, I place them between two layers of damp paper towels, fold them into a neat packet, and seal it in a plastic bag. Keep it in a warm spot (around 75°F) for 3-5 days, checking daily to ensure the towels stay moist but not soggy. You’ll know it’s working when tiny white roots appear—this is your signal to move to soil.
💧 Step 2: Plant the Pre-Sprouted Seeds
Fill small pots (about 3-4 inches deep) with a lightweight, well-draining mix—equal parts potting soil and perlite works perfectly. Poke a hole about ½ inch deep with your finger, then gently place one seed (root-side down) into each hole. Cover lightly with soil, just enough to secure it without burying it.
Water gently until the soil feels evenly moist, but don’t drown it. Pomegranate seedlings are sensitive to overwatering, so I use a spray bottle to mist the surface instead of pouring from above. Place the pots in a warm, bright spot—65-75°F is ideal—but avoid direct sunlight at first. You’ll see the first true leaves emerge in 2-4 weeks, depending on warmth.
☀️ Step 3: Provide Gradual Light and Airflow
Once the seedlings have 2-3 sets of true leaves, it’s time to introduce them to more light. Move them to a south-facing window or under a grow light for 12-14 hours daily. Pomegranate trees love light but can get sunburned if transitioned too quickly, so I start with 2-3 hours of morning sun and slowly increase exposure over 10 days. Watch for leaves that look pale or crispy—this means they’re getting too much direct sun.
Don’t forget airflow. Place a small fan nearby (on low) to encourage sturdy growth. You’ll notice the seedlings grow taller and stockier within a few weeks—that’s your sign they’re thriving. Once they reach 6-8 inches tall, you can transplant them into larger pots or the ground, but wait until after the last frost if planting outdoors.
✂️ Step 4: Prune and Encourage Bushy Growth
When your seedlings hit 6-12 inches, it’s time to shape them. Use clean scissors to trim the top set of leaves just above a leaf node—this encourages branching. I pinch off the very top growth to force the plant to grow wider rather than tall, which is crucial for fruit production later. You’ll see new side shoots emerge within 2-3 weeks, signaling the tree is developing its classic bushy form.
Real talk: Pomegranate trees grow slowly at first, but consistency pays off. Keep the soil lightly moist (never soggy) and fertilize lightly every 4-6 weeks with a balanced 10-10-10 formula once they’re established. Within 2-3 years, you’ll have a small tree ready to reward you with flowers—and eventually, those juicy pomegranates you started with.
Tips & tricks for fast pomegranate tree germination
Here's what I learned after struggling with stubborn pomegranate seeds that refused to sprout.
Temperature Matters: That 75°F warm spot in Step 1 is critical—it mimics the Mediterranean climate where pomegranates thrive. I keep mine on top of my fridge (not inside) or use a seedling heat mat. If your home is cooler, place the sealed bag near a sunny window during the day. Too cold and the seeds stay dormant; too hot and they may rot before sprouting.
Moisture Balance: The damp paper towels should feel like a wrung-out sponge—not dripping wet. I check them daily and adjust by adding a drop or two of water if they feel dry. Overwatering in Step 1 causes mold, while too little prevents root development. A clear plastic bag helps maintain humidity without creating a swampy environment.
Light Transition: When you move seedlings to more light in Step 3, start with 2-3 hours of morning sun—this gradual approach prevents sunburn. I place mine on an east-facing windowsill first, then slowly rotate to south-facing over the 10-day period. Watch for leaves that look like they've been bleached—this is your warning sign to reduce light exposure immediately.
Pruning Pro Tip: In Step 4, when pinching back those top leaves, make your cut just above a leaf node (the bump where leaves grow). This creates a clean wound that heals faster and encourages stronger side shoots. Use clean scissors each time to prevent disease—rusty blades can introduce pathogens to your young plants.
Pro Tips for Pomegranate Tree Seeds
- Here's what I learned after struggling with stubborn pomegranate seeds that refused to sprout.
- Temperature Matters: That 75°F warm spot in Step 1 is critical—it mimics the Mediterranean climate where pomegranates thrive.
- Moisture Balance: The damp paper towels should feel like a wrung-out sponge—not dripping wet.
Frequently asked questions
Got questions about growing pomegranate trees from seeds? You’re not alone! Here are answers to the most common queries to help you succeed with your pomegranate tree seeds—from germination to troubleshooting.
How long does it take for pomegranate seeds to sprout?
Patience is key! Most pomegranate seeds sprout within 2–4 weeks if kept warm (70–85°F) and moist. Some varieties may take up to 6 weeks. If no sprouts appear after 8 weeks, gently check for rot or replant fresh seeds.
Can I grow pomegranate trees from seeds in cold climates?
Yes, but with extra care! Start seeds indoors 8–10 weeks before your last frost, then transplant seedlings outdoors only after all danger of frost has passed. Use a greenhouse or cold frame in Zone 6 or colder to extend the growing season.
What’s the best way to speed up germination?
Boost your chances with these tricks:
- Soak seeds overnight in warm water to soften the hard outer shell.
- Use a heat mat (75–85°F) to mimic tropical conditions.
- Plant seeds shallowly (½ inch deep) in well-draining soil.
Will seeds from store-bought pomegranates grow true to the parent tree?
Probably not! Store-bought seeds often produce wild-type trees with smaller, tart fruit. For reliable varieties, buy seeds from nurseries specializing in pomegranates or graft onto a rootstock.
Why are my pomegranate seedlings dying?
Common culprits include:
- Overwatering (root rot is deadly—let soil dry slightly between waterings).
- Temperature swings (keep seeds in a warm, stable spot).
- Pests/fungus (use neem oil or fungicide if mold appears).
Wrapping up and next steps
Growing a pomegranate tree from seeds is a rewarding journey that blends patience with the joy of nurturing life! By following the right germination secrets—like soaking seeds overnight, maintaining warmth, and providing consistent moisture—you’ll unlock the potential for fast, healthy sprouts.
Whether you’re a gardening novice or a seasoned green thumb, these steps make it easier than you think.
Ready to take the next step? Start by planting your prepped seeds in well-draining soil and watch your little pomegranate tree grow. Happy gardening—your future harvest awaits! 🌱✨