Pruning
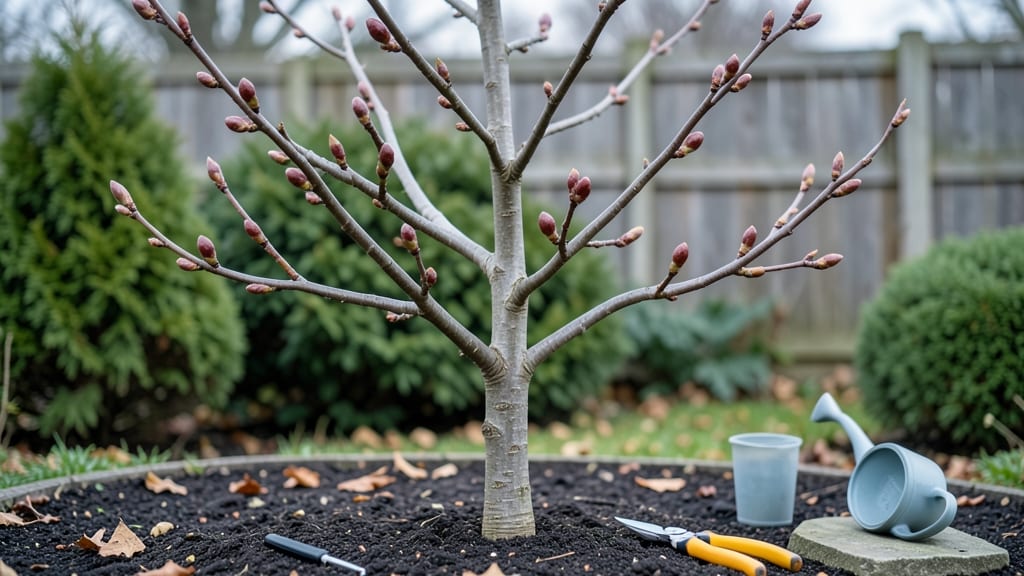
Your pear tree’s future harvest starts with those tiny fruit buds—and pruning them wrong could mean a sparse harvest this summer. 🌱 I’ve spent years watching buds swell in spring, only to see entire branches fail when pruning cuts too late or too aggressively.
The difference between a tree laden with fruit and one struggling to set buds often comes down to timing, technique, and knowing exactly what those buds look like before they bloom.
Here’s the thing—pear fruit buds are sneaky. They hide among the vegetative buds, which just grow leaves, and if you don’t recognize the difference, you’ll accidentally remove the ones that matter.
The key is pruning in late winter or early spring, before buds break dormancy, and making cuts just above a bud that’s plump and slightly pointed—not the flat, leafy ones.
A sharp pair of pruners and a sunny, well-watered tree are all you need to set the stage for a bountiful season.
What you’ll end up with is a tree that bursts into bloom with vibrant clusters of white flowers, each one a potential pear.
The buds that survive your pruning will swell into thick, rounded clusters by late spring, and by summer, you’ll be picking fruit instead of watching neighbors’ trees heavy with pears. The secret? Precision cuts that encourage the right buds to thrive while keeping the tree healthy and strong.
This works for both backyard pear trees and orchard varieties, though container-grown trees need slightly more frequent pruning to stay productive. The same principles apply whether you’re dealing with Bartletts, Bosc, or Asian pears—just adjust your timing for your local climate. Let’s get those buds ready for their close-up.
📚 In This Guide
- What you need
- Instructions
- Tips and common mistakes
- Wrapping up and next steps
What you need
- ● Pruning shears: Bypass pruners (sharp, clean, and sterilized with rubbing alcohol or bleach solution). Size: 6–8 inches for small branches.
- ● Loppers: For thicker branches (up to 2 inches in diameter). Look for: Long handles (30+ inches) and a smooth cutting mechanism.
- ● Pruning saw: For branches larger than 2 inches. Type: Curved-tooth saw for clean cuts.
- ● Gloves: Heavy-duty gardening gloves (cut-resistant, waterproof) to protect your hands from thorns and sap.
- ● Disinfectant: 1-part bleach to 9-parts water solution (for sterilizing tools between cuts).
- ● Rag or paper towels: For wiping tools and branches before/after pruning.
- ● Ladder or step stool: If your tree is taller than 6 feet. Safety first: Use a stable, non-slip model.
- ○ Marking twine or tape: To flag branches for removal (optional but helpful for complex pruning).
- ● Trash bags: For collecting pruned branches and debris.
- ● Hand pruners: Compact bypass pruners for precision work on small buds or twigs.
- ● Pruning sealant: (e.g., tree wound paint) to protect large cuts (controversial—skip if your tree is healthy!).
- ● Notebook & pencil: To sketch your tree’s structure or track bud locations.
- ● Safety glasses: If your tree has brittle branches prone to snapping.
- ● Tree growth regulator: (e.g., hydrogen peroxide spray) to reduce sap bleeding post-pruning.
Instructions for reviving pear tree fruit buds through pruning
Here’s how to coax new fruit buds into action—step by step, with the right cuts and timing.
✂️ Step 1: Time Your Pruning for Maximum Bud Revival
Prune your pear tree in late winter to early spring, just as buds begin to swell but before they burst open. This is the critical window—cutting too early risks exposing dormant buds to cold, while waiting too long removes potential fruit set. Look for plump, green-tipped buds (they’ll feel firm to the touch) as your signal to start.
If your tree is young or heavily pruned last year, you can do a light pruning in summer to redirect energy, but focus on winter pruning for fruit buds. Avoid pruning after mid-June—new growth won’t harden off before frost, and you’ll lose next year’s crop.
🌿 Step 2: Remove Dead, Diseased, or Crossing Branches First
Start by cleaning up the tree—cut out any branches that are dead, broken, or diseased (look for blackened bark, oozing sap, or fungal growth). Use sharp, clean pruners to make 45-degree cuts just outside the branch collar (the swollen area where the branch meets the trunk). This prevents tears and promotes faster healing.
Next, remove crossing or rubbing branches—these compete for energy and can create wounds that invite pests. If two branches grow toward each other, prune the weaker one at its base. You’ll know you’re on the right track when the tree’s center opens up to sunlight and airflow, which is essential for bud health.
☀️ Step 3: Prune for Light and Shape—Prioritize Fruit Buds
Pears thrive with open, airy canopies, so aim to reduce density by cutting back overlapping branches and suckers (shoots growing from the base or trunk). Focus on fruit spurs—short, stubby branches with clusters of buds. These are your fruit factories, so never prune them off entirely. Instead, trim back overly long branches to 6-12 inches to encourage bushier growth.
Shape the tree into an open vase or central leader form, depending on your variety. For dwarf pears, keep the height manageable (6-8 feet), while standard trees can stretch taller. Step back often to visualize sunlight reaching all branches—this ensures buds get the energy they need to develop.
💧 Step 4: Fertilize and Water for Bud Recovery
After pruning, feed your tree with a balanced, slow-release fertilizer (10-10-10 or similar) in early spring. Scratch it into the soil 6 inches from the trunk and water deeply to help roots absorb nutrients. Pears are heavy feeders, so don’t skimp—this is when buds need extra energy to wake up.
Water deeply once a week (or more in drought) to keep the root zone moist but not soggy. Mulch with 2-3 inches of organic matter (like wood chips) to retain moisture and regulate soil temperature. Avoid piling mulch against the trunk—keep it 2 inches away to prevent rot.
⏰ Step 5: Monitor Bud Development and Adjust as Needed
Check your tree weekly as buds swell. Healthy buds will plump up and turn green, while weak or damaged ones may stay shriveled or ooze sap. If you notice buds dropping off, it could mean late frost damage, over-pruning, or drought stress. Adjust watering or apply a light frost cloth if frost is forecasted.
By late spring, you should see new leaf growth emerging from the buds. If buds aren’t forming, consider thinning out excess fruit later in the season—too many pears can exhaust the tree, reducing next year’s crop. Thin to leave 6-8 inches between fruits for proper sizing.
Tips & tricks for reviving pear tree fruit buds
Precision pruning makes all the difference when it comes to waking up dormant fruit buds—here's how to avoid common mistakes and maximize your tree's potential.
The Timing Secret: Look for buds that are plump and green-tipped but haven't burst open yet—that's your perfect window in late winter to early spring. I learned this the hard way after pruning too early one year and losing potential fruit set to late frost. The buds should feel firm when you gently squeeze them, like a ripe peach. If they're still hard and shriveled, wait a few more days.
Cutting Technique That Changed Everything: Always make your cuts just outside the branch collar at a 45-degree angle—this prevents tears and promotes faster healing. I used to make straight cuts, which left ugly wounds that took forever to close. For crossing branches, remove the weaker one at its base rather than trying to cut it back. This opens up the tree's center for better airflow and sunlight penetration, which is crucial for bud development.
Fruit Spur Protection: Those short, stubby branches with clusters of buds are your fruit factories—never prune them off entirely. Instead, trim back overly long branches to 6-12 inches to encourage bushier growth. I've seen trees with beautiful fruit spurs completely removed during heavy pruning, which meant no fruit the following year. For dwarf varieties, keep the height manageable at 6-8 feet to make harvesting easier while still allowing sunlight to reach all branches.
Post-Pruning Recovery Strategy: After you've finished pruning, give your tree a boost with a balanced, slow-release fertilizer (10-10-10 works well) scratched into the soil 6 inches from the trunk. Water deeply to help roots absorb nutrients, and mulch with 2-3 inches of organic matter—but keep it 2 inches away from the trunk to prevent rot. This combination gives your tree the energy it needs to revive those dormant buds and prepare for spring growth.
Pro Tips for Pear Tree Fruit Buds
- Precision pruning makes all the difference when it comes to waking up dormant fruit buds—here's how to avoid common m...
- The Timing Secret: Look for buds that are plump and green-tipped but haven't burst open yet—that's your perfect windo...
- Cutting Technique That Changed Everything: Always make your cuts just outside the branch collar at a 45-degree angle—...
Frequently asked questions
Got questions about pear tree fruit buds and pruning?
You’re not alone! Here are answers to the most common queries to help you nurture a fruitful harvest.
When should I prune pear tree fruit buds for optimal blooming?
Prune pear trees in late winter or early spring (before buds swell but after severe cold passes). This timing ensures buds aren’t damaged by frost while allowing energy to focus on fruit production. Avoid pruning in fall—it can stimulate late growth vulnerable to winter cold.
How do I know if my pear tree buds are healthy or diseased?
Healthy buds are plump, firm, and brown or greenish (depending on variety). Watch for shriveled, blackened, or oozing buds—signs of fire blight or fungal issues. Remove affected branches immediately and sterilize tools with rubbing alcohol. Pro tip: Thin buds in clusters to improve air circulation and reduce disease risk!
Can I prune pear tree fruit buds too aggressively?
Yes! Pruning more than 25% of the canopy in one year can stress the tree, reducing fruit yield. Focus on opening the center and removing dead/diseased wood. For mature trees, limit cuts to 10–15% annually. Pro tip: Spread pruning over 2–3 years if heavy shaping is needed.
What if my pear tree buds bloom but don’t turn into fruit?
Several factors can cause this: poor pollination (plant a second variety nearby), late frost (protect blooms with frost cloth), or nutrient deficiencies (apply balanced fertilizer in early spring). Thin excess fruit early to avoid overburdening the tree. Pro tip: Hand-pollinate with a small brush if bees are scarce!
Are there alternative pruning methods for pear trees?
Yes! Try espalier pruning (training branches flat against a wall for space-saving) or candelabrum shaping (maintaining a central leader with scaffold branches). Dwarf varieties benefit from hedge-style pruning for easier harvests. Always prioritize removing suckers and water sprouts to direct energy to fruit buds.
Wrapping up and next steps
Mastering the art of pruning pear tree fruit buds is your ticket to a bountiful harvest and a healthier tree!
By following precise techniques—like timing, tool selection, and shape guidance—you’ll encourage vibrant blooms and robust fruit production. Every snip is an investment in next year’s harvest, so don’t hesitate to roll up your sleeves and get hands-on.
Ready to transform your pear tree? Start small: pick one branch this week, practice the steps, and observe the difference by next spring. Your future fruit-laden branches will thank you! 🌱