Trees
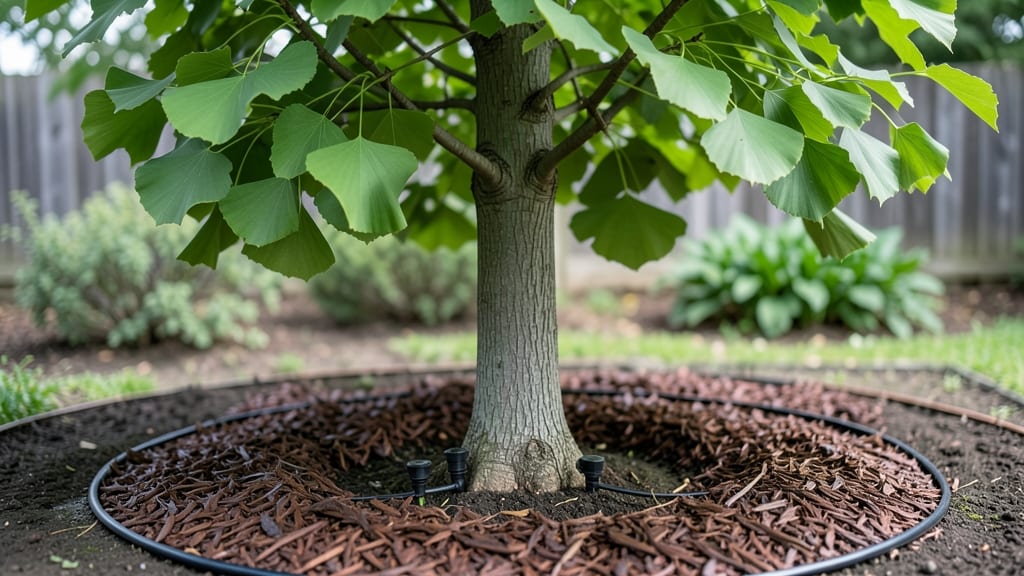
Caring for ornamental trees in the Pacific Northwest means mastering the art of frost-resistant pruning—where every cut shapes both beauty and resilience. 🌿 I’ve learned the hard way that late winter is the sweet spot: prune too early and you risk dieback from cold snaps; too late and you invite pests.
The key is timing cuts just as buds swell but before new growth bursts forth, ensuring your tree thrives despite our damp, chilly winters.
The right tools and technique make all the difference. You’ll need sharp bypass pruners for clean cuts, a sturdy ladder for higher branches, and a clear plan to remove no more than 25% of the canopy at once.
Mulch heavily around the base with wood chips to insulate roots, and water deeply in late fall to prepare for winter dormancy. These steps keep your tree looking stunning while building frost toughness.
What you’ll end up with is a tree that stays lush and vibrant year-round, with stronger branches that resist wind and ice damage. The pruning scars heal faster, and your tree’s natural shape—whether it’s a weeping cherry or a dramatic maple—comes into sharper focus.
Plus, you’ll save money by avoiding costly repairs from storm damage. Ready to transform your landscape?
This approach works for both young saplings and mature specimens, adapting to your tree’s growth rate and local microclimate. Whether you’re dealing with a newly planted tree or a decades-old favorite, these secrets keep ornamental trees thriving in our unique climate. Let’s get started with your pruning plan!
📚 In This Guide
- What you need
- Instructions
- Tips and common mistakes
- Wrapping up and next steps
What you need
- ● Pruning shears: Bypass pruners (for cuts sharp, high-quality (e.g., Felco F-2 or Corona).
- ● Loppers: 6–8" bypass loppers (for cuts 1–2" thick) – ratcheting or bypass type (e.g., Felco 202 or Fiskars).
- ● Pruning saw: Curved-tooth saw (for branches 2–4" thick) – avoid straight teeth to prevent tear-out.
- ● Extension pole: 6–10 ft telescoping pole saw – for hard-to-reach branches (e.g., Telescopic Pole Saw by Gorilla).
- ● Cleaning supplies: 70% isopropyl alcohol or rubbing alcohol (for sterilizing tools).
- ● Rag or paper towels.
- ● Disposable gloves: Nitrile or latex-free (to protect from sap and splinters).
- ● Safety gear: Safety glasses.
- ● Closed-toe shoes or boots.
- ○ Pruning sealant: Optional but helpful for large cuts (>1.5" diameter) – use a wound dressing like Tanglefoot Tree Wound Pruning Seal.
- ● Disposable bags: Heavy-duty contractor bags (for debris collection).
- ● Ladder (if needed): Sturdy, extension ladder (20–30 ft) with non-slip feet – never stand on the top 3 rungs!
- ● Notebook & pen: To sketch a pruning plan or mark cuts.
- ● Water & snacks: Hydration breaks are key—especially on chilly PNW days! 💧
- ● Know your tree: Research your specific ornamental tree species—pruning timing (late winter/early spring) and techniques vary!
- ● Check the weather: Prune on a dry, calm day (avoid frost or rain within 24 hours).
- ● Safety first: Clear the area of pets, kids, and bystanders—falling branches happen!
- ● Tool maintenance: Sharpen blades before starting to make clean cuts (dull tools crush wood, inviting disease).
Step-by-Step instructions for pruning frost-resistant ornamental trees
Here’s how I keep my Pacific Northwest trees healthy through winter—no guesswork, just proven techniques.
✂️ Step 1: Time Your Pruning for Frost Hardiness
Late winter is your best window—2-4 weeks before last frost date—when trees are still dormant but buds are swelling. This timing ensures fresh growth hardens off before cold snaps. I avoid pruning in fall because new growth won’t have time to mature before winter. Look for tight, brown buds that haven’t yet cracked open—those are your signal to start.
If you must prune in summer, wait until after flowering (for spring-bloomers) to avoid sacrificing next year’s blooms. Never prune during frost warnings—wet wood is more prone to disease. I always check my local frost calendar and mark the date with a bright flag on my calendar so I don’t miss it.
✂️ Step 2: Use the Right Tools for Clean Cuts
Dull tools tear bark and invite disease, so I invest in sharp, high-quality pruning shears (for branches under ½ inch thick) and a pruning saw for thicker limbs. Disinfect blades between cuts with rubbing alcohol—this prevents spreading fungal spores from one branch to another. I also keep a small pair of bypass shears in my tool belt for quick touch-ups during the growing season.
Make cuts just outside the branch collar—the swollen area where the branch meets the trunk. Cut at a 45-degree angle if removing a branch stub, but avoid leaving a flat surface that collects water. If you’re removing a large branch, make three cuts: first under the branch, then above it, and finally to remove the stub. This prevents tearing and gives the tree a clean break.
☀️ Step 3: Prioritize Structure and Airflow
Step back and assess the tree’s natural shape—your goal is to maintain its form while removing dead, crossing, or rubbing branches. I start at the top and work my way down, removing branches that grow inward or interfere with the tree’s structure. Thin out crowded areas to improve airflow, which reduces fungal diseases like powdery mildew that thrive in damp Pacific Northwest winters.
Never remove more than 25% of the tree’s foliage in one season—this stresses the tree and makes it vulnerable to frost damage. If you’re unsure, take before-and-after photos to track progress. I also avoid "topping" trees (cutting the top flat)—this creates ugly water sprouts and weak growth. Instead, focus on selective pruning to encourage strong, frost-resistant branches.
🌱 Step 4: Seal Cuts and Monitor for Stress
For trees with thick bark (like oak or maple), no sealing is needed—natural resins protect the wound. But for thin-barked trees (like birch or dogwood), I apply a tree wound sealant only on cuts larger than ½ inch. This prevents moisture loss and disease entry. Avoid over-sealing—just a thin layer is enough. I also water deeply after pruning to help the tree recover, especially if we’ve had a dry spell.
Watch for yellowing leaves or wilting in the weeks after pruning—these are signs of stress. If you see oozing sap or fungal growth on cuts, apply a copper-based fungicide as a precaution. I keep an eye on my trees for at least 4 weeks post-pruning to catch any issues early. In the Pacific Northwest, where winters can be wet and cold, giving your tree a little extra care now means fewer problems later.
Tips & tricks for perfect ornamental tree pruning
These simple yet game-changing tips will help you prune like a pro and keep your Pacific Northwest trees thriving through winter.
Timing Secret: In Step 1, when checking for tight, brown buds, also look for the first sign of sap flow—this confirms the tree is ready. If you're unsure about your last frost date, check your local agricultural extension service website or use a frost calendar app. I've learned the hard way that pruning too early can leave trees vulnerable to late-season frosts, while waiting too long risks stressing them before winter.
Tool Maintenance: In Step 2, don't forget to sharpen your pruning tools before each use. A simple way to test sharpness is to make a clean cut through a piece of paper—if it tears instead of cuts cleanly, your tools need sharpening. I keep a small file in my tool kit for quick touch-ups between uses. Also, store your tools in a dry place to prevent rust, which can spread disease to your trees.
Visual Pruning Guide: For Step 3, imagine the tree's natural shape as a vase or cone. Remove branches that disrupt this shape, starting with the smallest branches first. A helpful trick is to hold your pruners at a 45-degree angle when making cuts—this creates a natural water-shedding surface that prevents water pooling. I always step back every few cuts to reassess the tree's balance and airflow.
Post-Pruning Care: After completing Step 4, collect and dispose of all pruned branches properly. Leaving them on the ground can harbor pests and diseases. For thin-barked trees, I've found that applying a thin layer of tree wound sealant (about the thickness of a dime) works best. Too much sealant can suffocate the wound, while too little won't provide adequate protection against moisture loss.
Pro Tips for Ornamental Tree Care
- These simple yet game-changing tips will help you prune like a pro and keep your Pacific Northwest trees thriving thr...
- Timing Secret: In Step 1, when checking for tight, brown buds, also look for the first sign of sap flow—this confirms...
- Tool Maintenance: In Step 2, don't forget to sharpen your pruning tools before each use. A simple way to test sharpne...
Frequently asked questions
When is the best time to prune ornamental trees in the PNW to avoid frost damage?
Prune after the tree has fully leafed out in late spring or early summer (June–July). This ensures buds have hardened off post-frost. Avoid winter pruning—exposed cuts can’t heal before cold snaps, leaving trees vulnerable to bacterial infections or dieback. Pro tip: If your tree blooms early (like cherry), wait until after flowering to trim.
How do I protect my ornamental tree from late spring frosts?
Use frost cloths or row covers for young trees or newly pruned branches. For larger specimens, wrap trunks with burlap and avoid overhead watering before frost. If a freeze is forecasted, lightly mist leaves with water—it forms an insulating ice layer. Never use heat sources like space heaters near trees (fire hazard!).
Can I prune ornamental trees in winter for better shape?
Not ideal! Winter pruning stresses trees by exposing fresh cuts to cold, wet conditions, inviting disease. However, light structural pruning (removing deadwood) is okay in late winter (Feb–March) if you’re sterilizing tools with rubbing alcohol and sealing larger cuts with pruning sealant. Wait for spring for heavy pruning.
What’s the difference between “heading back” and “thinning out” pruning for ornamental trees?
| Heading Back | Thinning Out |
|---|---|
| Cutting back branch tips to encourage bushier growth (e.g., for hedges or flowering trees). | Removing entire branches at the collar to improve airflow and reduce disease risk. |
| Risk: Can lead to dense, weak growth if overdone. | Best for: Mature trees needing structural support. |
For PNW ornamental trees, thinning is often safer—it mimics natural light conditions and reduces frost pockets in the canopy.
My ornamental tree’s leaves are browning after pruning—what went wrong?
Browning can signal over-pruning, drought stress, or frost damage. Check for:
Too many cuts? Limit pruning to no more than 25% of the canopy per season.
Fungal signs? (Black spots, mold) Treat with neem oil or copper fungicide.
If browning persists, test soil pH—PNW’s acidic soil can stress trees post-pruning.
Wrapping up and next steps
Caring for your ornamental trees in the Pacific Northwest doesn’t have to be daunting—especially when you embrace frost-resistant pruning! By following the right techniques, timing, and tools, you’ll keep your trees thriving year after year. 🌿✨
Now that you’re armed with the knowledge, take action: schedule your pruning sessions, gather your supplies, and give your trees the love they deserve. Whether you’re a seasoned gardener or just starting out, every little effort makes a big difference. Happy pruning!