Pruning
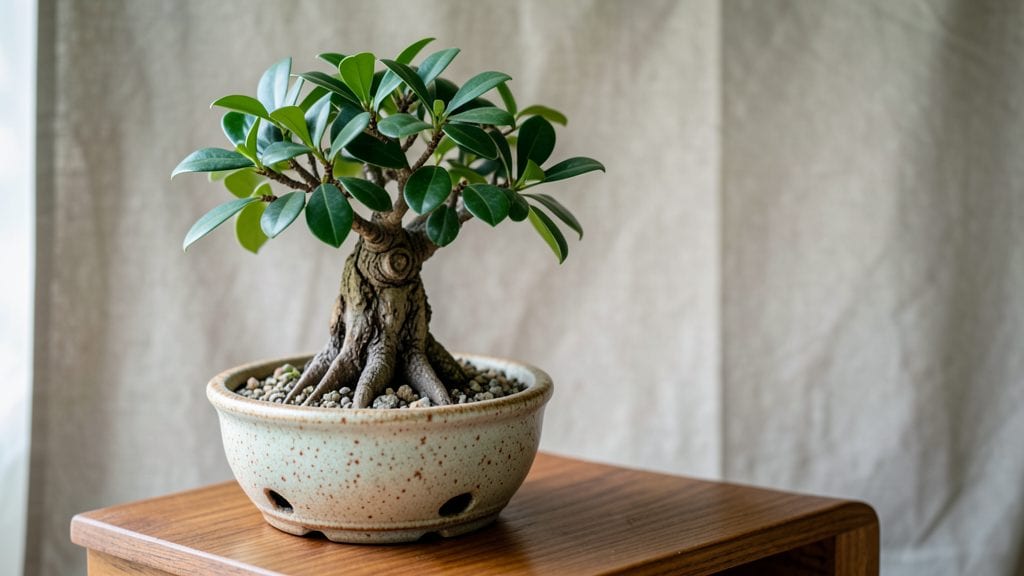
Creating a mini Japanese tree that stays perfectly proportioned isn’t just about pruning—it’s about patience, precision, and understanding the delicate balance between growth and restraint. 🌿 I’ve spent years refining my approach with dwarf cultivars like Japanese maple and black pine, and the results are worth every careful cut.
These tiny trees transform any space into a serene corner of nature, whether on a windowsill or a patio table.
The key lies in the details: well-draining soil, gentle watering, and strategic pruning to maintain their miniature stature. You’ll need basic tools—a pair of sharp bonsai shears, a small pot with drainage, and a mix of akadama, pumice, and organic matter.
For beginners, starting with a pre-bonsai cultivar (like a dwarf Japanese garden juniper) simplifies the process while still delivering stunning results. Even experienced growers can refine their technique here.
What you’ll achieve is a tree that stays small—under 2 feet tall—with intricate branches and lush foliage that feels ancient yet delicate. The satisfaction comes in watching it thrive year after year, its leaves turning vibrant shades of red or green, its bark developing character with age.
This isn’t just gardening; it’s crafting living art.
Whether you’re working with a Japanese maple’s delicate leaves or a black pine’s rugged needles, the principles stay the same: light, soil, and timing. Let’s dive into the tools, techniques, and secrets that keep these trees looking like masterpieces, no matter how small the space.
📚 In This Guide
- What you need
- Instructions
- Tips and common mistakes
- Wrapping up and next steps
What you need
- ● Bonsai Tree: A dwarf Japanese tree species (e.g., Ficus retusa, Juniperus procumbens, or Pinus mugo). Start with a 1–3 year-old sapling (3–6 inches tall).
- ● Bonsai Pot: A shallow, well-draining pot (4–6 inches in diameter) with drainage holes. Umeware (Japanese-style) or ceramic pots work best.
- ● Bonsai Soil: A mix of 70% inorganic material (like akadama, pumice, or lava rock) and 30% organic matter (peat moss or compost). Pre-mixed bonsai soil is convenient!
- ● Pruning Tools: Concave cutter (for shaping branches).
- ● Bypass pruners (for clean cuts).
- ● Root hook (for repotting and root pruning).
- ● Wire: Aluminum or copper bonsai wire (1–2mm thickness) for branch positioning.
- ● Bonsai Sealer: For coating cuts to prevent disease (e.g., Tree Top or Cut-Paste).
- ● Decorative Stones: Small tobi-ishi (stepping stones) or moss to enhance the scene.
- ● Humidity Tray: A shallow tray with pebbles and water to maintain moisture.
- ● Fertilizer: Slow-release bonsai fertilizer or liquid feed (e.g., Floracid).
- ● Spray Bottle: For misting leaves (especially in dry climates).
Step-by-Step guide to cultivating mini Japanese trees
Mastering these delicate trees transforms any space into a serene Japanese garden—here’s how to nurture them like a pro.
🌱 Step 1: Select the Right Tree and Pot
Choose a dwarf Japanese tree suited for indoor spaces, like a Ficus retusa or Carmona microphylla, both known for their adaptability. The pot must have drainage holes—I use unpainted ceramic to prevent root rot, which is a silent killer of bonsai. Size matters: a 4-6 inch pot works for young trees, but upgrade as roots grow. Fill the bottom with 1-2 inches of coarse gravel to ensure excess water drains away from roots.
Real talk: Skip plastic pots. They trap moisture and encourage fungal growth. Your tree’s health depends on airflow—choose something breathable. If repotting, do it in early spring when new growth begins. You’ll know it’s time when roots circle the pot’s bottom like a tangled mess.
☀️ Step 2: Prepare the Soil and Position for Light
Use a well-draining bonsai mix—I blend 50% akadama, 30% pumice, and 20% horticultural charcoal for aeration and microbial balance. Avoid garden soil; it compacts and suffocates roots. Moisten the mix until it feels like a wrung-out sponge, then fill the pot, leaving ½ inch from the rim for watering.
Place your tree in bright, indirect light—think east or north-facing windows. Direct sun scorches delicate leaves, while low light causes leggy growth (thin stems with sparse foliage). If your space lacks natural light, supplement with a full-spectrum LED grow light for 12-14 hours daily. Watch for leaves cupping upward—a sign of too much light.
💧 Step 3: Water with Precision and Establish a Routine
Water when the top inch of soil feels dry—stick your finger in; if it’s damp, wait. I use room-temperature water to avoid shocking roots. Pour slowly until water drains from the bottom, then empty the saucer to prevent soggy roots. Overwatering is the #1 killer; let the soil dry between waterings. In winter, reduce frequency—trees need less when growth slows.
Here’s the thing—mistaking thirst for drought is easy. Yellowing leaves often mean overwatering, while crispy edges signal underwatering. Adjust based on leaf color and soil moisture. A spray bottle helps maintain humidity, especially in dry climates. Aim for 50-60% humidity—your tree will thank you with lush, vibrant foliage.
✂️ Step 4: Prune and Wire for Shape
Prune in late winter or early spring to encourage new growth. Use sharp, clean bonsai shears to trim back 1/3 of new shoots—this prevents legginess. For thicker trunks, wire the branches with aluminum or copper wire, wrapping gently to guide growth. Remove wire after 3-4 months to avoid scarring. I start with the central leader (main upward branch) to create a balanced silhouette.
Don’t skip deadheading—remove yellow or brown leaves immediately to redirect energy. Shape matters: aim for asymmetry (a hallmark of Japanese bonsai). Step back often to assess balance. If a branch looks too heavy, prune opposite leaves to lighten the load. Patience is key—bonsai is a slow art, not a sprint.
🪴 Step 5: Fertilize and Monitor for Pests
Feed every 2 weeks in spring/summer with a balanced liquid fertilizer (10-10-10 or 20-20-20). Dilute to half-strength to avoid burning roots. In fall/winter, reduce to monthly. Organic options like fish emulsion work well—just follow package instructions. Over-fertilizing causes salt buildup, which stunts growth. Flush the soil annually with water to cleanse excess minerals.
Check for pests weekly—aphids, spider mites, and scale love bonsai. Wipe leaves with a neem oil solution (1 tsp per quart of water) to deter infestations. Isolate new trees for 2 weeks to prevent cross-contamination. Healthy trees resist pests, so light, soil, and water are your first line of defense. A thriving bonsai rarely attracts trouble.
Tips & tricks for perfect mini Japanese trees
These pro-level insights will help you cultivate thriving bonsai that look like they've been growing for decades—even in small spaces.
Soil Science: When mixing your 50% akadama, 30% pumice, and 20% charcoal blend, sift each component separately to prevent clumping. I use a fine mesh screen to break up any compacted bits—this ensures optimal aeration right from planting. The goal is a texture like crumbly cake batter, not dense packing soil.
Lighting Strategy: For that critical 12-14 hour daily light requirement, position your grow light about 6-8 inches above the tree. Use a timer to automate cycles—consistency is more important than intensity. I've found that LED bulbs rated at 6500K color temperature mimic natural daylight perfectly for bonsai growth.
Pruning Precision: When trimming back 1/3 of new shoots in Step 4, make cuts just above a leaf node at a 45-degree angle. This encourages branching while maintaining the tree's natural shape. I always sterilize my shears with rubbing alcohol between cuts to prevent bacterial transmission—bonsai wounds heal slowly.
Winter Care: During colder months, move your bonsai away from cold drafts and reduce watering to every 10-14 days. The 50-60% humidity target becomes even more critical indoors with heating systems. I place a humidity tray with pebbles and water beneath the pot to create a microclimate that mimics outdoor conditions.
Pro Tips for Mini Japanese Tree
- These pro-level insights will help you cultivate thriving bonsai that look like they've been growing for decades—even in small spaces.
- Soil Science: When mixing your 50% akadama, 30% pumice, and 20% charcoal blend, sift each component separately to prevent clumping.
- Lighting Strategy: For that critical 12-14 hour daily light requirement, position your grow light about 6-8 inches above the tree.
Frequently asked questions
Got questions about growing your own mini Japanese tree? You’re not alone! Here are some of the most common queries—plus quick, expert-backed answers to help you thrive.
How long does it take for a mini Japanese tree to mature?
A mini Japanese tree (like a dwarf bonsai) typically takes 3–5 years to reach its full aesthetic potential, though basic shaping can begin in as little as 6–12 months. Patience is key—focus on pruning techniques and root care to speed up growth. Some varieties, like Ficus microcarpa, grow faster than others like Juniperus procumbens.
Can I prune my mini Japanese tree year-round?
No—timing matters! Prune lightly in spring (to encourage new growth) and heavily in late summer/early fall (to harden wood before winter). Avoid pruning in winter (dormant phase) or peak summer (stressful heat). For tropical varieties, avoid frost exposure after pruning.
Do mini Japanese trees need full sunlight?
Most mini Japanese trees thrive in 4–6 hours of direct sunlight daily, but indirect light works for indoor varieties. South-facing windows or a grow light (12–14 hours/day) are ideal. Watch for yellowing leaves (too much sun) or leggy growth (too little). Adjust placement seasonally!
Why are my mini Japanese tree’s leaves turning brown?
Brown leaves usually signal overwatering (root rot) or underwatering (drought stress). Check soil moisture—it should be slightly dry at the top before watering. Also, fluoride in tap water can scorch leaves; use filtered or rainwater instead. Ensure proper drainage (no soggy pots!).
What’s a good alternative if I don’t have space for a bonsai?
Try dwarf varieties like:
- Chinese Elm (Ulmus parvifolia) – Hardy and compact.
- Dwarf Gardenia (Gardenia jasminoides ‘Radicans’) – Fragrant and slow-growing.
- Miniature Olive (Olea europaea ‘Gigantea’) – Thrives in pots.
- Pencil Cactus (Euphorbia tirucalli) – Succulent-style, zero-fuss.
Wrapping up and next steps
Creating your own mini Japanese tree—or bonsai—is a rewarding journey that blends artistry, patience, and a deep connection with nature. Whether you’re a beginner or an enthusiast, mastering the techniques of pruning, wiring, and styling transforms even the smallest space into a serene, living masterpiece. 🌿✨
Now that you’re equipped with the materials and answers to common questions, it’s time to roll up your sleeves and start your bonsai adventure!
Begin with a healthy mini Japanese tree, follow the steps carefully, and don’t forget to enjoy the process—every twist of the wire and trim of the leaves brings you closer to your dream bonsai.
Happy growing! 🌱