
Pruning
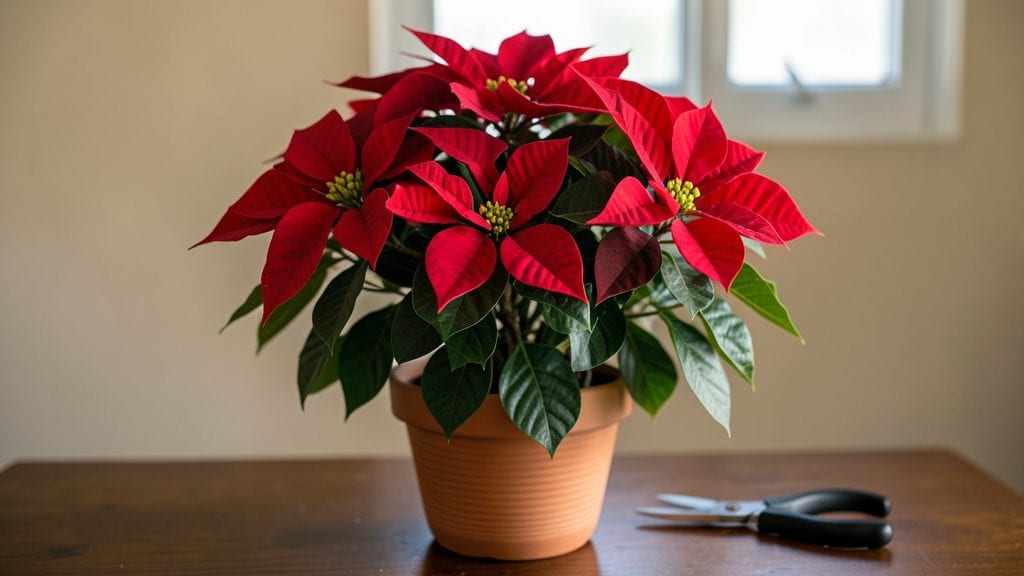
Growing a Mexican poinsettia tree (Euphorbia pulcherrima) means bringing vibrant red foliage indoors and outdoors in warm climates—no holiday season required. 🌿 The key difference from traditional poinsettias?
This one thrives year-round with the right care, and layering its branches creates a fuller, bushier plant that steals the show.
I’ve learned the hard way that skipping this step leads to leggy, sparse growth, but with a few simple cuts and patience, you’ll transform it into a lush, flowering powerhouse.
The secret to bushier growth lies in layering—a pruning technique that encourages multiple stems instead of one tall, bare branch. You’ll need sharp pruners, a small pot for propagation (optional), and a sunny spot with indirect light.
Start by pinching back new growth in early spring, then trim just above leaf nodes to spark branching. This method works best in USDA Zones 9-11, but container-grown plants can winter indoors anywhere. The payoff? A plant that blooms continuously, not just once a year.
Once you master layering, your Mexican poinsettia will reward you with bold red bracts (those showy leaves) and glossy green foliage year-round. The trickiest part? Avoid overwatering—let the top inch of soil dry out between waterings—and watch for pests like mealybugs, which love this plant’s sap.
With consistent care, you’ll end up with a plant that’s sturdier, fuller, and far more reliable than its holiday counterpart. Ready to turn that single stem into a bushy masterpiece?
This technique works for both container-grown plants and in-ground specimens in warm climates. For cooler zones, bring it indoors before frost and place it near a south-facing window.
The layering method also speeds up recovery if your plant gets leggy—just trim and repot, and it’ll bounce back faster than you’d expect. Let’s get those branches multiplying!
📚 In This Guide
- What you need
- Instructions
- Tips and common mistakes
- Wrapping up and next steps
What you need
- ● Healthy Mexican Poinsettia Tree: A mature plant (at least 1-2 years old) with flexible, semi-wooden stems.
- ● Sharp Pruning Shears: Clean, sterilized shears (or a knife) for precise cuts.
- ○ Rooting Hormone (optional but recommended): A gel or powder to boost root growth.
- ● Plastic or Biodegradable Pots: Small pots (4-6 inches in diameter) for layering.
- ● Well-Draining Potting Mix: A blend of peat, perlite, and sand (or a cactus/succulent mix).
- ● Plastic Wrap or Clear Plastic Bag: To create a humid environment for rooting.
- ● Twist Ties or Rubber Bands: To secure stems in place.
- ● Gloves: Protect your hands from sap (which can irritate skin).
- ● Spray Bottle: For misting layers to keep them hydrated.
- ● Bright, Indirect Light: A sunny windowsill or grow light for optimal growth.
- ● Patience! Layering takes 4-8 weeks for roots to form.
Step-by-Step instructions for layering Mexican poinsettia trees
Here's how to coax bushier growth using proven layering techniques—no pruning required.
🌿 Step 1: Select Healthy Branches for Layering
Choose semi-mature branches that are 3-4 inches long and show signs of new growth but aren't too tender. Look for branches with at least 3-4 leaves—these will support root development while still photosynthesizing. Avoid branches that are already flowering or have signs of stress like yellowing leaves or soft spots.
I like to work on branches that angle slightly downward—they naturally encourage root formation as they bend. Use clean, sharp pruning shears to make a diagonal cut just above a leaf node (where the leaf meets the stem). This ensures the branch retains its connection to the parent plant while allowing new roots to form.
✂️ Step 2: Prepare the Layering Site and Wound
Strip away 1-2 inches of bark from the lower half of the selected branch using a pocket knife or pruning shears. Be careful to avoid damaging the green stem underneath—you're creating a wound that will stimulate root growth. This process is called "ringing," and it tricks the plant into thinking it's been cut off, prompting root development.
Apply a rooting hormone to the wounded area to boost success rates. I use a gel formulation because it stays put and doesn't drip onto the soil below. Wrap the wounded section with sphagnum moss (kept damp but not soggy) and secure it with plastic wrap or a clear plastic bag. This creates a humid microclimate that encourages root formation.
💧 Step 3: Bury and Secure the Layered Branch
Dig a shallow trench near the base of the plant, about 2-3 inches deep, and position the moss-wrapped section horizontally in the trench. Secure the branch in place with plastic clips or bent wire, ensuring it stays buried at the correct depth. The moss should remain in contact with the soil to absorb moisture while allowing roots to grow into the surrounding earth.
Water the area gently but thoroughly to settle the moss and encourage root contact with the soil. Keep the moss consistently moist—not dripping wet—for the next 6-8 weeks. You'll know it's working when you see small roots emerging from the moss into the soil. This is your signal that the layer has taken root and is ready to separate.
☀️ Step 4: Monitor and Separate New Plants
Once roots have formed and the new branch shows signs of vigorous growth (typically 8-12 weeks), it's time to separate. First, make a clean cut just below the new root ball using sterilized pruning shears. Lift the branch carefully from the trench, ensuring you don't damage the delicate roots.
Transplant the new plant into its own pot with well-draining potting mix and place it in a location with bright, indirect light for the first few weeks. Avoid full sun initially—new roots are sensitive and can scorch. Water lightly but consistently, keeping the soil evenly moist until the plant establishes itself.
🌱 Step 5: Encourage Bushy Growth in New Plants
To maintain a bushy shape, pinch back the tips of new growth when they reach 4-6 inches tall. This encourages lateral branching and a fuller appearance. I like to do this in early spring when the plant is actively growing. Avoid heavy pruning—just a light trim to stimulate side shoots.
Mexican poinsettias thrive in 65-75°F temperatures and appreciate high humidity. If your home runs dry, mist the leaves occasionally or place the pot on a tray of pebbles filled with water. With proper care, your layered plants will reward you with vibrant foliage and even more opportunities for propagation.
Tips & tricks for perfect Mexican poinsettia tree layering
Here's what nobody tells you about layering Mexican poinsettias—these tricks make all the difference between struggling and thriving plants.
Branch Selection Secret: In Step 1, focus on branches that bend slightly downward—they naturally form roots more easily. I've found that branches with 4-5 leaves (instead of the minimum 3-4) produce stronger root systems. Avoid branches with flower buds, as they'll divert energy away from root development. Also, morning sunlight branches tend to be more vigorous than those in afternoon shade.
Layering Timing Tip: The 6-8 weeks of moisture maintenance in Step 3 is critical, but don't rush it! I've seen roots form in as little as 4 weeks with ideal conditions, but waiting the full time ensures robust development. Check moisture daily—soggy moss leads to rot, while dry moss stops root growth. A spray bottle keeps things perfectly damp without oversaturating.
Rooting Hormone Hack: While rooting hormone boosts success rates, I've had great results using cinnamon powder as a natural alternative in Step 2. Sprinkle a pinch on the wounded area before applying moss—it has antifungal properties and stimulates root growth. Just make sure to keep the area covered as directed.
Separation Strategy: When you see roots emerging in Step 4, wait 1-2 more weeks before separating. This extra time lets the roots thicken and the new plant establish a stronger connection to its water supply. I've found plants separated too early often struggle to establish properly, while those given extra time thrive immediately.
Pro Tips for Mexican Poinsettia Tree
- Here's what nobody tells you about layering Mexican poinsettias—these tricks make all the difference between struggling and thriving plants.
- Branch Selection Secret: In Step 1, focus on branches that bend slightly downward—they naturally form roots more easily.
- Layering Timing Tip: The 6-8 weeks of moisture maintenance in Step 3 is critical, but don't rush it!
Frequently asked questions
Got questions about growing your Mexican poinsettia tree? You’re not alone! Whether you’re a pruning pro or a plant parent just starting out, these answers will help you keep your tree lush and thriving.
How often should I prune my Mexican poinsettia tree for bushier growth?
Prune your Mexican poinsettia tree every 4–6 weeks during its active growing season (spring and summer). Focus on trimming back leggy stems by about ⅓ to encourage branching. Avoid heavy pruning in fall/winter, as this is when the plant sets buds for blooms.
When is the best time to layer my Mexican poinsettia tree?
Layering works best in early spring or late summer. Choose a warm, humid day and select healthy, flexible branches. The goal is to stimulate root growth before the plant’s dormancy period. Pro tip: Use a rooting hormone to boost success rates!
What temperature range is ideal for growing Mexican poinsettia trees?
Mexican poinsettias thrive in 65–75°F (18–24°C) during the day and 55–60°F (13–16°C) at night. Avoid drafts or temperatures below 50°F (10°C), as cold stress can cause leaf drop or stunted growth. If indoors, keep them away from heating/AC vents.
Can I grow a Mexican poinsettia tree indoors year-round?
Yes! With the right care, your Mexican poinsettia can thrive indoors. Place it near a bright, south- or west-facing window for 6+ hours of sunlight daily. Supplement with grow lights if natural light is limited. Just ensure good air circulation and occasional outdoor time (if possible) to prevent pests.
Why are my Mexican poinsettia leaves turning yellow or dropping?
Yellowing or dropping leaves often signal overwatering, underwatering, or stress. Check soil moisture—it should be slightly dry between waterings. Also, inspect for pests like spider mites or aphids. If the issue persists, adjust light exposure or humidity levels (aim for 40–60%).
Are Mexican poinsettias toxic to pets?
Unlike traditional poinsettias, Mexican poinsettias (Euphorbia pulcherrima) are non-toxic to cats and dogs. However, their milky sap can still irritate skin or cause mild stomach upset if ingested in large amounts. Always monitor pets around new plants until you’re sure they’re safe!
Wrapping up and next steps
Growing a lush, bushy Mexican poinsettia tree is totally within reach—especially with layering techniques that encourage vibrant growth! 🌿 By following the right steps—like selecting healthy branches, creating strategic cuts, and providing consistent care—you’ll soon enjoy a fuller, more vibrant plant that blooms beautifully. Don’t stop here! Experiment with different layering methods or share your progress with fellow plant enthusiasts for even more inspiration.
Next step: Grab your tools and start layering—your Mexican poinsettia will thank you with stunning, bushy foliage! 🌸