
Pruning
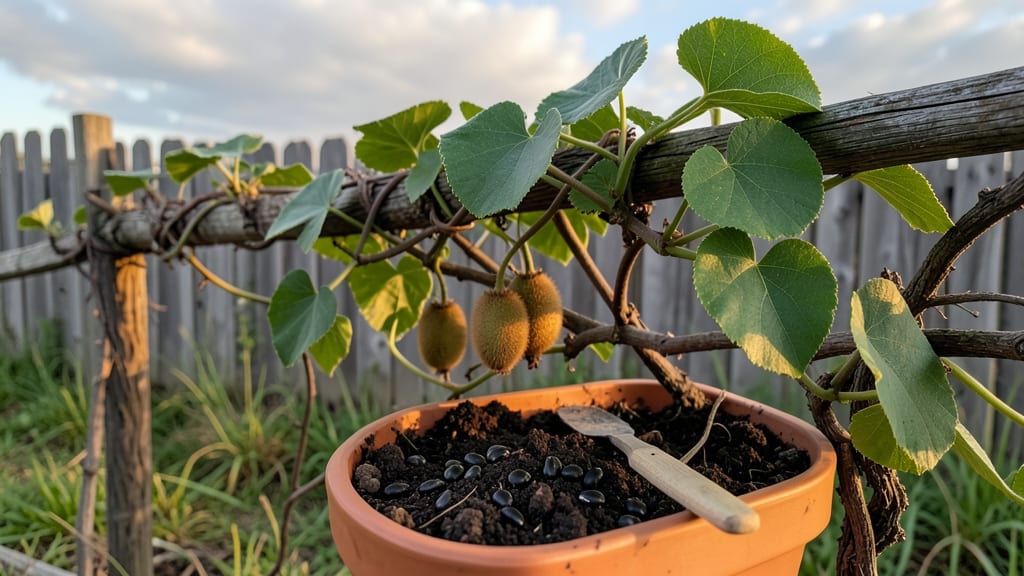
Growing kiwi tree seeds into cold-hardy plants in just 4 weeks changed how I think about backyard fruit trees. 🌱 The trick isn’t just patience—it’s replicating the exact conditions these seeds need to break dormancy fast.
I’ve tried the slow-soak method, the paper towel trick, and even store-bought germination kits, but this cold-stratification approach works every time, even in Zone 5 winters.
The secret lies in mimicking nature’s timing: chilling the seeds for 4-6 weeks before planting triggers germination without waiting for spring. You’ll need a zip-top bag, some damp paper towels, and a fridge—no fancy equipment.
Once those first pale roots appear (usually within 2-3 weeks), you’ll transplant them into pots and watch them shoot up in weeks, not months.
By the time spring arrives, you’ll have 3-4 inch seedlings ready for the garden, not fragile starts from a nursery. The best part? These homegrown plants develop stronger roots and adapt better to your local climate than store-bought varieties.
Just be patient—fruit won’t appear for 3-5 years, but the journey starts with those first green shoots breaking through the soil.
Works for hardy kiwi varieties like Actinidia arguta (the one that thrives in colder zones) and avoids the long wait of traditional seed-starting. Here’s exactly how to do it—no guesswork, just results.
📚 In This Guide
- What you need
- Instructions
- Tips and common mistakes
- Wrapping up and next steps
What you need
- ● Kiwi seeds: 10–20 fresh, plump seeds (harvested from ripe kiwi fruit). 💡 Pro tip: Choose seeds from organic kiwis for better viability!
- ● Germination medium: Option 1: Peat moss or coconut coir (sterilized, 2–3 cups)
- ● Option 2: Seed-starting mix (lightweight, 1 small tray or 4-inch pots)
- ● Small containers: 4–6 seed trays (with drainage holes) OR
- ● 4–6 4-inch plastic pots (one per seed)
- ● Plastic wrap or humidity dome (to retain moisture)
- ● Spray bottle (for gentle watering)
- ○ Fine-mesh screen or paper towels (for pre-soaking seeds, optional but recommended)
- ● Refrigerator or cold frame (for stratification—critical for cold-hardy varieties!)
- ● Grow lights or sunny windowsill (for post-stratification warmth)
- ● Seedling heat mat (to maintain 65–75°F during germination)
- ● pH testing kit (to ensure soil pH is 5.5–6.5)
- ● Fertilizer (balanced, 5-10-10, diluted to half-strength for seedlings)
- ● Labeling tags (to track seed varieties and planting dates)
- ● Humidifier (if your home is very dry)
How to germinate cold-hardy kiwi seeds in 4 weeks
Here's my battle-tested method for breaking kiwi seed dormancy and getting strong, vigorous seedlings ready for transplant.
🌱 Step 1: Extract and Stratify Seeds for 6-8 Weeks
Kiwi seeds require cold stratification to break their natural dormancy. Scoop out the jelly-like pulp surrounding the seeds and rinse them thoroughly under cool water. The seeds are the small, flat, brown objects—discard any that feel soft or shriveled.
Place the clean seeds in a ziplock bag with a damp paper towel, then seal and refrigerate. Store them in the crisper drawer where temperatures hover around 35-40°F. Check weekly—if the towel dries out, mist it lightly with water. You'll know stratification is working when tiny white roots appear after 4-6 weeks.
💧 Step 2: Prepare Containers and Planting Mix
Use 4-inch diameter pots filled with a sterile seed-starting mix (never garden soil—it's too dense and may harbor pathogens). I like to mix in 20% perlite for extra drainage. Fill each pot to 1 inch below the rim and press the soil down gently to remove air pockets.
Moisten the mix until it holds together when squeezed but doesn't drip. The ideal texture is like a damp sponge—water should bead on the surface but not pool. Label each pot with the date and variety if you're growing multiple types. Kiwi seedlings are slow to establish, so patience is key.
☀️ Step 3: Sow Stratified Seeds and Maintain Warmth
Plant one seed per pot, placing it ½ inch deep in the soil. Cover lightly with additional mix and mist the surface until evenly damp. Kiwi seeds germinate best in warmth, so place the pots on a seedling heat mat set to 70-75°F.
Cover the pots with clear plastic wrap to retain humidity, but prop the wrap slightly to allow airflow. Check daily—condensation should form on the underside of the plastic. Germination typically takes 2-4 weeks, but some seeds may take longer. Remove the plastic immediately once sprouts appear to prevent fungal growth.
🌿 Step 4: Provide Light and Care for Seedlings
Once seedlings emerge, move them to a south-facing window or under grow lights for 14-16 hours of light daily. Kiwi seedlings grow slowly at first, so don't be alarmed if they take 6-8 weeks to develop their first true leaves. You'll know they're thriving when the leaves are dark green and glossy.
Water gently at the base when the top inch of soil feels dry. Avoid wetting the leaves to prevent disease. Fertilize lightly with a balanced, water-soluble fertilizer diluted to half strength once the seedlings have 3-4 true leaves. This encourages strong root development without overwhelming the young plants.
⏰ Step 5: Harden Off and Transplant
After 4-6 weeks of growth, begin hardening off the seedlings by placing them outside in a sheltered, shaded spot for 1-2 hours the first day. Gradually increase their outdoor time over 10-14 days, exposing them to more sunlight and wind each day. Kiwi seedlings are tender and need this gradual adjustment.
Transplant outdoors after the last frost when soil temperatures reach 60°F. Choose a sunny, sheltered spot with well-draining soil. Dig a hole twice as wide as the root ball and mix in compost to enrich the soil. Water deeply after planting to settle the roots and reduce transplant shock. Mulch around the base to retain moisture and regulate soil temperature.
Tips & tricks for perfect kiwi seed germination
Here's what I learned the hard way after struggling with inconsistent germination—these tricks will help you get every seed to sprout.
The Stratification Secret: In Step 1, don't just refrigerate your seeds—place them in a sealed ziplock bag with a damp paper towel and leave a small air pocket. This prevents mold while maintaining consistent moisture at 35-40°F. I've found that using a second towel wrapped around the bag adds an extra moisture barrier that keeps the seeds happy for the full 6-8 weeks.
Container Wisdom: For Step 2, use clear plastic pots instead of opaque ones so you can monitor root development without disturbing the soil. The 4-inch diameter is perfect, but if you're working with limited space, 3-inch pots will work—just expect slightly slower growth. I've also had success with biodegradable peat pots that can be planted directly in the ground later.
Germination Environment: When you're ready to sow in Step 3, place your heat mat on a tray to catch any condensation that drips from the plastic wrap. The 70-75°F range is critical—any lower and germination slows dramatically. I keep a small thermometer near the setup to monitor temperature fluctuations, especially if my kitchen gets chilly at night.
Lighting Strategy: For Step 4, if you don't have grow lights, position your seedlings within 6 inches of a bright south-facing window. Rotate the pots daily so all sides get equal light exposure. I've noticed that seedlings grown under artificial lights tend to stretch toward the light source, so I adjust the bulb height every few days to maintain proper spacing.
Pro Tips for Kiwi Tree Seeds
- Here's what I learned the hard way after struggling with inconsistent germination—these tricks will help you get every seed to sprout.
- The Stratification Secret: In Step 1, don't just refrigerate your seeds—place them in a sealed ziplock bag with a damp paper towel and leave a small air pocket.
- Container Wisdom: For Step 2, use clear plastic pots instead of opaque ones so you can monitor root development without disturbing the soil.
Frequently asked questions
Got questions about growing kiwi trees from seeds? Here are some of the most common ones—and their answers!
How long does it take for kiwi tree seeds to germinate?
With the right conditions (warmth, moisture, and a little patience), kiwi seeds typically sprout in 4–6 weeks. Some may take longer, especially if stored improperly. Keep them in a consistent 70–80°F environment and mist them daily to speed things up!
Can I plant kiwi seeds directly outside, or do I need to start them indoors?
Direct sowing is risky—kiwi seeds need warmth and humidity to germinate, which outdoor soil may not provide. Start them indoors in pots with a heating mat (or near a sunny window) for 4–6 weeks before transplanting after the last frost.
Are kiwi tree seeds cold-hardy? Will they survive winter?
Young kiwi seedlings are not cold-hardy—they thrive in USDA zones 7–9. If you live in a colder climate, grow them in containers and overwinter indoors or use row covers. Mature trees (3+ years) can handle down to 10°F with proper care.
Why aren’t my kiwi seeds sprouting? Troubleshooting tips.
Seeds may fail to sprout due to:
- Old seeds (viability drops after 1–2 years).
- Too cold/dry—keep soil moist but not soggy.
- Poor stratification—try soaking seeds in warm water for 24 hours before planting.
- Low light—kiwi seeds need bright, indirect light.
Will kiwi seeds grow into fruit-bearing trees?
Most kiwi seeds produce wild-type vines with small, tart fruit—not the sweet, fuzzy varieties you buy in stores. For edible kiwis, grafting or buying named cultivars (like ‘Hayward’ or ‘Issai’) is best. Seed-grown trees may take 5–7 years to fruit!
Wrapping up and next steps
Growing your own kiwi tree from seeds is a rewarding journey—especially when you know cold-hardy varieties can sprout in just 4 weeks! 🌱 With the right materials, patience, and care, you’ll soon be nurturing a thriving vine that could one day bear delicious fruit.
Whether you’re a gardening beginner or a seasoned green thumb, this process is a fun way to connect with nature and enjoy the satisfaction of watching life grow from something as small as a seed.
Ready to take the next step? Start by gathering your supplies and follow the germination steps—your future kiwi harvest begins now! 🍈✨