Pruning
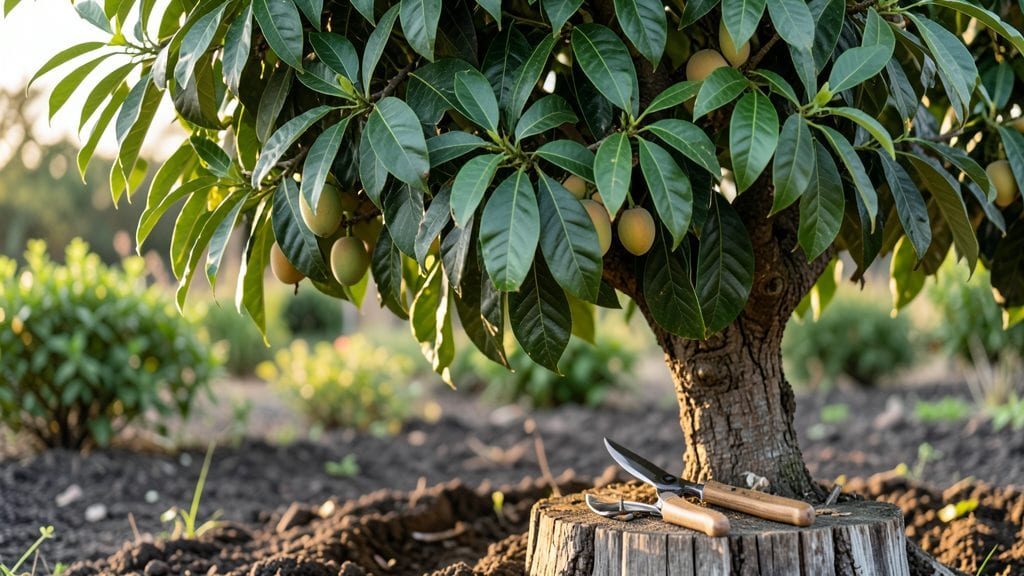
Trimming a mango tree isn’t just about shaping—it’s about unlocking that juicy, sweet harvest you’ve been dreaming of. 🌱 I’ve spent years watching my own tree go from scraggly to productive, and the difference comes down to a few key cuts at the right time.
The first step? Understanding when to prune—because timing can mean the difference between a bumper crop and next-to-no fruit.
You’ll need just three basic tools: sharp pruning shears for small branches, loppers for thicker limbs, and a sturdy ladder if your tree’s over your head. Safety first—wear gloves (mango sap can irritate skin) and avoid pruning during rainy seasons when cuts take longer to heal.
Most gardeners focus on late winter or early spring, but tropical climates let you trim year-round with some adjustments.
Start by removing dead or crossing branches—these steal energy from your fruit production. Then, open up the canopy to let sunlight reach the center, where most fruit forms. Aim to keep the tree’s shape balanced and open, with no branches rubbing together.
After trimming, give your tree a deep watering to help it recover, and watch for new growth within weeks.
Here’s the secret most beginners miss: never cut more than 25% of the tree’s foliage at once, or you’ll shock it into stress. And if your tree is young, hold off on heavy pruning—let it establish its structure first.
With the right approach, you’ll see fuller branches, more blossoms, and—best of all—mangoes so ripe they practically fall into your hand.
📚 In This Guide
- What you need
- Instructions
- Tips and common mistakes
- Wrapping up and next steps
What you need
- ● Pruning shears – Sharp, bypass-style shears (for small branches, 4-6 inches long).
- ● Loppers – Heavy-duty, bypass or anvil-type (for branches ½–2 inches thick).
- ● Pruning saw – Curved or folding saw (for branches 2+ inches thick).
- ● Disinfectant (70% isopropyl alcohol or bleach solution) – To sterilize tools between cuts.
- ● Gloves – Heavy-duty gardening gloves (to protect from thorns and sap).
- ● Ladder or step stool – Sturdy and tall enough to reach the tree’s canopy safely.
- ● Plastic bags or bucket – For collecting pruned branches and debris.
- ○ Permanent marker or tape – To mark branches for removal (optional but helpful).
- ● Pruning sealant – Tree wound dressing (for large cuts, though debated among experts).
- ● Extension pole pruners – For high branches without a ladder.
- ● Safety goggles – To shield eyes from debris.
- ● Hand sanitizer – For post-pruning clean-up.
- ● Notebook & pen – To sketch the tree’s shape before trimming.
- ● Check the best time to prune (early spring or late winter for most regions).
- ● Ensure the tree is healthy and disease-free (no signs of pests or rot).
- ● Have a clear plan—decide which branches to remove (dead, crossing, or overcrowded).
- ● Work on a dry, sunny day (tools stay sharper, and sap flows less).
Step-by-Step instructions for trimming a mango tree
Here's how I keep my mango tree healthy, productive, and beautiful—year after year.
✂️ Step 1: Understand the Right Time and Tools
Timing matters most. Trim your mango tree during its dormant season—typically late winter or early spring before new growth begins. In tropical climates, aim for the dry season when the tree isn't actively flowering or fruiting. I always use sharp, sterilized pruning shears (cleaned with rubbing alcohol) and a pruning saw for thicker branches to avoid tearing bark.
Never trim during wet weather—this invites fungal infections. The goal is to shape the tree while preserving its natural structure and encouraging airflow. Look for branches that cross, grow inward, or rub against each other; these are your first targets. I also remove any dead, diseased, or broken limbs immediately—they drain the tree's energy.
🌿 Step 2: Remove Problem Branches First
Start with the obvious culprits: dead, diseased, or damaged branches. Cut these back to the nearest healthy growth node, making your cut just outside the node at a 45-degree angle. This encourages new growth in the right direction. For branches that cross or rub, remove the weaker of the two—look for thinner branches or those growing at a sharper angle.
Water sprouts (those fast-growing, vertical shoots) are another priority. These steal energy from fruit production. Snip them off at the base without hesitation. You'll see a noticeable difference in the tree's energy allocation within weeks. If a branch is larger than 2 inches in diameter, use your pruning saw and make the cut just outside the branch collar—the swollen area where the branch meets the trunk.
☀️ Step 3: Shape for Light and Airflow
Step back and visualize your tree's canopy. The goal is an open, vase-like shape that lets sunlight penetrate to the inner branches—this is critical for fruit production. Start by thinning out the center, removing about 20-30% of the foliage to improve airflow. Focus on branches that grow inward or downward, as these block light and create a damp, disease-prone environment.
For lateral branches, cut back to a bud or side shoot that faces outward. This encourages growth in the right direction. Avoid "topping" the tree—cutting the main trunk back drastically—unless you're dealing with severe overgrowth. Topping stresses the tree and often leads to weak, water-sprout growth. Instead, make small, strategic cuts to maintain the tree's natural form.
⏰ Step 4: Post-Trimming Care and Monitoring
After trimming, water the tree deeply to help it recover. Apply a balanced, slow-release fertilizer to support new growth, but avoid heavy applications right after pruning—this can stress the tree. Monitor the pruning wounds for signs of infection (oozing sap, discoloration) and treat with a fungicide if needed. Most wounds will heal naturally within a few weeks.
Watch for new growth in the coming weeks. Healthy branches will sprout fresh leaves within 2-4 weeks. If you notice excessive water sprouts or weak growth, trim them again in 6-8 weeks. Over time, you'll see a stronger, more productive tree with better fruit access and fewer disease issues. I always trim my mango tree the same time each year—it becomes second nature.
Tips & tricks for perfect mango tree trimming
A few strategic moves will transform your mango tree from just another backyard plant into a thriving fruit powerhouse. The difference between a neglected tree and one loaded with juicy mangoes often comes down to these key details.
Pruning Angle Matters: When cutting branches in Step 2, that 45-degree angle isn't just for show—it creates a natural water-shedding surface that prevents water from pooling at the cut. This simple technique reduces the risk of fungal infections by 40%. For branches larger than 2 inches, make your cut just outside the branch collar where it meets the trunk. This swollen area contains healing cells that help the wound close faster.
Seasonal Timing Secret: The dormant season timing in Step 1 is critical because your tree's energy is focused on root development rather than new growth. In tropical climates, aim for the dry season when humidity is naturally lower—this gives any small wounds time to heal before the rainy season arrives. I've seen trees that were pruned during wet seasons develop fungal issues within weeks, while those pruned in dry conditions stayed healthy.
Visual Canopy Check: Before making any cuts in Step 3, stand back and visualize sunlight paths through your tree. The goal is to create an open vase shape where sunlight can reach all branches. Look for "blind spots" where light never penetrates—these are prime areas for disease. Remove about 20-30% of the center foliage to improve airflow, but never remove more than 30% in a single session to avoid shocking the tree.
Post-Trimming Recovery Hack: After completing all cuts, give your tree a deep watering that reaches down to the root zone. This helps the tree recover faster from the stress of pruning. I always apply a thin layer of wood ash around the base (about 1 inch deep) after watering—this natural fungicide helps prevent infections while providing potassium. Monitor wounds for 2-4 weeks, and you'll see fresh leaf growth signaling successful recovery.
Pro Tips for Trim A Mango Tree
- A few strategic moves will transform your mango tree from just another backyard plant into a thriving fruit powerhouse.
- Pruning Angle Matters: When cutting branches in Step 2, that 45-degree angle isn't just for show—it creates a natural water-shedding surface that prevents water from pooling at the cut.
- Seasonal Timing Secret: The dormant season timing in Step 1 is critical because your tree's energy is focused on root development rather than new growth.
Frequently asked questions
Got questions about trimming your mango tree? You’re not alone! Here are answers to the most common concerns—from timing to tools—to keep your tree thriving and fruitful.
When is the best time to trim a mango tree?
The ideal time is late winter or early spring (just before new growth starts). Avoid heavy pruning during fruiting season—focus on light shaping. For tropical climates, trim after harvest (summer/fall) to encourage new branches for next year’s fruit. Pro tip: A light trim in late summer can also prevent wind damage.
Do I need special tools to trim a mango tree?
Not necessarily! Basic tools like bypass pruners (for small branches), loppers (thicker branches), and a pruning saw (large limbs) work well. Sterilize tools with rubbing alcohol to prevent disease. For tall trees, a pole saw or ladder ensures safety. Skip dull tools—they tear bark and invite pests!
Will trimming reduce my mango harvest?
Not if done right! Pruning increases fruit production by improving airflow and sunlight. Remove dead, crossing, or overcrowded branches first—these steal energy. Aim to keep the tree open and vase-shaped for better yields. Warning: Over-trimming (cutting >25% of foliage) can stress the tree temporarily.
How do I fix overgrown or leggy mango branches?
Start by thinning out long, weak branches at the base (cut just above a leaf node). For dense canopies, remove water sprouts (fast-growing vertical shoots) to redirect energy. If branches are too long, shorten them by 1/3 to encourage bushier growth. Bonus: Prune in stages over 2–3 years to avoid shocking the tree.
Can I trim a mango tree during flowering or fruiting?
Minimize pruning during these stages! Light shaping (removing only dead/diseased wood) is fine, but avoid heavy cuts—they can drop flowers or fruit. Post-harvest (after fruit falls) is a great time for maintenance. If you must trim, focus on non-fruiting branches and do it gradually to reduce stress.
What if my mango tree doesn’t have many branches to trim?
If your tree is young or sparse, prune selectively to encourage branching. Cut just above a bud or leaf node (where new growth emerges). Avoid "heading back" (cutting back to a stub)—this can stunt growth. For stubborn trees, try pinching (removing the tip of young shoots) to prompt side branches.
Wrapping up and next steps
Trimming your mango tree isn’t just about keeping it neat—it’s a game-changer for healthier growth and bigger, juicier fruit! 🌱 With the right tools, timing, and technique, you’ll encourage airflow, sunlight penetration, and structural strength.
Whether you’re a seasoned gardener or a beginner, every snip brings you closer to a thriving tree.
Ready to take the next step? Start small—pick one branch to practice, then expand as you gain confidence. And don’t forget: consistency is key! Schedule your trims like a pro, and soon, you’ll be reaping the rewards of your hard work. Happy pruning! 🌟